The RAW format provides better digital images, but only if you know how to use RawTherapee software.
With the boom in digital photography still booming, more people are taking advantage of the benefits of spending a little more on their first (or second) digital camera. Not only can you preview your images through the camera seconds after taking it, you can also download your images and appreciate them straight away without having to take a roll of film down to Boots and cross your fingers that the results are as you'd hoped.
The Manual Approach
With such immediacy comes a level of reliance on the camera itself. Although more people are taking to the medium, it doesn't necessarily follow that they're capable of configuring their equipment like a professional. Most snappers will leave their cameras on automated settings, which will tend to save images in the JPEG format. This is fine for the average snapshot, but if you really want to push the boundaries, you need to think about making manual adjustments to the film speed, aperture and shutter speed.
Another crucial factor in achieving the best quality images is to abandon the JPEG format which, by its very nature, will introduce compression and all the noise and artifacts associated with it. The alternative is your camera's RAW format. Not all cameras provide access to non-compressed formats but, as technologies develop, we're beginning to see more consumer models offer this option.
Update Your Software
After you've downloaded RAW images to your computer, you'll be keen to view them. However, as the format isn't a universal standard, you may have some problems doing so. The good news is that, since RawTherapee, the software has provided specific controls for the import and configuration of such files.
Unlike other spfteares, you won't find a menu reference for it, though it will automatically load whenever you attempt to open a RAW image. Before you jump in to check out its features, bear in mind that the rapid rate of digital camera development will mean that even RawTherapee users will be running an outdated version of the software.
For the most comprehensive support, the RawTherapee website has the latest 5.3 update (you can update from RawTherapee website using the Download option). This weighs in at just 1.7MB, though we'd recommend you opt for the 2.8MB package that also includes the converter. Once the program has been installed, you'll find that RawTherapee supports a wider range of RAW formats, making it less likely that you'll experience any compatibility issues.
Raw Settings
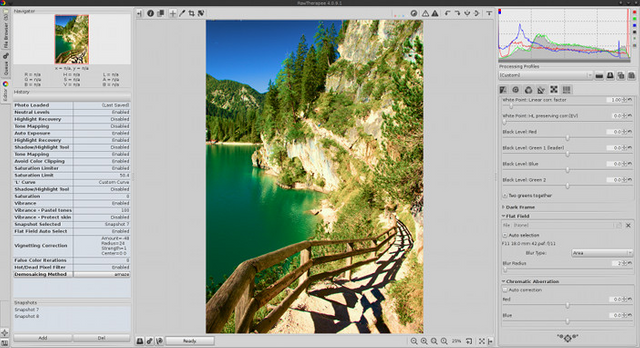
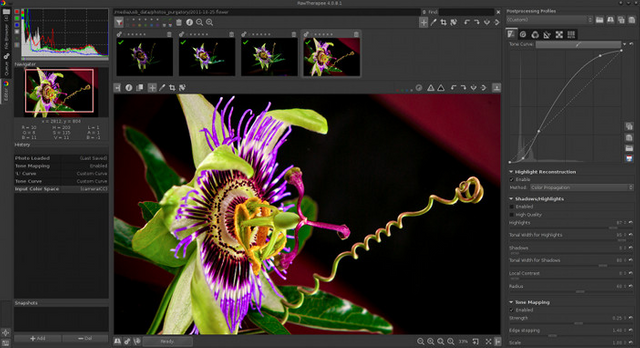
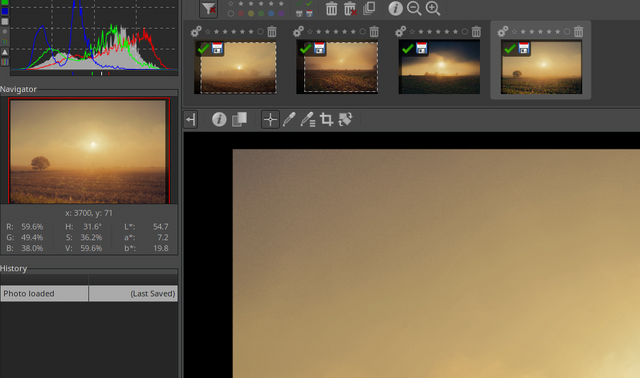
You can now open a RAW file. The plug-in's interface makes itself quite apparent, being dominated by the preview of the image being opened. To the right of this, you have a histogram of the RGB channels (indicated by their appropriate colours), with white reflecting the composite. Below the histogram are primary controls for the program, with tabs providing access to the grouped options. The number of tabs increases depending on whether you're working in 'Basic' or 'Advanced' modes, which can be selected using the radio buttons below the 'OK' and 'Cancel' buttons.
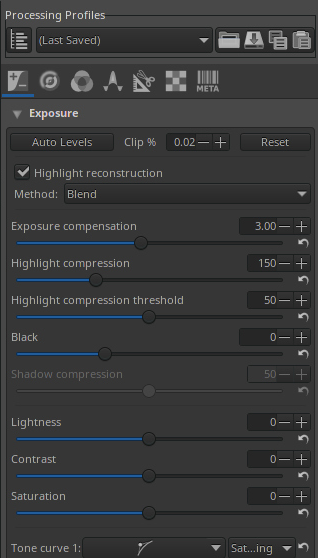
In 'Basic' mode, you have access to the 'Adjust' tab, which provides controls over white balance. You can also adjust the exposure, shadows, brightness and contrast to bring out details based around light qualities, while the saturation slider provide a boost to colour balance. The 'Detail' tab provides controls over sharpness, as well as basic options for reducing noise or luminance anomalies your image may suffer from.
'Advanced' mode extends the number of available tabs, with options for correcting lens issues that may occur with digital SLR cameras. 'Chromatic Aberration' controls are available for reducing coloured fringing that sometimes occurs around high contrast areas, while 'Vignetting' options cater for distortion around borders. The 'Calibrate' tab presents a number of refined controls over channel content, though any changes here must be made in the confidence that your camera and monitor's ICC profiles are correctly adjusted to gauge more accurate results.
Tools and Dimensions
A selection of tools is included, with the familiar 'Zoom' and 'Hand' providing magnification and movement controls. The 'White Balance' tool is particularly powerful as it enables you to click on points within your preview that match your image's highlights. Although you have access to a variety of white balance settings through the right-hand options, it's often easier to make use of the tool rather than manually adjust the sliders.
With a larger monitor, it's recommended to make changes with the preview at 100 per cent, though this often leads to imbalanced localised adjustment. Toggling between 'full size' and 'fit to view' is essential. You also have access to options for colour space and bit-depth towards the foot of the interface. Most image applications work comprehensively with 8-bit images. RawTherapee has a number of improvements that allow for the greater detail contained within 16-bit images to be a realistic option. The size and resolution options will, by default, be determined by the capabilities of the camera, though it's possible to change these to suit. Bear in mind that increasing bit-depth will risk degradation in quality, as interpolation and pixelation come into effect.
Post Plug-in
Once you've made some changes, you'll be ready to 'OK' the plug-in and leave RawTherapee to apply the configured settings to your image prior to giving you access to the primary RawTherapee interface. You could continue to make subsequent adjustments using RawTherapee's regular tools, but each adjustment will end up altering pixel content and degrading the image.
An image is only as good as its source and the most important aspect to get right is the original shoot. If you're confident about making the necessary settings to your camera, there'll be minimal changes necessary through the plug-in. But using the plug-in to correct any marginal imbalances will result in a much higher quality image than would be possible were you to edit a JPEG using primary adjustment tools. [See below for tips on correcting white balance].
Correcting White Balance
Run a few basic adjustments to an image using the RawTherapee plug-in.
1- Open the CRW_2331.crw file from the SuperDisc for a typical RAW image straight from the camera. A truer light balance will often bring out colour, contrast and texture that may be lacking. Turn to the 'Adjust' tab and try out a few white balance presets. If none are satisfactory, you'll need to make some manual adjustments.
2- However, this approach takes a little experience to configure accurately. An alternative approach is to make use of the 'White Balance' tool available to the right of the 'Preview'. Select it and click on a point of the image that appears to be the brightest. In this image, we found this to be the highlight on the background branch.
3- You'll need to gauge whether this has created the best settings but the method generally provides a reasonable estimate of the light balances that you can subsequently edit (if necessary). I found that, by raising the white balance 'Temperature' while increasing the 'Exposure and Shadows settings', I achieved a satisfactory result.
Posted on Utopian.io - Rewarding Open Source Contributors
Your contribution cannot be approved yet because it is not as informative as other contributions. See the Utopian Rules. Please edit your contribution and add try to improve the length and detail of your contribution (or add more images/mockups/screenshots), to reapply for approval.
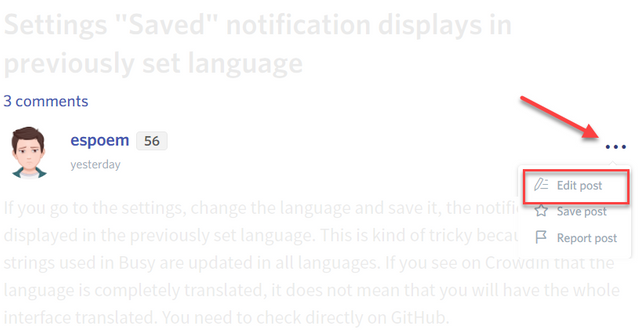
You may edit your post here, as shown below:
You can contact us on Discord.
[utopian-moderator]
Downvoting a post can decrease pending rewards and make it less visible. Common reasons:
Submit
Kindly review my contribution. I have made the necessary adjustments. Thanks
Downvoting a post can decrease pending rewards and make it less visible. Common reasons:
Submit
Thank you for the contribution. It has been approved.
You can contact us on Discord.
[utopian-moderator]
Downvoting a post can decrease pending rewards and make it less visible. Common reasons:
Submit
Hey @yissakhar I am @utopian-io. I have just upvoted you!
Achievements
Suggestions
Get Noticed!
Community-Driven Witness!
I am the first and only Steem Community-Driven Witness. Participate on Discord. Lets GROW TOGETHER!
Up-vote this comment to grow my power and help Open Source contributions like this one. Want to chat? Join me on Discord https://discord.gg/Pc8HG9x
Downvoting a post can decrease pending rewards and make it less visible. Common reasons:
Submit