My GF is a photographer and she is building up terabytes of data. Until now she was buying external HDD every so often to keep the data stored. I learned about NAS storage in one of my courses, but when I finally wanted to buy one I was stunned. The prices for a NAS without HDD was steep. And then you did not even have HDD in it. So, I had an old PC standing around. And I started to look on the internet. And found some info left and right.

So here is my guide for the setup of the Synology NAS setup.
Some things you will need in advance:
- USB Drive for the installation of the boot of the NAS (note that this USB requires only a few
- MB but the drive will be lost as we will format it in a special way)
- A screen, keyboard, mouse just needed for the setup.
- And another fully working computer to create the USB and access the NAS.
- Internet for your NAS and MAIN PC
- These files
Synology Cloud Station
Synology Assistance
The Windows Disk Manager
XPEnoboot image file
DSM DS3615 pat file
Or download them all together in a zip file
I don’t use a mac so I did not research this well. I did however find these files.
If you have a MAC you need these files

Lets start: Burning the IMG file
The first thing we need to do is burn the IMG file onto our USB drive.
NOTE THIS USB DRIVE CAN NOT BE USED AFTER THIS.
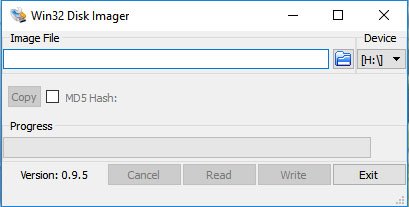
Install the windows disk manager and open it up (it might tell you it can’t open because you don’t have the rights. Open it up as Administrator).

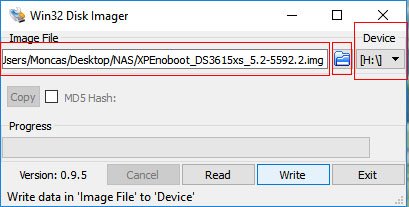
Then we click the small map icon and move towards your XPEnoboot_DS3615xs_5.2-5592.2.img file location. In the Device drop down select the location of the USB drive location. And then click Write.

When you have done that you should have a USB with 4 files on it.
Moving over to the NAS PC
Booting the system
First, we will need to go into the BIOS of the NAS computer. This is different for every system. Sometimes it says how to do it in the boot sequence. And sometimes you will need to dig deep to find how-to. My system required to spam the delete button and my other pc requires F1. So, look up your motherboard and find out.
Once you’re in the BIOS search where to find the order of boot devices priority’s. Once here change your first boot device to USB. This can sometimes be named differently but with some common insight you will figure out what it is named in your system.

Launching the system
If you managed to get this far and your system is launching from the USB you will see a blue window with some versions and test systems. Just let it run, you will need these if your system has a error.
Now you will see a lot of random text on the screen and a lot of OK in green. If there are some FAILS in red. Don’t worry, perfectly normal and nothing to worry about.
So now your NAS is launched
Back to your main computer
Getting the system ready
Ok so the NAS is running that does not mean it is working. Now we need to access the system. There are two ways.
- Paste this link "find.synology.com" in your bowser and the chances are it will find your NAS running.
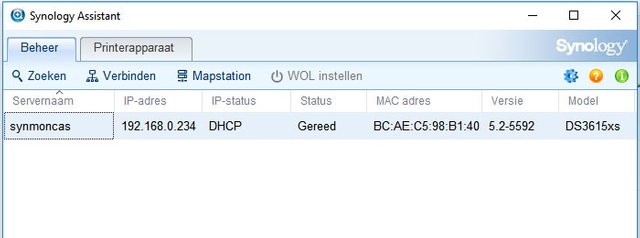
- If that does not work use the SynologyAssistantSetup-5.2-5566.exe. Install it and run it.
When you run it, you press search and if your system is running correctly (which it should) you can find all your Synology connected devices on your network. Once found click on the item and connect.
!!!! DO NOT PRESS INSTALL YET !!!!

Installing the main software
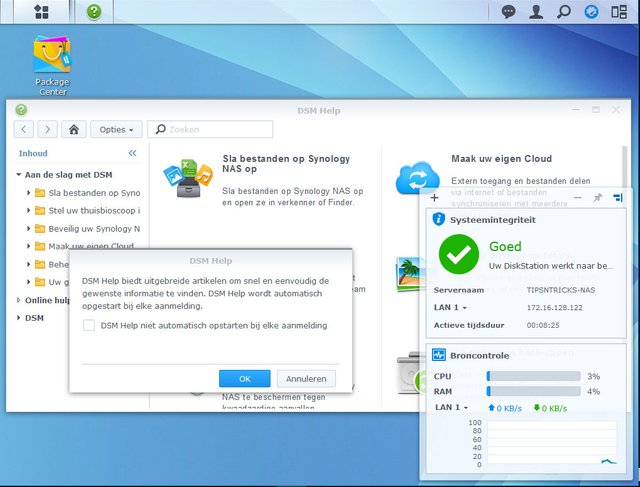
If you are connected threw the browser you will see an install button. Underneath you will have an advanced button. Press that and select the DSM_DS3615xs_5592.pat file as the system to be installed.
Choose that file. All the rest of the settings is up to you. We all know what type of usernames and passwords and what not we need. There is only one thing that I advise. Download the updates but do not automatically install. Everything is legal but Synology updates there system faster than XPEnology can follow.

How to use the system is for a different tutorial. I hope I helped with those of you who wanted a NAS up and running. There are many good YouTube videos to help you use the system.
Enjoy
Posted on Utopian.io - Rewarding Open Source Contributors
comes in very handy such a nas server!
Downvoting a post can decrease pending rewards and make it less visible. Common reasons:
Submit
Oo it sertanly does.
Downvoting a post can decrease pending rewards and make it less visible. Common reasons:
Submit
Congratulations! This post has been upvoted from the communal account, @minnowsupport, by ZoeF from the Minnow Support Project. It's a witness project run by aggroed, ausbitbank, teamsteem, theprophet0, someguy123, neoxian, followbtcnews/crimsonclad, and netuoso. The goal is to help Steemit grow by supporting Minnows and creating a social network. Please find us in the Peace, Abundance, and Liberty Network (PALnet) Discord Channel. It's a completely public and open space to all members of the Steemit community who voluntarily choose to be there.
If you would like to delegate to the Minnow Support Project you can do so by clicking on the following links: 50SP, 100SP, 250SP, 500SP, 1000SP, 5000SP. Be sure to leave at least 50SP undelegated on your account.
Downvoting a post can decrease pending rewards and make it less visible. Common reasons:
Submit
Thank you for the contribution. It has been approved.
You can contact us on Discord.
[utopian-moderator]
Downvoting a post can decrease pending rewards and make it less visible. Common reasons:
Submit
Thank you
Downvoting a post can decrease pending rewards and make it less visible. Common reasons:
Submit
Hey @zoef I am @utopian-io. I have just upvoted you!
Achievements
Suggestions
Get Noticed!
Community-Driven Witness!
I am the first and only Steem Community-Driven Witness. Participate on Discord. Lets GROW TOGETHER!
Up-vote this comment to grow my power and help Open Source contributions like this one. Want to chat? Join me on Discord https://discord.gg/Pc8HG9x
Downvoting a post can decrease pending rewards and make it less visible. Common reasons:
Submit