The great people at Framer recently introduced Framer Studio, adding a visual design interface to the existing coding tool. Although not quite as extensive as Sketch, it still offers speed and flexibility for designing screens with vector graphics and text.
In this post, I am going to show you how to create an entire Apple Watch notification presentation from scratch. Along the way, I will also share some tips and tricks for extending the built-in vector design capabilities of Framer Studio's Design tab.
Let's get to it!
Anatomy of an Apple Watch Notification
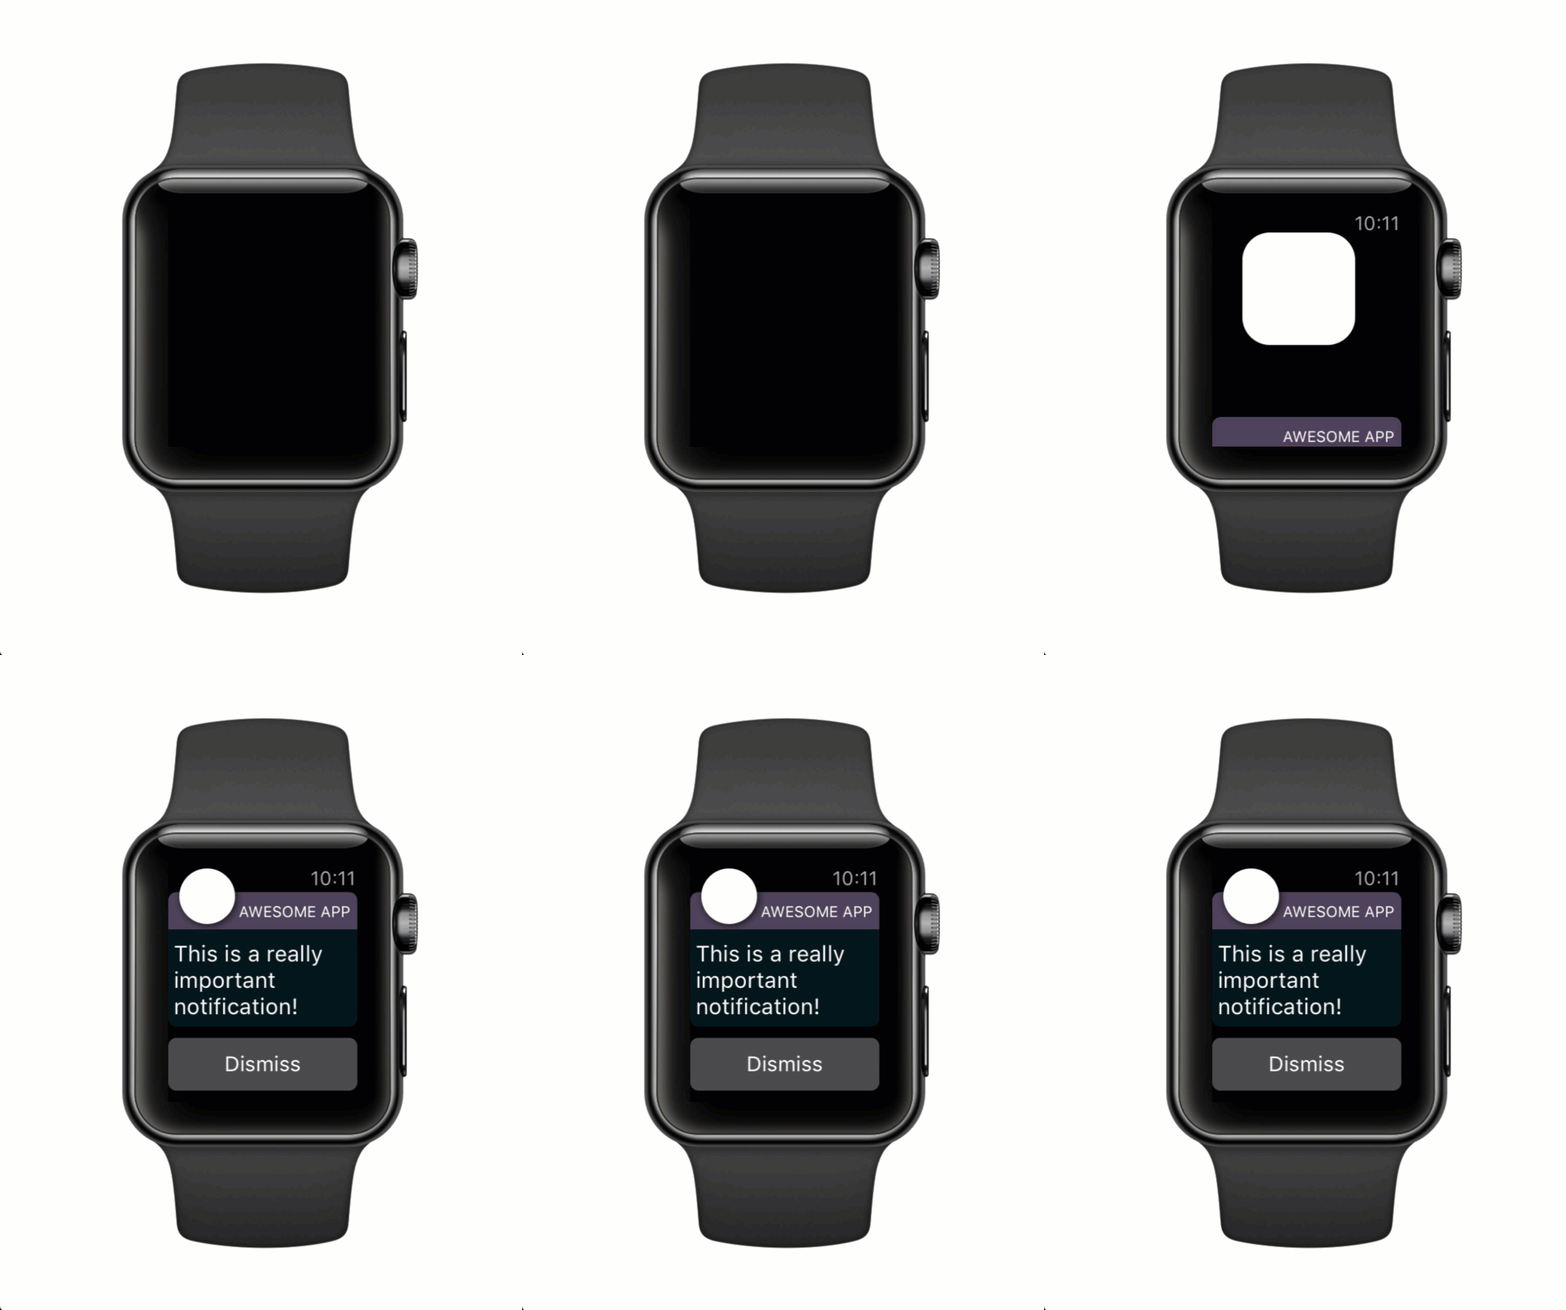
On watchOS, notifications happens in 2 stages - short looks and long looks. The short look happens when the user raises their wrist and consists of a very short animation displaying the app icon and app name. If the user keeps their wrist raised, the short look then transitions into the long look, which displays more information about the notification by way of a message and optional action buttons.
For our prototype, we are going to need 3 screens: the watch face, the short look and the long look.
Designing the Screens
Fire up Framer Studio, which will start in the Design tab and present you with a blank canvas.
Step 1: Setting Up the Stage
Click on the Artboard button in the left-hand column. This will toggle a list of existing devices and screen sizes on the right-hand side of the interface. Choose 'Apple Watch 38mm' - this adds the corresponding artboard onto the canvas.
Set its fill colour as #000000.
Repeat the process 2 more times and keep the artboards slightly separated.
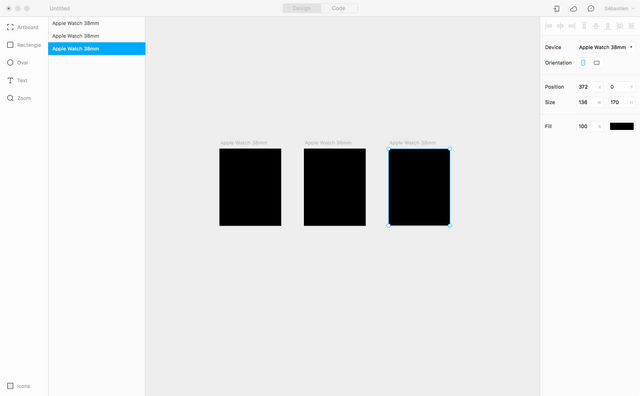
Rename the screens "Face", "Short" and "Long" respectively. (You can either double-click and edit the names from the canvas or from the elements list on the left-hand side of the canvas.) Finally, you need to add a target for each of them so we can reference each screen in code. You do this by hovering over each screen name in the elements pane. Right-click and select 'Create Target' from the pop-over menu. A tooltip reading "Short in Code" appears, confirming it is now set as a code target.
Step 2: Designing the Short Look Screen
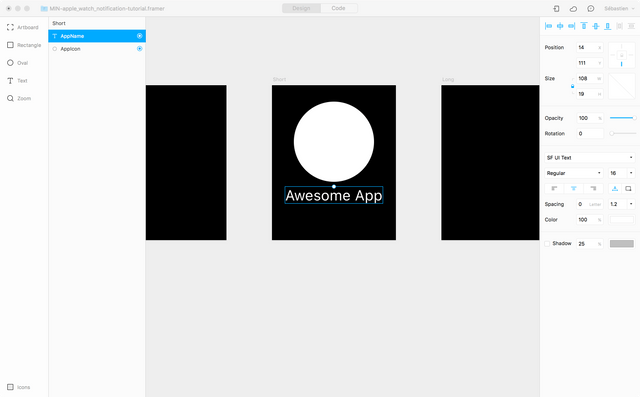
This screen is made up of 2 elements: the app icon and the app name.
For the app icon, simply use the 'Oval' design tool to draw a circle with the following attributes:
x: 24

y: 18

width: 88

height: 88

fill: #FFFFFF

opacity: 100%
Next, we're going to add the app name using the 'Text' tool. Apply the attributes below:
color: #FFFFFF

font: SF Compact Text

style: Regular

size: 18

text-alignment: center

y: 111
Rename each UI element from the Elements panel list on the left-hand side of the canvas: "AppIcon" for the application icon, "AppName" for the application name.
Hover your mouse over each element. You will see a small 'target' icon appear to the right of the element's name. By clicking on it, Framer generates a variable you can now use in code to refer to the element. Do this for each one. You should have the same screen as below:
Step 3: Designing the Long Look Screen
Next, we're going to take care of the long look screen. First, insert a small app icon - same colour and shape as the large one but with the following attributes:
x: 8

y: 2

width: 40

height: 40
Second is the time display. Insert a Text element and write any time you want with the below attributes:
x: 98

y: 1

color: #AAAAAA

font: SF UI Text

style: Regular

size: 14
Next on the list is the sash rectangle:
x: 0

y: 19

width: 136

height: 27

background-color: #4F4156 (you can customise it to any colour you want)

border-radius: 6, 6, 0, 0
For the message body background, we use a Rectangle too:
x: 0

y: 46

width: 136

height: 70

background-color: #02151A

border-radius: 0, 0, 6, 6
Inside, you're going to draw (by clicking-dragging the mouse) a text box. Type in any text you want inside but keep it to 3 lines and make sure you input the correct attributes:
x: 4

y: 8

width: 128

height: 54

color: #FFFFFF

font: SF UI Text

font-style: Regular

font-size: 16
You will notice that the above x and y values are not in relation to the screen itself but, rather, in relation to the containing rectangle. Framer has a nifty way of automatically placing an element as a child (see the left indentation for the element in the left-hand pane) if it is positioned within another element. Here, our text box is smaller than the rectangle underneath so Framer considers it as a child element of the coloured rectangle. X and y position values are relative to the parent element.
Let's continue with setting up the Long Look UI elements with the action button. For our prototype, we are only going to use one button but Apple Watch notifications can contain several.
Our button has the following attributes:
x: 0

y: 124

width: 136

height: 38

background-color: #4B4B4B

border-radius: 6
To wrap up, insert a Text element inside your sash rectangle:
x: 49

y: 7

text-align: right

font: SF UI Text

font-style: Regular

font-size: 11
- and type in you app name, as well as the action button title - "Dismiss":
font: SF UI Text

font-style: Regular

font-size: 15
Use your mouse and the canvas guides to center it inside the button.
Coding the Animations
We are going to use Layer States to manage screen transitions and animations.
Step 1: Animating the Short Look Screen
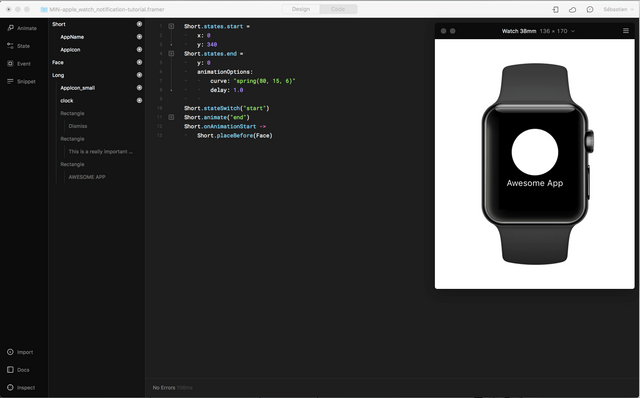
Switch over to the Code tab and enter the following code:
Short.states.start =

  x: 0

  y: 340

Short.states.end =

  y: 0

  animationOptions:

    curve: "spring(80, 15, 6)"

    delay: 1.0
The 'start' state defines the initial position of the Short screen. The 'end' state brings it up with a spring animation. (For more on animations in Framer, check out Jay Stakelon's excellent blog article Animating with Framer.js).
You will see that, despite adding this code, nothing happens in the Preview window. That is because we have not added any instructions to trigger the transition animation yet. Under the previous lines of code, add:
Short.stateSwitch("start")

Short.animate("end")

Short.onAnimationStart ->

  Short.placeBefore(Face)
You can now see the result in the Preview window. We are starting from the blank Face screen (we will customise it a bit later) and can see the spring animation transition to the Short screen.
Step 2: Animating the Long Look Screen
We are going to be animating the app icon from the short look screen and have it overlap the long look screen animation. To do this, our artboard requires a few adjustments.
First, we will hide the 'AppIcon_small' by unchecking the Fill attribute. This leaves the element on the stage so we can reference its frame attributes later.
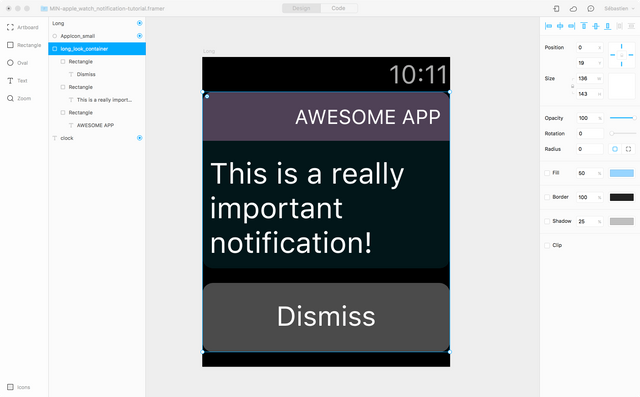
Next, we need to group the sash banner, title, message and action buttons together. Unfortunately, Framer Studio does not have a grouping functionality (like Sketch has for example). The trick is to create a parent rectangle that will contain the UI elements listed above.
Name it 'long_look_container' and uncheck it's Fill attribute in order to make it invisible.
Finally, drag the 'AppIcon_small' element so that it is above all the other artboard elements.
For the app icon transition attributes, add the following code:
AppIcon.states.end =

  borderRadius: 20

  frame: AppIcon_small.frame

  animationOptions:

     curve: "spring(75, 15, 9)"

  shadowX: 1

  shadowY: 1

  shadowColor: "rgba(0, 0, 0, 0.75)"

  shadowBlur: 5
Then add the states code for the 'long_look_container" group:
long_look_container.states.start =

  x: 0

  y: 170

long_look_container.states.end =

  y: 19

  animationOptions:

  curve: "spring(75, 15, 9)"
Finally, we are triggering the long look transition once the short look screen has finished its animations:
Short.onAnimationEnd ->

  Long.x = 0

  Long.y = 0

  Long.bringToFront()

  AppIcon.parent = Long

  long_look_container.stateSwitch("start")

  AppIcon.stateCycle()

  long_look_container.animate("end")
As you can see from the Preview window, things are shaping up and are almost complete!
Next steps
In Part 2, I will show you how to customise the application icon with an imported vector graphic and tweak the UI elements and their animations for smoother transitions and higher fidelity to the watchOS notifications.
I have posted the live Framer project so you can download the source code and play with it.
Hope you enjoy!
Very informative!
Downvoting a post can decrease pending rewards and make it less visible. Common reasons:
Submit
Thanks @michaelol!
Downvoting a post can decrease pending rewards and make it less visible. Common reasons:
Submit
Great post and very well explained !!
Downvoting a post can decrease pending rewards and make it less visible. Common reasons:
Submit
Merci :)
Downvoting a post can decrease pending rewards and make it less visible. Common reasons:
Submit