
Since Vue.js is an approachable, performant and versatile framework for building web user interfaces, it also needs a best-in-class internationalization solution.
You may know vue-i18n, but for those already knowing i18next a Vue.js adapted version of i18next would be more appropriate.
In this tutorial we'll make use of the i18next-vue module.
TOC
- So first of all: "Why i18next?"
- Let's get into it...
So first of all: "Why i18next?"
When it comes to React localization. One of the most popular is i18next with it's Vue extension i18next-vue, and for good reasons:
i18next was created in late 2011. It's older than most of the libraries you will use nowadays, including your main frontend technology (React, Angular, Vue, ...).
➡️ sustainable
Based on how long i18next already is available open source, there is no real i18n case that could not be solved with i18next.
➡️ mature
i18next can be used in any javascript (and a few non-javascript - .net, elm, iOS, android, ruby, ...) environment, with any UI framework, with any i18n format, ... the possibilities are endless.
➡️ extensible
There is a plenty of features and possibilities you'll get with i18next compared to other regular 18n frameworks.
➡️ rich
Here you can find more information about why i18next is special and how it works.
Let's get into it...
Prerequisites
Make sure you have Node.js and npm installed. It's best, if you have some experience with simple HTML, JavaScript and basic Vue.js, before jumping to i18next-vue.
Getting started
Take your own Vue project or create a new one, new one, i.e. with the vue create cli command.
npx @vue/cli create vue-starter-project
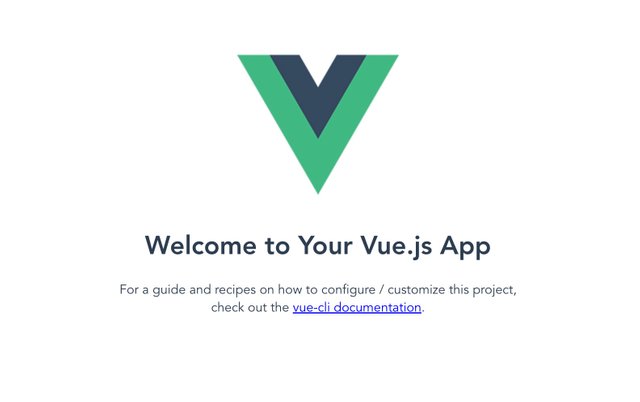
We are going to adapt the app to detect the language according to the user’s preference.
And we will create a language switcher to make the content change between different languages.
Let's install some i18next dependencies:
npm install i18next i18next-vue i18next-browser-languagedetector
Let's prepare an i18n.js file:
import i18next from 'i18next'
import I18NextVue from 'i18next-vue'
import LanguageDetector from 'i18next-browser-languagedetector'

i18next
  // detect user language
  // learn more: https://github.com/i18next/i18next-browser-languageDetector
  .use(LanguageDetector)
  // init i18next
  // for all options read: https://www.i18next.com/overview/configuration-options
  .init({
    debug: true,
    fallbackLng: 'en',
    resources: {
      en: {
        translation: {
          // here we will place our translations...
        }
      }
    }
  });

export default function (app) {
  app.use(I18NextVue, { i18next })
  return app
}
Let's import that file in our main.js file:
import { createApp } from 'vue'
import i18n from './i18n'
import App from './App.vue'

i18n(createApp(App)).mount('#app')
Now let's try to move some hard coded text out to the translations.
For the first text we just use a simple welcome key to directly invoke the $t function. The $t is more or less the same as i18next.t.
For the second text we will use the v-html directive to directly output real HTML.
Security Warning
Dynamically rendering arbitrary HTML on your website can be very dangerous because it can easily lead to XSS vulnerabilities. Only use v-html on trusted content and never on user-provided content.
<template>
  <div class="hello">
    <h1>{{ $t('welcome') }}</h1>
    <p v-html="$t('descr')"></p>
  </div>
</template>

<script>
export default {
  name: 'TranslationShowCase'
}
</script>
The texts are now part of the translation resources:
import i18next from 'i18next'
import I18NextVue from 'i18next-vue'
import LanguageDetector from 'i18next-browser-languagedetector'

i18next
  // detect user language
  // learn more: https://github.com/i18next/i18next-browser-languageDetector
  .use(LanguageDetector)
  // init i18next
  // for all options read: https://www.i18next.com/overview/configuration-options
  .init({
    debug: true,
    fallbackLng: 'en',
    resources: {
      en: {
        translation: {
          welcome: 'Welcome to Your Vue.js App',
          descr: 'For a guide and recipes on how to configure / customize '
            + 'this project,<br>check out the '
            + '<a href="https://cli.vuejs.org" target="_blank" '
            + 'rel="noopener">vue-cli documentation</a>.'
        }
      }
    }
  });

export default function (app) {
  app.use(I18NextVue, { i18next })
  return app
}
Language Switcher
Now let's define a language switcher:
<template>
<div class="hello">
<h1>{{ $t('welcome') }}</h1>
<p v-html="$t('descr')"></p>
<hr />
<div>
<div v-if="languages">
<span v-for="(lng, index) in Object.keys(languages)" :key="lng">
<a v-if="$i18next.resolvedLanguage !== lng" v-on:click="$i18next.changeLanguage(lng)">
{{ languages[lng].nativeName }}
</a>
<strong v-if="$i18next.resolvedLanguage === lng">
{{ languages[lng].nativeName }}
</strong>
<span v-if="index < (Object.keys(languages).length - 1)"> | </span>
</span>
</div>
</div>
</div>
</template>
<script>
export default {
name: 'TranslationShowCase',
data () {
return {
languages: {
en: { nativeName: 'English' },
de: { nativeName: 'Deutsch' }
}
}
}
}
</script>
And also add some translations for the new language:
import i18next from 'i18next'
import I18NextVue from 'i18next-vue'
import LanguageDetector from 'i18next-browser-languagedetector'

i18next
  // detect user language
  // learn more: https://github.com/i18next/i18next-browser-languageDetector
  .use(LanguageDetector)
  // init i18next
  // for all options read: https://www.i18next.com/overview/configuration-options
  .init({
    debug: true,
    fallbackLng: 'en',
    resources: {
      en: {
        translation: {
          welcome: 'Welcome to Your Vue.js App',
          descr: 'For a guide and recipes on how to configure / customize '
            + 'this project,<br>check out the '
            + '<a href="https://cli.vuejs.org" target="_blank" '
            + 'rel="noopener">vue-cli documentation</a>.'
        }
      },
      de: {
        translation: {
          welcome: 'Willkommen zu Deiner Vue.js App',
          descr: 'Eine Anleitung und Rezepte zum Konfigurieren/Anpassen '
            + 'dieses Projekts findest du<br>in der '
            + '<a href="https://cli.vuejs.org" target="_blank" '
            + 'rel="noopener">vue-cli-Dokumentation</a>.'
        }
      }
    }
  });

export default function (app) {
  app.use(I18NextVue, { i18next })
  return app
}
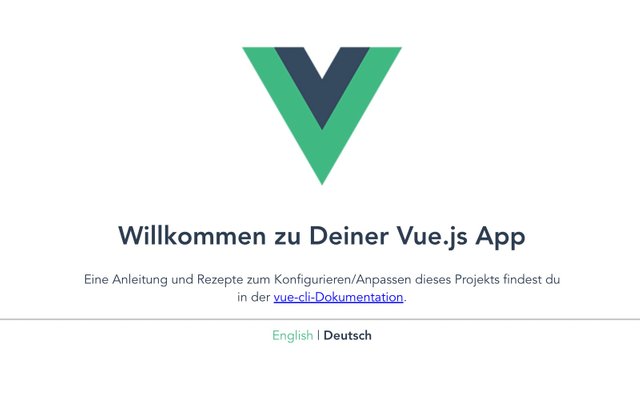
🥳 Awesome, you've just created your first language switcher!
Thanks to i18next-browser-languagedetector now it tries to detect the browser language and automatically use that language if you've provided the translations for it. The manually selected language in the language switcher is persisted in the localStorage, next time you visit the page, that language is used as preferred language.
How to get the current language?
Since i18next v21 there is i18next.resolvedLanguage.
It is set to the current resolved language and it can be used as primary used language, for example in a language switcher.
If your detected language for example is en-US and you provided translations only for en (fallbackLng) instead i18next.resolvedLanguage will return en.
i18next.language vs. i18next.languages vs. i18next.resolvedLanguage
/* language */
i18next.language;
// Is set to the current detected or set language.

/* language */
i18next.languages;
// Is set to an array of language codes that will be used to look up the translation value.
// When the language is set, this array is populated with the new language codes.
// Unless overridden, this array is populated with less-specific versions of that code for fallback purposes, followed by the list of fallback languages

// initialize with fallback languages
i18next.init({
  fallbackLng: ["es", "fr", "en-US", "dev"]
});
// change the language
i18next.changeLanguage("en-US-xx");
// new language and its more generic forms, followed by fallbacks
i18next.languages; // ["en-US-xx", "en-US", "en", "es", "fr", "dev"]
// change the language again
i18next.changeLanguage("de-DE");
// previous language is not retained
i18next.languages; // ["de-DE", "de", "es", "fr", "en-US", "dev"]

/* resolvedLanguage */
i18next.resolvedLanguage;
// Is set to the current resolved language.
// It can be used as primary used language,
// for example in a language switcher.
Interpolation and Pluralization
i18next goes beyond just providing the standard i18n features.
But for sure it's able to handle plurals and interpolation.
If you like to see how this works, have a look at this section in that other blog post.
Formatting
Also formatting can be done.
If you like to see how this works, have a look at this section in that other blog post.
Context
What about a specific greeting message based on the current day time? i.e. morning, evening, etc.
This is possible thanks to the context feature of i18next.
If you like to see how this works, have a look at this section in that other blog post.
Separate translations from code
Having the translations in our i18n.js file works, but is not that suitable to work with, for translators.
Let's separate the translations from the code and pleace them in dedicated json files.
Because this is a web application, i18next-http-backend will help us to do so.
npm install i18next-http-backend
Move the translations to the public folder:

Adapt the i18n.js file to use the i18next-http-backend:
import i18next from 'i18next'
import I18NextVue from 'i18next-vue'
import LanguageDetector from 'i18next-browser-languagedetector'
import Backend from 'i18next-http-backend'

i18next
  // i18next-http-backend
  // loads translations from your server
  // https://github.com/i18next/i18next-http-backend
  .use(Backend)
  // detect user language
  // learn more: https://github.com/i18next/i18next-browser-languageDetector
  .use(LanguageDetector)
  // init i18next
  // for all options read: https://www.i18next.com/overview/configuration-options
  .init({
    debug: true,
    fallbackLng: 'en'
  });

export default function (app) {
  app.use(I18NextVue, { i18next })
  return app
}
Now the translations are loaded asynchronously.
If you have a slow network connectivity, you may notice until the translations are loaded only the i18n keys are shown.
To prevent this, we make use of the new Suspense functionality of Vue.js.
First let's adapt the i18n.js file, by exporting the i18next init promise:
import i18next from 'i18next'
import I18NextVue from 'i18next-vue'
import LanguageDetector from 'i18next-browser-languagedetector'
import Backend from 'i18next-http-backend'

export const
  i18nextPromise = i18next
  // i18next-http-backend
  // loads translations from your server
  // https://github.com/i18next/i18next-http-backend
  .use(Backend)
  // detect user language
  // learn more: https://github.com/i18next/i18next-browser-languageDetector
  .use(LanguageDetector)
  // init i18next
  // for all options read: https://www.i18next.com/overview/configuration-options
  .init({
    debug: true,
    fallbackLng: 'en'
  });

export default function (app) {
  app.use(I18NextVue, { i18next })
  return app
}
...and use that promise in the App.vue:
<template>
  <TranslationShowCase />
</template>

<script>
import TranslationShowCase from './components/TranslationShowCase.vue'
import { i18nextPromise } from './i18n.js'

export default {
  name: 'App',
  components: {
    TranslationShowCase
  },
  // used in combination with Suspense.
  // useful when translations are not in-memory...
  async setup() {
    await i18nextPromise
    return {}
  }
}
</script>
Let's create a new file: i.e. Suspenser.vue:
<template>
  <Suspense>
    <template #default>
      <App />
    </template>
    <template #fallback>
      <div>
        <h1>Loading...</h1>
      </div>
    </template>
  </Suspense>
</template>

<script>
import App from './App.vue'

export default {
  name: 'Suspenser',
  components: {
    App
  }
}
</script>
And use that in your main.js file:
import { createApp } from 'vue'
import i18n from './i18n'
import App from './Suspenser.vue'

i18n(createApp(App)).mount('#app')
Now, as long your translations gets loaded you'll see the fallback template:
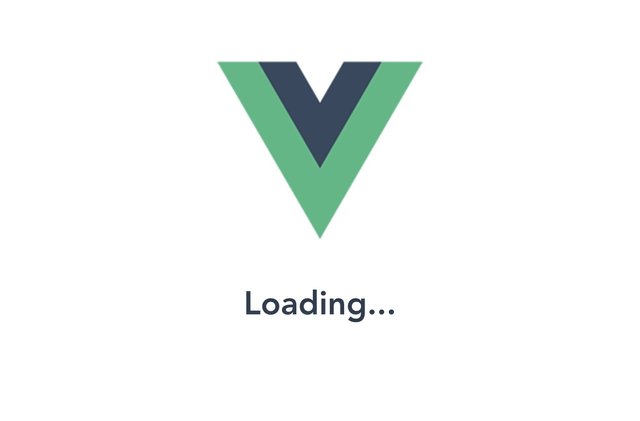
Now your app looks still the same, but your translations are separated.
If you want to support a new language, you just create a new folder and a new translation json file.
This gives you the possibility to send the translations to some translators.
Or if you're working with a translation management system you can just synchronize the files with a cli.
Better translation management
By sending the translations to some translators or translator agency you have more control and a direct contact with them. But this also means more work for you.
This is a traditional way. But be aware sending files around creates always an overhead.
Does a better option exist?
For sure!
i18next helps to get the application translated, and this is great - but there is more to it.
- How do you integrate any translation services / agency?
- How do you keep track of new or removed content?
- How you handle proper versioning?
- How you deploy translation changes without deploying your complete application?
- and a lot more...
Looking for something like this❓
- Easy to integrate
- Continuous deployment? Continuous localization!
- Manage the translation files with ease
- Order professional translations
- Analytics & Statistics
- Profit from our content delivery network (CDN)
- Versioning of your translations
- Automatic and On-Demand Machine Translation
- Riskfree: Take your data with you
- Transparent and fair pricing
- and a lot more...

How does this look like?
First you need to signup at locize and login.
Then create a new project in locize and add your translations. You can add your translations either by using the cli or by importing the individual json files or via API.
Done so, we're going to replace i18next-http-backend with i18next-locize-backend.
npm install i18next-locize-backend
After having imported the translations to locize, delete the locales folder.
Adapt the i18n.js file to use the i18next-locize-backend and make sure you copy the project-id and api-key from within your locize project:
import I18NextVue from 'i18next-vue'
import i18next from 'i18next'
import Backend from 'i18next-locize-backend'
import LanguageDetector from 'i18next-browser-languagedetector'

const locizeOptions = {
  projectId: '94c21299-0cf5-4ad3-92eb-91f36fc3f20f',
  apiKey: 'bc8586d9-fceb-489c-86ac-2985393ed955', // YOU should not expose your apps API key to production!!!
  version: 'latest'
}

export const
  i18nextPromise = i18next
                    // i18next-locize-backend
                    // loads translations from your project, saves new keys to it (saveMissing: true)
                    // https://github.com/locize/i18next-locize-backend
                    .use(Backend)
                    // detect user language
                    // learn more: https://github.com/i18next/i18next-browser-languageDetector
                    .use(LanguageDetector)
                    // init i18next
                    // for all options read: https://www.i18next.com/overview/configuration-options
                    .init({
                      debug: true,
                      fallbackLng: 'en',
                      backend: locizeOptions
                    })

export default function (app) {
  app.use(I18NextVue, { i18next })
  return app
}
i18next-locize-backend offers a functionality to retrieve the available languages directly from locize, let's use it:
<template>
<div class="hello">
<h1>{{ $t('welcome') }}</h1>
<p v-html="$t('descr')"></p>
<i>{{ $t('new.key', 'this will be added automatically') }}</i>
<hr />
<div>
<div v-if="languages">
<span v-for="(lng, index) in Object.keys(languages)" :key="lng">
<a v-if="$i18next.resolvedLanguage !== lng" v-on:click="$i18next.changeLanguage(lng)">
{{ languages[lng].nativeName }}
</a>
<strong v-if="$i18next.resolvedLanguage === lng">
{{ languages[lng].nativeName }}
</strong>
<span v-if="index < (Object.keys(languages).length - 1)"> | </span>
</span>
</div>
</div>
</div>
</template>
<script>
import i18next from 'i18next'
export default {
name: 'TranslationShowCase',
data () {
return {
languages: []
}
},
async mounted () {
this.languages = await i18next.services.backendConnector.backend.getLanguages()
}
}
</script>
save missing translations
Thanks to the use of the saveMissing functionality, new keys gets added to locize automatically, while developing the app.
Just pass saveMissing: true in the i18next options:
import I18NextVue from 'i18next-vue'
import i18next from 'i18next'
import Backend from 'i18next-locize-backend'
import LanguageDetector from 'i18next-browser-languagedetector'

const locizeOptions = {
  projectId: '94c21299-0cf5-4ad3-92eb-91f36fc3f20f',
  apiKey: 'bc8586d9-fceb-489c-86ac-2985393ed955', // YOU should not expose your apps API key to production!!!
  version: 'latest'
}

export const
  i18nextPromise = i18next
                    // i18next-locize-backend
                    // loads translations from your project, saves new keys to it (saveMissing: true)
                    // https://github.com/locize/i18next-locize-backend
                    .use(Backend)
                    // detect user language
                    // learn more: https://github.com/i18next/i18next-browser-languageDetector
                    .use(LanguageDetector)
                    // init i18next
                    // for all options read: https://www.i18next.com/overview/configuration-options
                    .init({
                      debug: true,
                      fallbackLng: 'en',
                      backend: locizeOptions,
                      saveMissing: true
                    })

export default function (app) {
  app.use(I18NextVue, { i18next })
  return app
}
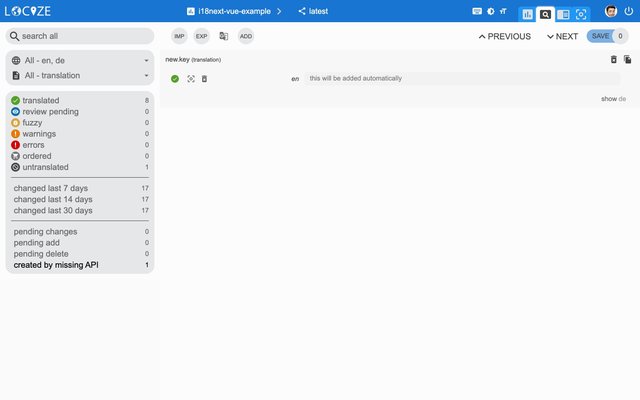
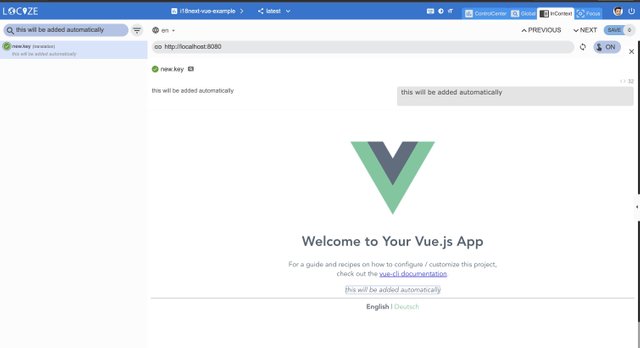
Each time you'll use a new key, it will be sent to locize, i.e.:
<i>{{ $t('new.key', 'this will be added automatically') }}</i>
will result in locize like this:
👀 but there's more...
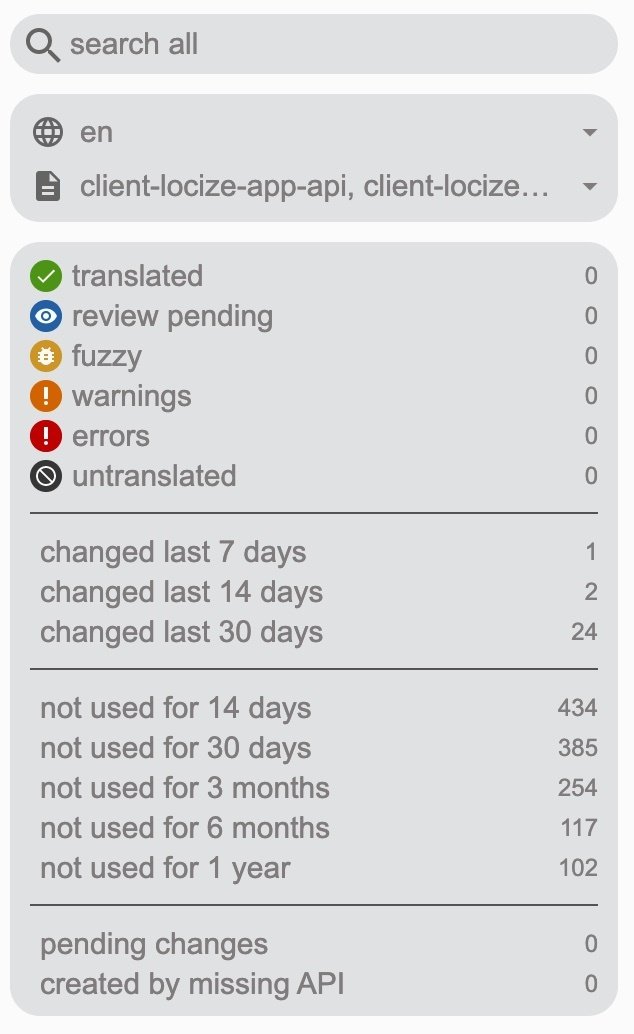
Thanks to the locize-lastused plugin, you'll be able to find and filter in locize which keys are used or not used anymore.
With the help of the locize plugin, you'll be able to use your app within the locize InContext Editor.
Lastly, with the help of the auto-machinetranslation workflow and the use of the saveMissing functionality, new keys not only gets added to locize automatically, while developing the app, but are also automatically translated into the target languages using machine translation.
Check out this video to see how the automatic machine translation workflow looks like!
{% youtube VfxBpSXarlU %}
npm install locize-lastused locize
use them in i18n.js:
import I18NextVue from 'i18next-vue'
import i18next from 'i18next'
import Backend from 'i18next-locize-backend'
import LanguageDetector from 'i18next-browser-languagedetector'
import LastUsed from 'locize-lastused'
import { locizePlugin } from 'locize'

const locizeOptions = {
  projectId: '94c21299-0cf5-4ad3-92eb-91f36fc3f20f',
  apiKey: 'bc8586d9-fceb-489c-86ac-2985393ed955', // YOU should not expose your apps API key to production!!!
  version: 'latest'
}

export const
  i18nextPromise = i18next
                    // locize-lastused
                    // sets a timestamp of last access on every translation segment on locize
                    // -> safely remove the ones not being touched for weeks/months
                    // https://github.com/locize/locize-lastused
                    .use(LastUsed)
                    // locize-editor
                    // InContext Editor of locize
                    .use(locizePlugin)
                    // i18next-locize-backend
                    // loads translations from your project, saves new keys to it (saveMissing: true)
                    // https://github.com/locize/i18next-locize-backend
                    .use(Backend)
                    // detect user language
                    // learn more: https://github.com/i18next/i18next-browser-languageDetector
                    .use(LanguageDetector)
                    // init i18next
                    // for all options read: https://www.i18next.com/overview/configuration-options
                    .init({
                      debug: true,
                      fallbackLng: 'en',
                      saveMissing: true,
                      backend: locizeOptions,
                      locizeLastUsed: locizeOptions
                    })

export default function (app) {
  app.use(I18NextVue, { i18next })
  return app
}
Automatic machine translation:

Last used translations filter:
📦 Let's prepare for production 🚀
Now, we prepare the app for going to production.
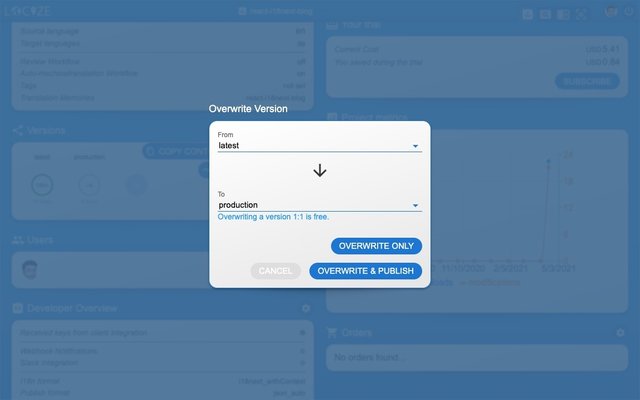
First in locize, create a dedicated version for production. Do not enable auto publish for that version but publish manually or via API or via CLI.
Lastly, enable Cache-Control max-age for that production version.
Let's making use of the environment feature of react-scripts.
Lets' create a default environment file and one for development and one for production:
.env:
VUE_APP_LOCIZE_PROJECTID=94c21299-0cf5-4ad3-92eb-91f36fc3f20f
.env.development:
VUE_APP_LOCIZE_VERSION=latest
VUE_APP_LOCIZE_APIKEY=bc8586d9-fceb-489c-86ac-2985393ed955
.env.production:
VUE_APP_LOCIZE_VERSION=production
Now let's adapt the i18n.js file:
import I18NextVue from 'i18next-vue'
import i18next from 'i18next'
import Backend from 'i18next-locize-backend'
import LanguageDetector from 'i18next-browser-languagedetector'
import LastUsed from 'locize-lastused'
import { locizePlugin } from 'locize'

const isProduction = process.env.NODE_ENV === 'production'

const locizeOptions = {
  projectId: process.env.VUE_APP_LOCIZE_PROJECTID,
  apiKey: process.env.VUE_APP_LOCIZE_APIKEY, // YOU should not expose your apps API key to production!!!
  version: process.env.VUE_APP_LOCIZE_VERSION
}

if (!isProduction) {
  // locize-lastused
  // sets a timestamp of last access on every translation segment on locize
  // -> safely remove the ones not being touched for weeks/months
  // https://github.com/locize/locize-lastused
  i18next.use(LastUsed);
}

export const
  i18nextPromise = i18next
                    // locize-editor
                    // InContext Editor of locize
                    .use(locizePlugin)
                    // i18next-locize-backend
                    // loads translations from your project, saves new keys to it (saveMissing: true)
                    // https://github.com/locize/i18next-locize-backend
                    .use(Backend)
                    // detect user language
                    // learn more: https://github.com/i18next/i18next-browser-languageDetector
                    .use(LanguageDetector)
                    // init i18next
                    // for all options read: https://www.i18next.com/overview/configuration-options
                    .init({
                      debug: !isProduction,
                      fallbackLng: 'en',
                      saveMissing: !isProduction,
                      backend: locizeOptions,
                      locizeLastUsed: locizeOptions
                    })

export default function (app) {
  app.use(I18NextVue, { i18next })
  return app
}
Now, during development, you'll continue to save missing keys and to make use of lastused feature. => npm run serve
And in production environment, saveMissing and lastused are disabled, and also the api-key is not exposed. => npm run build

🧑💻 The complete code can be found here.
Check also the code integration part in this YouTube video.
🎉🥳 Congratulations 🎊🎁
I hope you’ve learned a few new things about i18next, Vue.js localization and modern localization workflows.
So if you want to take your i18n topic to the next level, it's worth to try the localization management platform - locize.
The founders of locize are also the creators of i18next. So with using locize you directly support the future of i18next.