](https://steemitimages.com/640x0/https://cdn-images-1.medium.com/max/2000/1*Ijrqp6KgpcuSyA4AHxSbiQ.png)
If you are experiencing issues with your keys when you’re interacting with the EOS blockchain, then you might be experiencing critical permission problems with your Exodus account. The EOS blockchain has an account system that allows you to delegate your permissions to other entities for transaction verifying. This process can be done without smart contracts or multi-signature wallets. For more information on the permissions process, you can check out the official thread by EOS here.
If you have any questions during this article, you can comment, and we would be glad to help assist you. If you experience any Exodus issues, you should always check our story library as we post all common Exodus issues, and it would likely save you time.
Introduction
Today we will be going over the steps you need to take so you can get your account back on track. We would be giving you step by step instructions on how to fix your account if the permissions were changed.
To figure out if your settings in EOS were changed, you should try and send or exchange a small amount of EOS. If they were changed, then you will receive an error that says
“Your EOS keys no longer provide access to your EOS account. If this is intentional, you can use the ‘Reset Account…’ option in the advanced menu to unlink this account from your wallet.“
Fix
Update your Exodus Wallet, most issues occurs by outdated version:
- **Download Exodus Wallet last version for Windows**
- **Download Exodus Wallet last version for Android**
- **Download Exodus Wallet last version for Mac**
We will break the process down in a few different sections, so you know exactly what you are doing during the given steps.
Getting your EOS private key
❕❕ Download Exodus Wallet Updated ❕❕
**https://www.exodus.io/download/**
Step 1: Click on the three dots on your application that will create a drop-down menu with “Asset Menu.” Then after clicking on the list, you can select “Add Account (WIF).”
Step 2: Copy and paste your private key into the box that says “Import.”
Now your private key will be added to Exodus as “active” permission. The key will not be stored within the Exodus application, so you’re able to add it to a hardware device if you would like.
Changing EOS wallet permissions
You will now need to change the permissions in the EOS system. We will be using the application Scatter, but you could use any of them.
Step 1: Go to the official Scatter website and find the downloads for the app. You can go directly to it by clicking here.

**Step 2: **When you install the application, you will want to click on “I have my own private keys” and then review the terms and conditions and accept them.
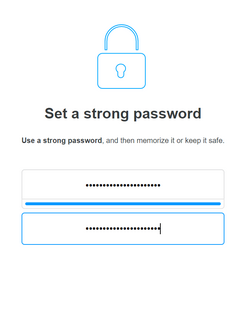
Step 3: You will now be asked to create a password in which you should write it down and store it in a safe area.
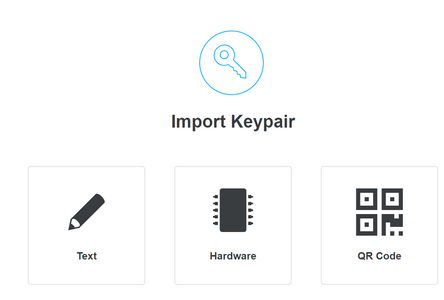
Step 4: You can now import your key. You will be given three options, text, hardware, and QR code. If you have the QR code, then you can scan that, or if you have the private key in cold storage, you can select the “hardware” option, which is the safest method. If you have no other options, then you can choose “Text,” but this is the most unsecure method.
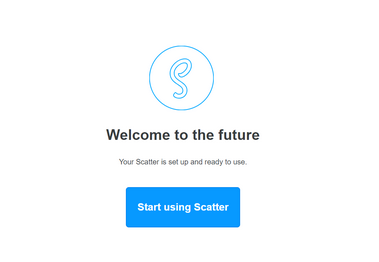
Step 5: You will now be able to accept and click “start using scatter.”
Step 6: You should now navigate over to “wallet” and click on “import key.” You are now able to click on “Text” and import it.
Step 7: Go back to Exodus and copy your private key and paste it into the Scatter platform.
Step 8: You can now change your permissions by going to “Wallet” and then clicking on your EOS account that is showing up.
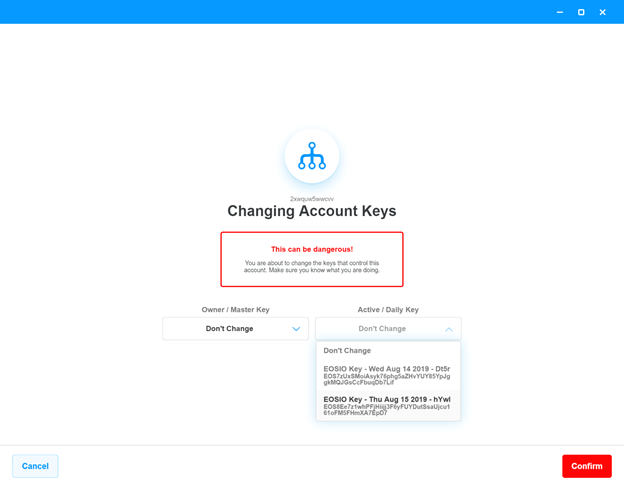
Step 9: You should now click “Change,” and then “Change account keys.” You will need to verify your password, and then you’re able to continue.
Step 10: You can now go to Exodus and click on “Owner, Master Key,” and then “Active Daily key.”
If you have followed all the steps, then you will be good to go!
Conclusion
Changing your EOS permissions can be a fifteen-minute process, but it’s worth it, especially if you are going to be using Exodus for a while. After you have changed the permissions to match your Exodus application, you will be able to interact with EOS without any further interruptions.
Make sure you have saved all sensitive information on a piece of paper and safely secure it by locking it in a flameproof box.