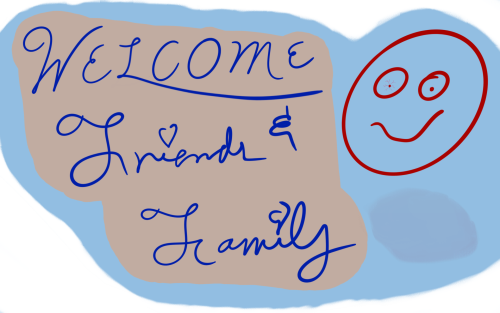
Welcome to Steemit! I'm going to be doing a series of these posts as needed to help you get started. For the random individuals that stumble over this post, I know there are other posts that do an excellent job of explaining this, but I'm writing this anyway, explicitly aiming it at the people that I've dragged kicking and screaming into Steemit.
The topic of this article is Posting. Now that you're here and you have your account, I wanted to describe the process of posting. It's a little weird, but with a tiny bit of practice it'll get easier.
The anatomy of a post
A post is made up of a title, a body, tags, and a reward distribution option.
Title
Titles are pretty straight forward. Just like with articles in newspapers or magazines, you'll need to title your post so people have an idea of what's in it.
Body
This is where you write your actual article content.
You will write your post in a language called Markdown. This just means that you will be using a few funny symbols to effect what your post looks like. You can also use some HTML, but prefer using mostly markdown formatting as HTML tends to make the post hard to read while you are editing it.
There is a limit to article length, and it's in the thousands of words. Don't ever write a post that long. If you have that much to say, split it up over multiple posts.
Tags
Tags are also called topics or categories. When people are browsing for content, the tags you choose will control where your article shows up on Steemit and other sites. Pick tags that represent the key words you might type into Google if you were researching the topic of your post.
If you are making a post in response to a contest, there may be rules that require you to use specific tags, so always check that before you add your own tags.
The very first tag you enter is permanent. You can edit the other tags after you post, so be mindful of this.
You may be limited to only five, depending on what front end you use, so be mindful of this, too.
If you post through busy.org, you should definitely make busy one of your tags so you can get an extra vote. Seriously, the value of this extra vote is higher than many of my posts.
Use more than two tags to increase the chances of somebody finding your post, but make sure the tags are relevant to your article.
Reward Distribution
The choices for payout are 50/50, full Steem, or refuse. Generally you will want to use 50/50 or alternate between 50/50 and full Steem, depending on how soon you need the funds in liquid form. Avoid the refuse payout option because it wont help you when you're just getting started. It may discourage potential upvotes for people that are out looking for your posts because it means they wont get a payout for voting on your stuff, either.
Posting
The formatting
There are only a few ways you should try to format your post. You will make use of <div> and <center> for text alignment options. You will use markdown for almost everything else.
Here's the template I like to use for my simpler posts:
<div class="text-justify">
<div class="pull-right">

</div>
The article teaser goes here.
The introduction. Features a bulletted list if it's a
tutorial or I just jump right into whatever fiction I'm
writing.
# Section Heading
If I did a bulletted list at the beginning, the section
headings mirror those bullets and then these paragraphs
expand on them.
# Another Section Heading
See previous section.
# Summary or Conclusion
If it was a tutorial, I summarize what I covered. If it was
a work of fiction, I may skip the conclusion. If it was for
a contest, I explain where the contest was, who hosted it,
and encourage people to join it.
</div>
* * *
I generally put a little footer at the bottom of the post
where I provide links to other posts I've done that are
related. That way the reader can go see other similar stuff
I've done.
After that I provide image attribution. If it's something I
made, I say that here. If it's something I got from some
other site, I mention it here.
<center> ~~ A thank you of some kind. ~~ </center>
A few more details about posting
The Teaser
The first sentence, or part of the first sentence, will be used as the teaser line for your post when viewed from Steemit. So be careful how you word the first sentence; don't include a link as your first sentence, don't include image attribution as your first sentence, and after you post, view your "blog" to make sure your first sentence is what you want people to see when they see your blog but haven't read the post yet.
Images
I hate that this is the case, but generally you will need to include an image in your post. If you need a photograph, surf Pixabay.com for some free ones. Then, at the end of your post, mention the picture was from there.
Images should enhance the post, so don't use too many animated images or no one will be able to read the text around them because they're too distracting.
Make sure the image you are using is free to be used the way you are using it. You're safe with creative commons style licensed imagery, but make sure that you follow any rules for re-use.
To actually use an image, download it to your computer, then drag and drop that image right onto the text box where you are typing your article. The image will take a moment to upload, then it will show up in your post like this:

Be sure to change the text between the brackets, that's the alternate text, which shows up while the image is loading, for accessibility reasons, you should put a description there. It can be a single word, just don't leave it as filename.png.
If the image is taking a while to upload, you might need to resize it before uploading it.
Left/Right/Center Images
If you want the image to be on one side of the screen and then for text to wrap around it, you can wrap it in div tags. This would stick it on the right, for example:
<div class="pull-left">

</div>
Example of an image on the left with text wrapping to the right around it.
Or to stick it to the right, like in my template:
<div class="pull-right">

</div>
Example of an image on the right with text wrapping around the left of it.
If you want an image in the center, put <center> tags around it, for example:
<center>  </center>
In all of these examples, be sure to match the spacing exactly or you will end up with problems in formatting. Also, make sure that the end </div> tag is present if you used my general template as the preview will get confused otherwise.
Word Wrap
Do not manually word wrap your text, it will screw up in stupid ways. Only insert a return if you are starting a new paragraph. And then it's a good idea to separate your paragraphs with one empty line.
Bold/Italics/Strikethrough
If you want **bold** text use two asterisks.  For *italics*
use single asterisks.  *You can do both, **but** make sure
it looks right in the preview.*  For ~~Strikethrough~~ it's
two sets of tildes, make sure it touches the text to strike
out.
Formatting example with bold, italics.
If you want bold text use two asterisks. For italics use single asterisks. You can do both, but make sure it looks right in the preview. For Strikethrough it's two sets of tildes, make sure it touches the text to strike out.
Block Quotes
I'm getting into the habit of using a block quote to put captions on code blocks, but you don't need to do that. Instead you could use them for quoting people. For example:
> This could be a quote. -- me, just now
This could be a quote. -- me, just now
Links
If you want to link to your other content, use something called a relative link. For example, if I wanted to link to my Formatting Quirks I'd do it like this:
For example, if I wanted to link to my [Formatting Quirks](/steemit/@not-a-bird/formatting-quriks-of-steemit) I'd do it like this...
Links, full relative link example.
You could actually skip that first category tag and do it like this, too:
[Formatting Quirks](/@not-a-bird/formatting-quriks-of-steemit)
Links, shortened perm-link example.
Post Quality
A lot of times it wont matter that your post quality is higher than other people's. You need people to see your post in order to vote on it and those other people have lots of followers or purchased votes. Try not to be discouraged when you find absolute garbage in a subject you excel at, there are a lot of factors at play, and you'll understand them in time.
Post Promotion
Don't bother with that promotion button. Instead, if you are taking part in a contest, be sure to link to your post in a reply to that contest. And make use of the right tags, so people can find your entry.
Be sure to go comment on other people's stuff, but generally you wont link back to your own stuff. If people like your input, they'll click on your user name and see what else you've posted.
People will be encouraged to vote on your content when you are first starting out because your lower reputation and SP means they can get a kickback or curation bonus for voting on your content. Use this to your advantage and build your reputation and the rest will fall into place.
Post Edits
You can edit your post for up to six point five days after it has been created. Be sure to come back a day later and re-read your post for mistakes so that you can fix them before they are frozen and immortalized.
Post Replies
Don't upvote people you don't know when all they have said is "Nice Post". Do upvote people that give some form of meaningful addition to your post. It's entirely up to you what constitutes meaningful.
Keep this in mind when you post replies to other people's posts. Your goal in leaving a reply should be to acknowledge what they've written and add your own value to it. In doing this it will encourage others to view your content.
Post Language
Not everyone speaks English and no one is going to pull out a dictionary or thesaurus to read your post. So if you want people to read and understand your post then it behooves you not to extemporaneously postulate or pontificate on erudite topics of pedantry or employ such bombastically eclectic vernacular as this. Because you, dear friends and family, are the only ones that would bother to have read that sentence just now, everyone else closed the window and went back to looking at pictures of kitties.
Post Length
It's a careful balancing act, and I just failed. I wanted to pack enough information into this post so that everything could be found in one place. But there are some drawbacks I've incurred. The post being this long means that it's harder for users to engage and comment on, they have to spend longer reading it, and if they want to find some small detail in it, they have a wall of text to read back through to find it.
So, depending on how you want to engage your audience, you will want to vary the length of your post. For fiction, it's okay if it runs longer, but try not to go over a thousand words. For tutorial content you can sometimes break it up into multiple shorter tutorials, but you're pretty much a slave to the materials you're presenting and it cannot be helped.
Don't go to the other extreme. If you are just posting some funny photograph or piece of art, then there better be plenty of additional text (when relevant) to go along with the post.
More to come...
I've rambled a lot, but with any luck future edits will cut this down in size (don't count on it). So, I'm going to end this here and I'll be posting on whatever other topics might help you guys.
Image is my own.
You forgot to mention that in order to use this advice you are giving one might want to just print it out so they have a basic reference manual.😃😅Yes i seriously plan on doing that.
Downvoting a post can decrease pending rewards and make it less visible. Common reasons:
Submit
That's some pretty good advice.
Downvoting a post can decrease pending rewards and make it less visible. Common reasons:
Submit
Pretty neat and useful for newbies ^^ I hope they somehow find this post.
Downvoting a post can decrease pending rewards and make it less visible. Common reasons:
Submit
Oh, that's a fair point. I haven't emailed all of them yet... I'll definitely be sending them a link in the very near future!
Downvoting a post can decrease pending rewards and make it less visible. Common reasons:
Submit
Thanks for sending me this link I hope that this leads me in the right direction
Downvoting a post can decrease pending rewards and make it less visible. Common reasons:
Submit
No problem. I'll try to give you a few days to look around and get comfortable before I throw another giant wall of text at you.
Downvoting a post can decrease pending rewards and make it less visible. Common reasons:
Submit
I just want to thank you for spelling out how to center the text at the bottom of this tutorial because I didn't see where it was explained above. Did I miss something?
Downvoting a post can decrease pending rewards and make it less visible. Common reasons:
Submit
Text and images are all centered the same way, you put the
<center>tags around them. For example:Would produce the following:
Downvoting a post can decrease pending rewards and make it less visible. Common reasons:
Submit