
How to disable Windows Defender Antivirus using Windows Security
If you want to disable the built-in security solution to complete a specific task, such as installing an application, you don’t have to disable Windows Defender Antivirus permanently. You only need to turn it off temporarily.
To disable the Windows 10 antivirus temporarily, use these steps:
Open Start .
Search for Windows Security and click the top result to open the app.
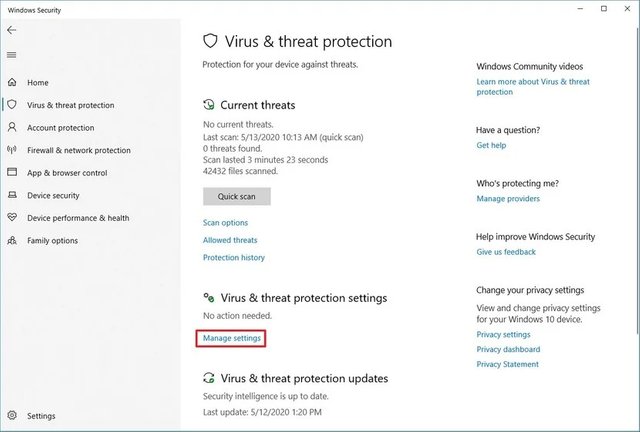
Click on Virus & threat protection .
Under the “Virus & threat protection settings” section, click the Manage settings option.
Turn off the Real-time protection toggle switch to disable Windows Defender temporarily.
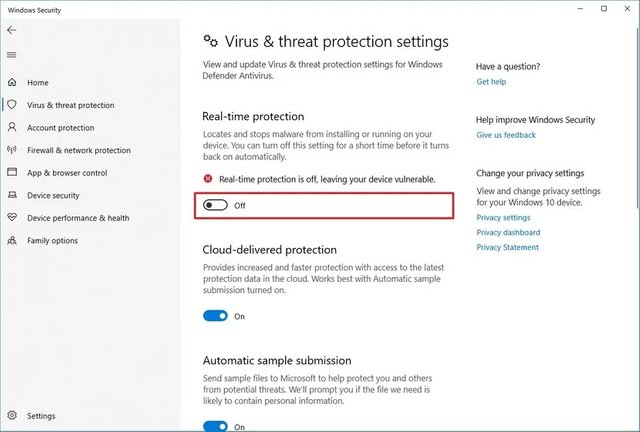
Once you complete the steps, the antivirus will disable the real-time protection, which it’ll allow you to install apps or make a specific system change, which you weren’t able before because the security feature was blocking the action.
You can always enable the real-time protection again by restarting the device, or using the same instructions outlined above, but on step No. 5 , make sure to turn on the Real-time protection toggle switch.
Although this isn’t a permanent solution, it’s the best option to disable the Windows 10 antivirus to perform a specific task.
How to disable Windows Defender Antivirus Tamper Protection
Disable Tamper Protection
To disable Tamper Protection on Windows 10, use these steps:
Open Start .
Search for Windows Security and click the top result to open the app.
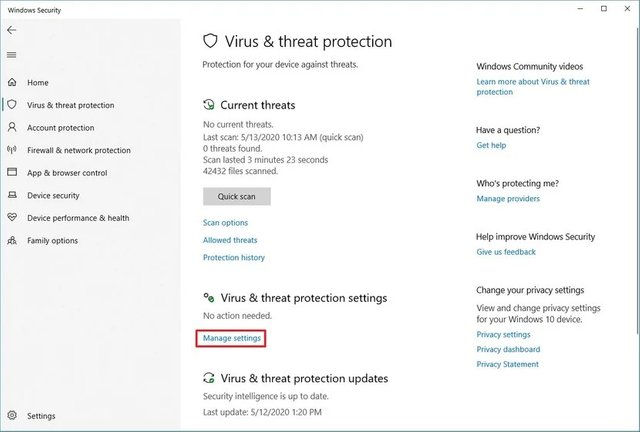
Click on Virus & threat protection .
Under the “Virus & threat protection settings” section, click the Manage settings option.
.jpeg)
Turn off the Tamper Protection toggle switch.
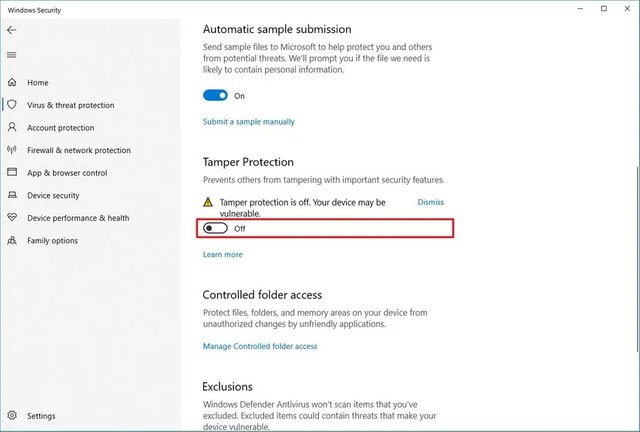
After you complete the steps, you can continue with the instructions to disable Windows Defender Antivirus permanently using Group Policy.
Disable Windows Defender Antivirus Group Policy Editor
To disable Windows Defender Antivirus permanently, use these steps:
Open Start .
Search for gpedit.msc and click the top result to open the Local Group Policy Editor.
Browse the following path: Computer Configuration > Administrative Templates > Windows Components > Windows Defender Antivirus
Double-click the Turn off Windows Defender Antivirus policy.
After you complete the steps, you can continue with the instructions to disable Windows Defender Antivirus permanently using Group Policy.
Disable Windows Defender Antivirus Group Policy Editor
To disable Windows Defender Antivirus permanently, use these steps:
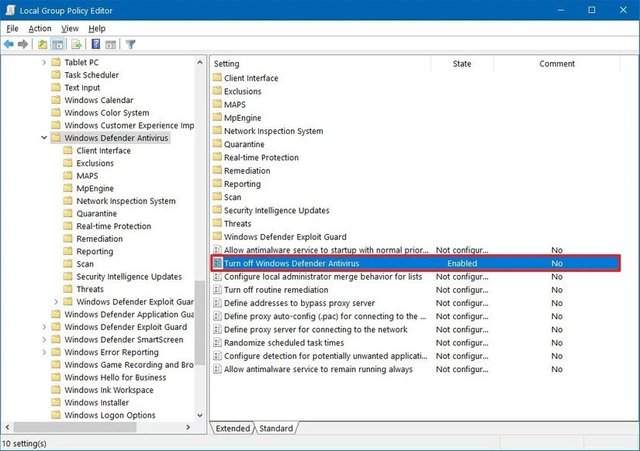
Select the Enabled option to disable Windows Defender Antivirus.
Click the Apply button.
Click the OK button.
Restart your device.
Once you complete the steps, the antivirus will disable permanently. Also, you’ll notice that the “shield” icon will remain in the taskbar, but this is one expected behavior since the icon is part of the Windows Security app, not from the antivirus.
If you need to revert to the original settings, you can always re-enable the Windows Defender Antivirus using the same instructions above, but on step No. 5 , make sure to select the Not Configured option, and restart your computer to apply the changes. Also, don’t forget to re-enable the “Tamper Protection” feature using the same above steps, but on step No. 5 , make sure to enable the toggle switch.
How to disable Windows Defender Antivirus using Registry
Alternatively, if you don’t have access to the Local Group Policy Editor, you can modify the Registry to disable the Windows Defender Antivirus permanently.
To disable the Defender antivirus permanently with the Registry, use these steps:
Warning: This is a friendly reminder that editing the Registry is risky, and it can cause irreversible damage to your installation if you don’t do it correctly. It’s recommended to make a full backup of your PC before proceeding.
Open Start .
Search for regedit and click the top result to open the Registry Editor.
Browse the following path: HKEY_LOCAL_MACHINE\SOFTWARE\Policies\Microsoft\Windows Defender Quick tip: You can now copy and paste the path in the Registry’s address bar to quickly jump to the key destination.
Right-click the Windows Defender (folder) key, select New , and click on DWORD (32-bit) Value .
Name the key DisableAntiSpyware and press Enter .
Double-click the newly created DWORD and change the value from 0 to 1 .
Click the OK button.
Restart your device.
Once you complete the steps, the Windows Defender Antivirus will no longer protect your system against malware.
If you want to revert the changes, you can use the same instructions outlined above, but on step No. 6 , right-click the DisableAntiSpyware key and select the Delete option.
BONUS: Disable Windows defender Services
Control Panel > Administrative Tools > Services > Search for windows defender, Right click and ‘‘Properties’’ and Simply select ‘‘Disable’’ from drop-down menu.
Go to the ‘‘Recovery’’ tab and Select ‘‘Take no action’’ from all drop-down menu. Apply and save changes.
In this guide, we continue to use the Windows Defender Antivirus reference, but starting with the Windows 10 May 2020 Update, the service is known as “Microsoft Defender Antivirus.”
Although you can use multiple methods to disable the Windows 10 antivirus, I don’t recommend using a computer without anti-malware software. However, there might be situations when disabling the security feature could make sense. Also, remember that if you’re installing a third-party anti-malware, you don’t need to disable the Windows Defender since it’ll be disabled automatically during the installation process.
Enjoy!