24/7 Staking WSP on a Raspberry Pi — Full Tutorial — @WisprTech
A lot of people are interested in generating passive income. Staking your WSP is one way to do so, and at this moment there is no cheaper alternative than the Raspberry Pi. We calculated the total annual electricity costs of running a Wispr node on an average PC, laptop and Raspberry Pi in The Netherlands and we came to the conclusion that running a Wispr node on a Raspberry Pi is 114 times cheaper than on an average PC and 27 times cheaper than on a laptop. Below you will find a complete tutorial on how to get your Raspberry Pi started.
What do you need?
A Raspberry Pi. The latest model is the Raspberry Pi 3 model B, but it should work on previous ones as well.
8 GB+ MicroSDHC card. Class 6 or higher recommended, buy a 16 GB one if you have the chance.
Micro USB cable for power or the power adapter provided with the RPi. We would opt for an original RPi charger, as your RPi will be running 24/7.
(Cat 5) Ethernet cable or USB WiFi adapter. Opt for the network cable for reliability.
USB keyboard, monitor + HDMI cable. These are not necessary when you are planning to do a headless install (this means that you will connect your RPi to your router and control it via your laptop, pc or phone for example)!
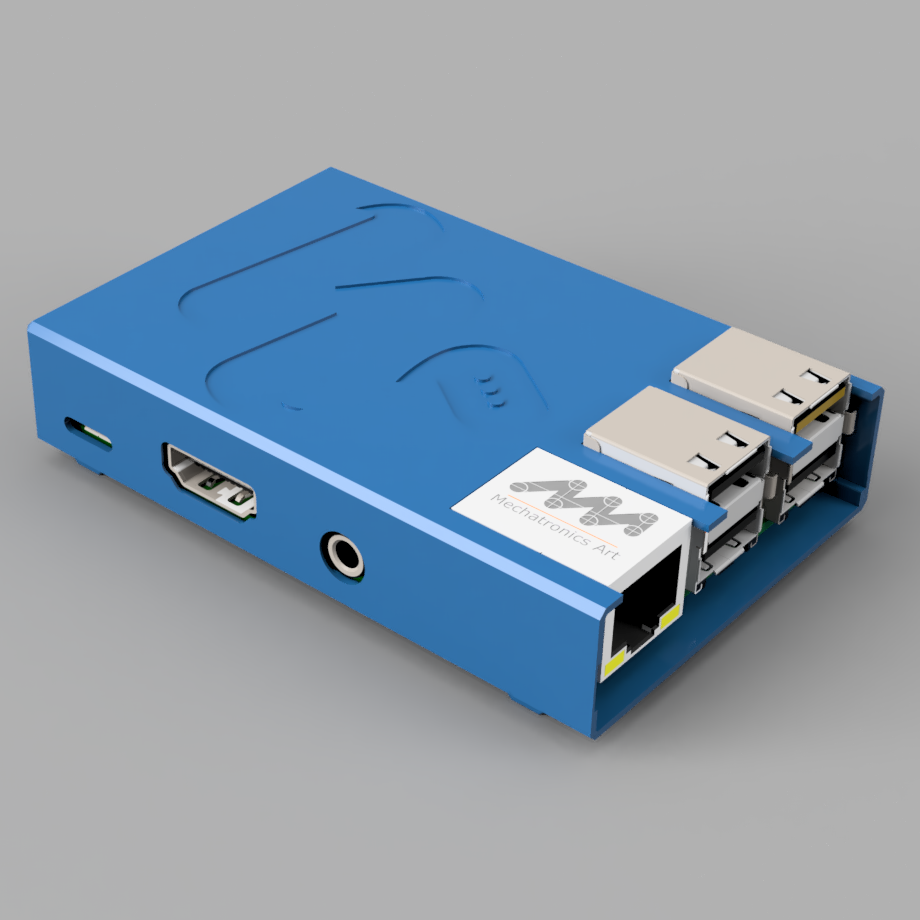
Setting up your Raspberry Pi
Setting up the RPi for the first time can be quite tricky, but below you will find an extensive explanation. If you have already installed the latest version of Raspbian and you know how to access your Pi, please go to the next chapter.
The first thing you have to do is download the latest Raspbian image by clicking this link.
Meanwhile, download and install a tool that allows you to write IMG files to an SD card such as Etcher.
After you have completed both steps you should open Etcher and add the image and write it your SD card. Etcher allows you to add the .zip file so you don’t have to extract it. Make sure that your target location is your SD card!
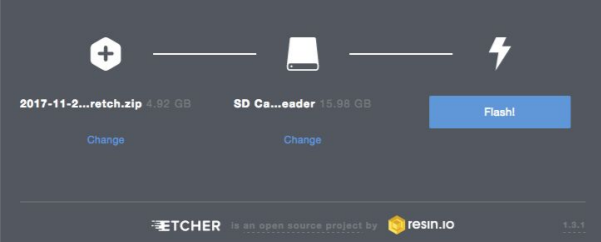
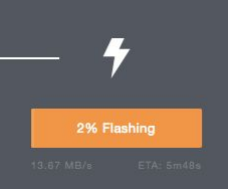
Press ‘Flash’ and wait until it finishes.
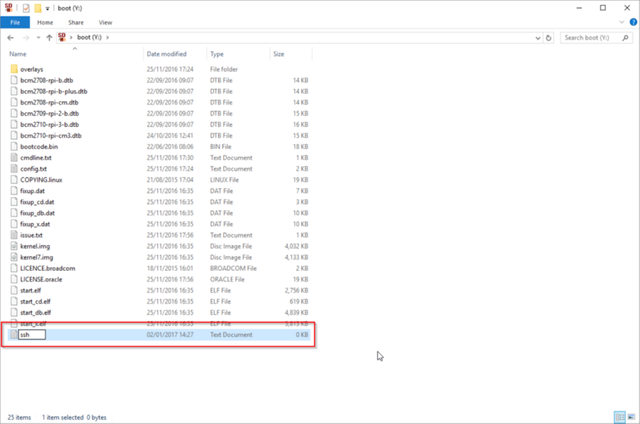
If you are planning to connect to your Raspberry Pi via your PC or laptop for example (headless install), you should add a file called ‘ssh’ with no extension to your SD card after you’ve written the Raspbian image to your SD card. (If you are planning to hook up your Raspberry Pi to a monitor, keyboard and mouse you don’t have to do this).
Eject the SD card from your PC and put it in your Raspberry Pi.
Hook up your Raspberry Pi to your monitor with an HDMI cable, plug in your mouse and keyboard and finally plug in your power adapter. The Pi does not have a power switch so once you plug it in it will turn on by itself. Connect your Pi to WiFi in the top right corner and go to the next chapter.
If you are planning to access your Pi via your PC or laptop you should hook up your Pi to your router with your Ethernet cable and plug in the power adapter. It will turn on by itself.
Find out what your Raspberry Pi’s IP address is. An easy way to do so is by downloading and installing Angry IP Scanner. Open up Angry IP Scanner and hit ‘Start’ and it will scan your local network. It will give a list of all connected devices to your network. Find ‘raspberrypi’ or ‘raspberrypi.local’ and write down the IP address of your Pi.
Download and install the latest version of PuTTY. PuTTY is an SSH client that allows you to access the Pi. Copy the IP address and press ‘Open’. You will now see a terminal. The default username is pi and the default password is raspberry.
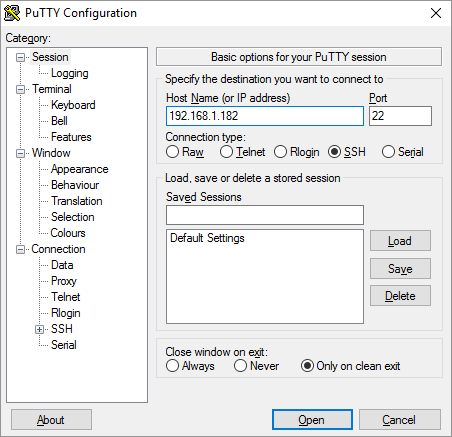
Access your Pi by copying the IP address and pressing ‘Open’. Use the default credentials.
Configure your pi by typing the command sudo raspi-config. This will bring you to the screen below. Go to ‘Interfacing Options’ and select ‘P2 SSH’ and enable it. Do the same thing for ‘P3 VNC’ and exit PuTTY.
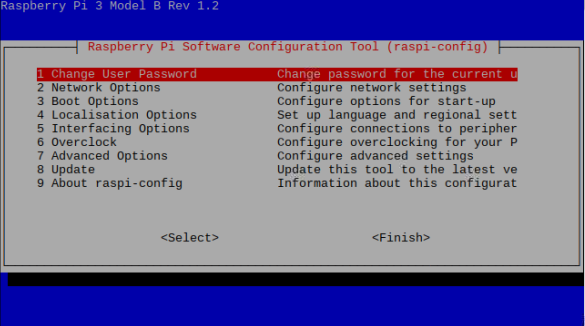
Select ‘Interfacing Options’ and enable SSH and VNC on your Raspberry Pi.
Download and install VNC Viewer — a tool which allows you to remotely control your Pi and which is also available for mobile devices. Open VNC Viewer and copy the IP address of the Pi to the top bar and hit enter. Login with your default credentials and you should see your Pi desktop.
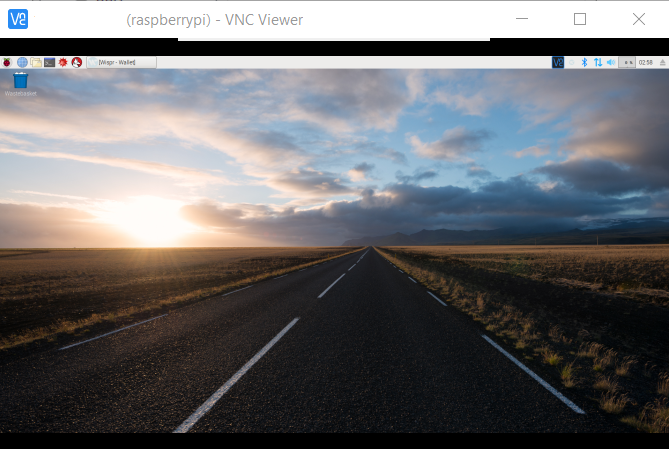
Compiling the Wispr wallet
After you have accessed your Pi you are now ready to start compiling the Wispr wallet.
Go to the main menu and go to Accessories > Terminal.
After you have opened the terminal use the following commands:
sudo apt update and then sudo apt upgrade -y --fix-missing .
The Pi is now running the latest software. The next step is to install new software in order to compile and run the wallet. Copy the following lines of code and use them separately.
sudo apt install libqrencode-dev libssl1.0-dev libdb++-dev libminiupnpc-dev -y
sudo apt install git build-essential libboost-all-dev -y
sudo apt install qt5-default qt5-qmake qtbase5-dev-tools qttools5-dev-tools -y
After you have installed everything you need to download the latest version of the Wispr source-code. Use the following command: git clone https://github.com/WisprProject/core.git (This command doesn’t work with copy/paste, so please type out this command).

Download the latest version of the Wispr source-code.
Before compiling we have to increase the Pi’s swap size. Use this command: sudo nano /etc/dphys-swapfile and replace CONF_SWAPFILE=100 with CONF_SWAPFILE=512.
Your Pi might show CONF_SWAPSIZE instead CONF_SWAPFILE, just do the same thing but use SWAPSIZE instead. Press ‘CTRL + \’ to replace the line and hit enter to continue. Press ‘CTRL + X’ to exit.
Restart your Raspberry Pi by using this command: sudo shutdown -r now.
After your Pi has restarted, open up the terminal again and type cd core.
For the last (big) step we need to compile the wallet — which might take an hour or two. Depending on the version of your Pi, run the following command:
On a Pi Zero, 1 or 2: qmake && make
On a Pi 3: qmake && make -j2
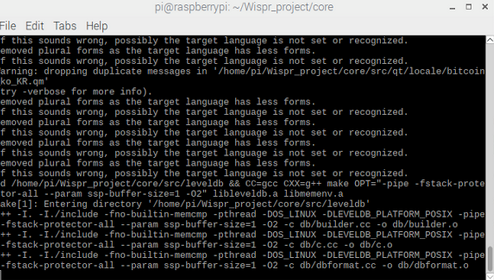
Your Pi will start compiling the wallet. This may take a while.
Open your wallet by using this command: ./Wispr-qt — your wallet will start syncing automatically.
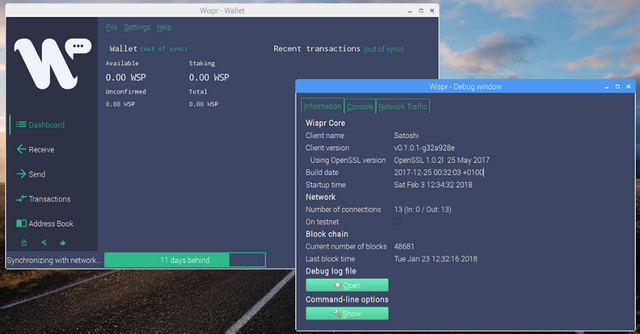
You are now running the Wispr wallet on your Raspberry Pi.
Having a desktop shortcut to your wallet might be useful. Go to the main menu and go to Accessories > File Manager and enter the folder URL: ~/core/ and move the wispr-qt file to your desktop.
Side-quest: adding nodes and/or your wallet.dat
If your wallet only has 1 or 2 connections to the network, or no connections at all you should start adding nodes. Also, if you have an existing wallet somewhere else you can move it to the Wispr folder which should now be located on your Pi.
Adding nodes
Open the terminal on your Pi and use the following command: echo | curl https://wispr.tech/nodes > ~/.wispr/wispr.conf
Restart your wallet and you should get more connections. You can also manually add extra nodes, check out our FAQ.
Adding your wallet.dat
Find a way to copy your existing wallet.dat to your Raspberry Pi. A simple way is to upload your wallet.dat backup to an online cloud and download it via the browser in your Raspberry Pi — please keep in mind that uploading important files to a cloud storage is not very safe!
Open the File Manager and go to /home/pi/.wispr
If your current wallet.dat does not contain any WSP, you can delete this file and replace it with your backup wallet.dat
Run the wallet and your wallet should now sync and show your funds.
Changing your Pi’s password
If you followed this tutorial you will have noticed that your Pi uses the default credentials. If it does, change your password as soon as possible.
Go to the main menu and go to Preferences > Raspberry Pi Configuration.
Select ‘Change Password’ and change your password.
Troubleshooting
If you encounter any problems please check if you have done all steps correctly. Furthermore, consult the FAQ on our website and/or Google. If your problems remain unsolved please contact one of the admins directly on Telegram or on Discord.
Thank you for taking the time to read this update. Please follow us on Telegram, Twitter, Facebook and Discord and be sure to spread our story to everyone you know!
Kind regards,
The Wispr team
www.wispr.tech
If it is unclear how to use some of the commands you can also check our blog @ https://medium.com/wispr-blockchain-technology-revolutionizing/24-7-staking-wsp-on-a-raspberry-pi-full-tutorial-wisprtech-5312ad97b085