Handmade Antique Lamp Restoration #3
Hi All,
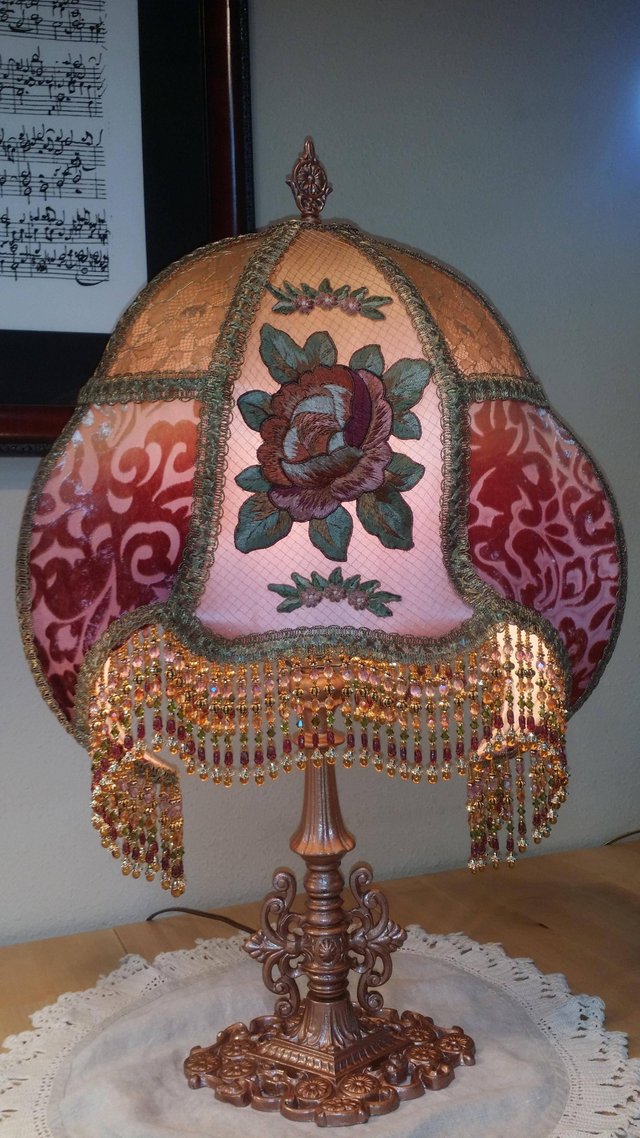
I'm sharing the process and finished product of an antique lamp restoration with you. This lamp is named "English Rose" because I purchased the large antique center textiles in England.
The Process
Yet another great Ebay find on the lamp base. Interestingly, this one came with a completely different finial (top piece) than you see in the photo. I got amazingly lucky while hunting Etsy for shade finials, and found the one you see here, which is an epic perfect match! The odds of finding one for a lamp this old are a million to one. Back to the lamp...it is made of cast iron and is heavy as hell. When it arrived, it had old wiring and sockets, and was sadly too rusty to touch-up the original paint. I sanded and painted the lamp with some good ol' Rustoleum, in Hammered Copper. Then, off to the electrician to get brand new electrical parts installed.
The frame I used is called "Boston Crab", and it is huge. I must admit, this frame intimidated the hell out of me with all those bizarre curves. I'd never tried this frame before, and that is a LOT of silk to lose if I screw up.
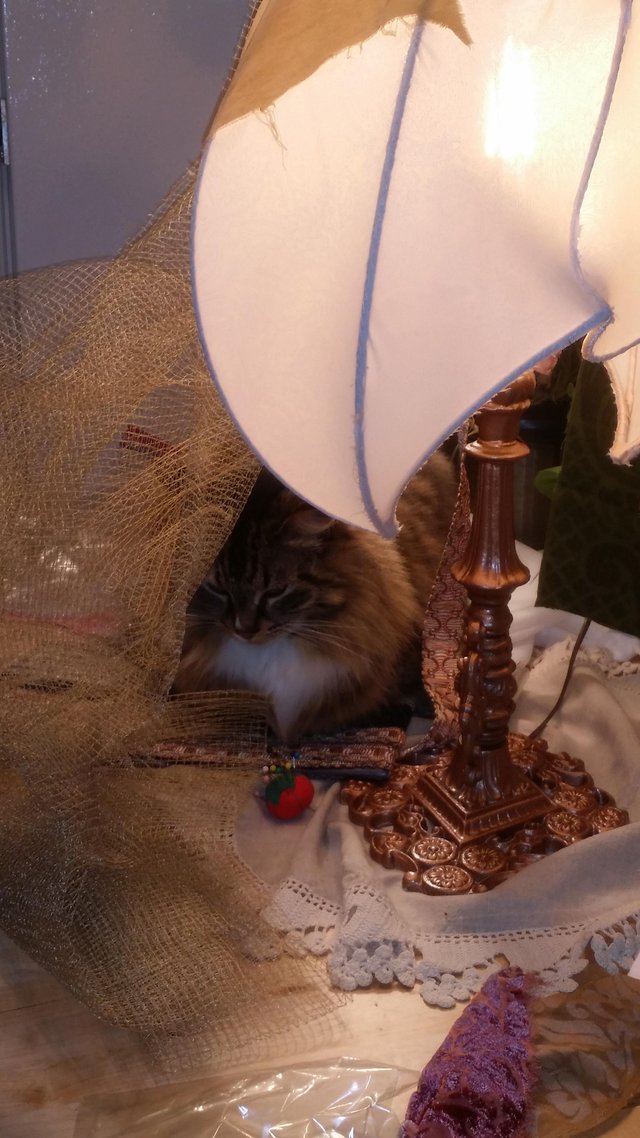
I lined this frame in an off-white color because I wanted to get a soft light from the lamp, but did not want to interfere by brightening the old-time look of the gorgeous colors I knew I would be using. Here's a picture of my lovely assistant Jadzia Dax, sitting under the lined frame, snuggled in antique French metal mesh that would eventually cover the face of the shade. Dax is really into metal and Star Trek.
Next, I hand-dyed silk charmeuse using Procion dye in Antique Rose and Gold. I ombre dyed the gold onto the rose using the dip-dye method. It took a lot of patience to get the colors right. I also dyed silk burnout velvet (some call it devore) for contrasting overlay on the lower side panels. It is worth noting that, when you dye silk charmeuse and silk devore using the same dye bath, the velvet will always "take" the dye much darker and stronger than the charmeuse.
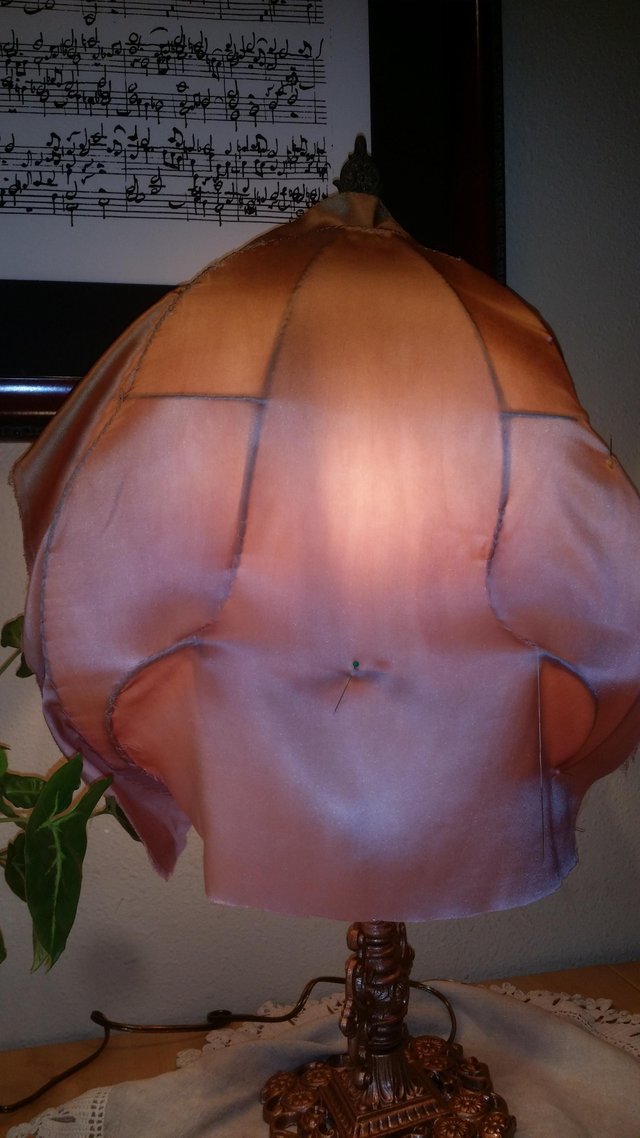
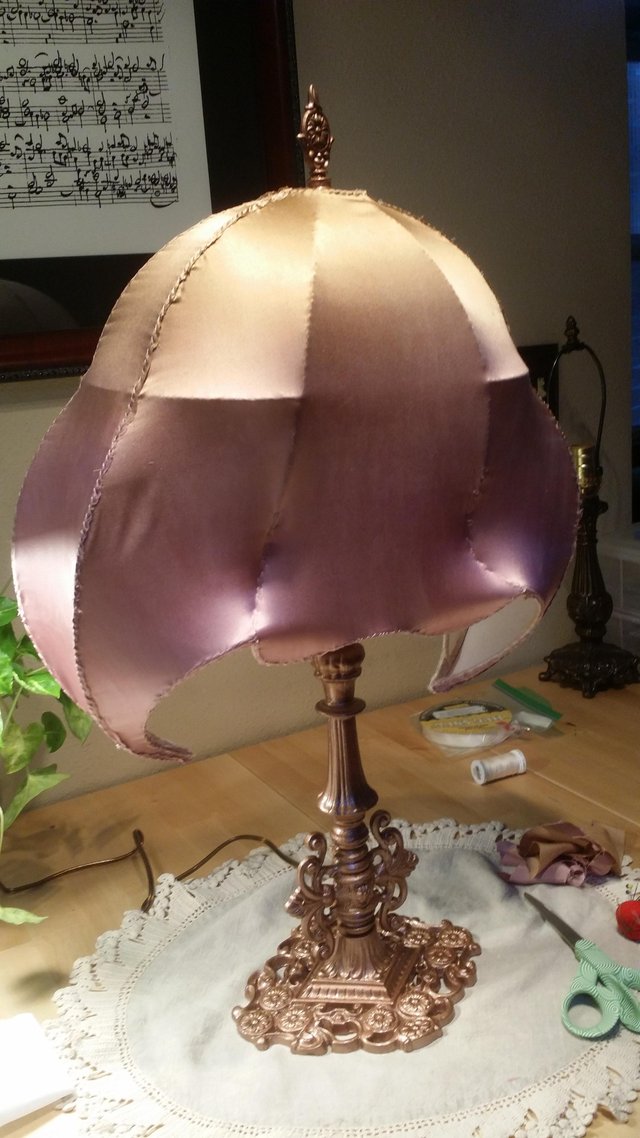
!Here is a shot of the shade getting the silk panel sewn on. I was stunned at how easily most of it went, with exception to the "points" on the front of the shade. I sewed the face panels on in one piece. It was a ballsy move, but it worked. Usually, I cut and sew the panels on individually. One interesting thing about silk charmeuse is that it looks entirely different, in different lighting. The first shot was taken with flash, and the one below, without. What a difference! (And yes, I was able to pull that ripple out.)
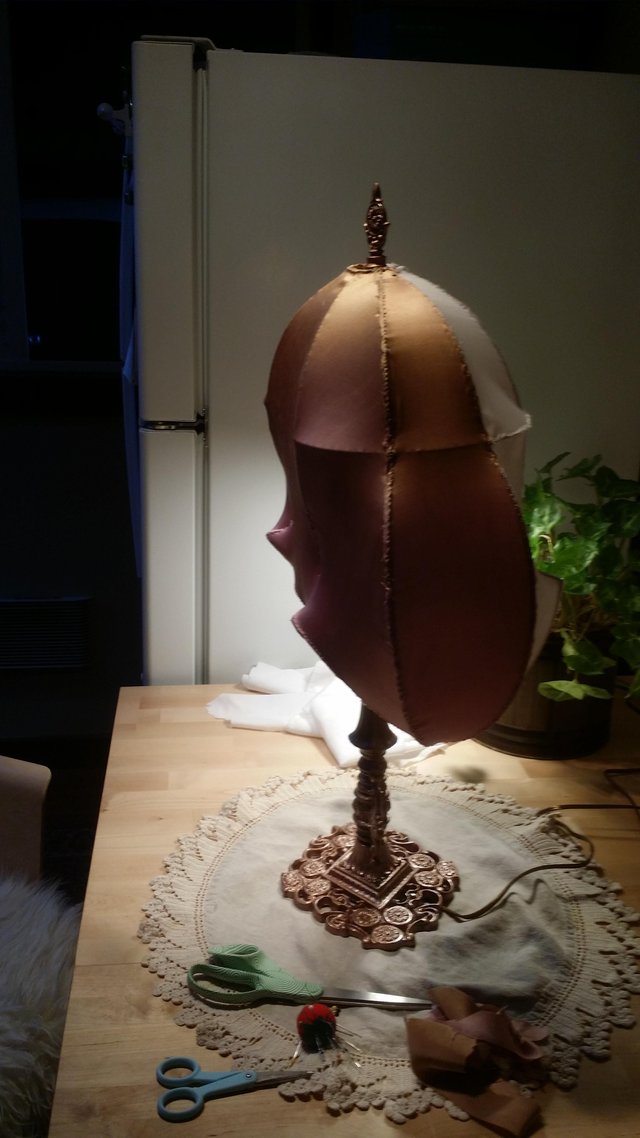
Remember I said this shade has odd curves? Not kidding. The points are a trip, and are hard to sew without getting a "run" in the silk. This is because the silk is essentially tension-set onto the frame in order to avoid puckering. It looks like a face in profile. I'm pretty sure that this was a popular shape during the 1920's Art Deco movement.
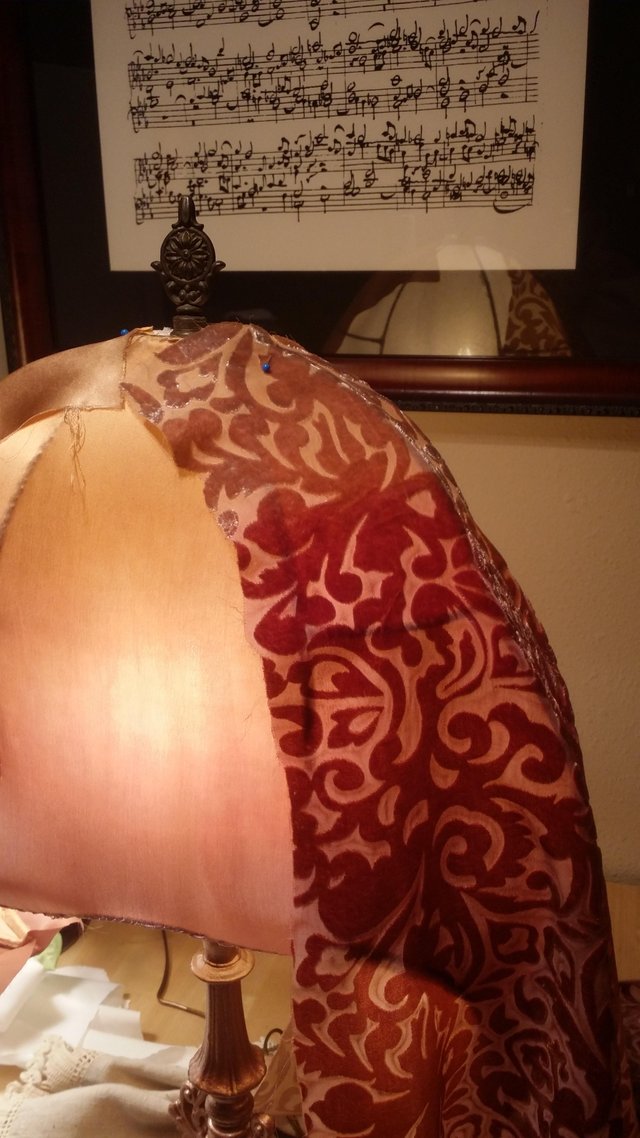
Next up, sew on the hand-dyed silk devore. It is critical to ensure that the color transitions between the two fabrics match-up perfectly, or it looks bizarre when the lamp is lit. On this lamp, I used two completely different velvet patterns on the side panels for dramatic effect. Waaaaaait, no..it ended up looking fabulously dramatic, but I did it because I screwed-up and did not dye enough velvet in the first batch. Measure twice, cut once, friends!
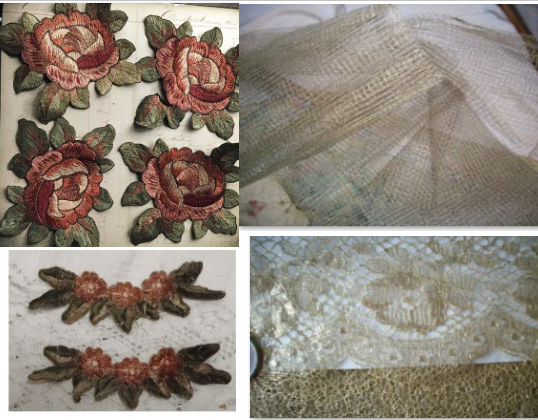
Here's a collage of antique textiles that I used on this shade. Clockwise: Very large antique "rose" appliques from England dated about 1930, French metal "square" mesh dated early 1900's, Small french silk appliques of flower swags dated 1920, and this incredibly rare French metal lace in a rose motif. The looms for these laces no longer exist, and this shit is expensive! Like $100 per square foot expensive. It is made of woven silk and metal, and feels like metal to the touch.
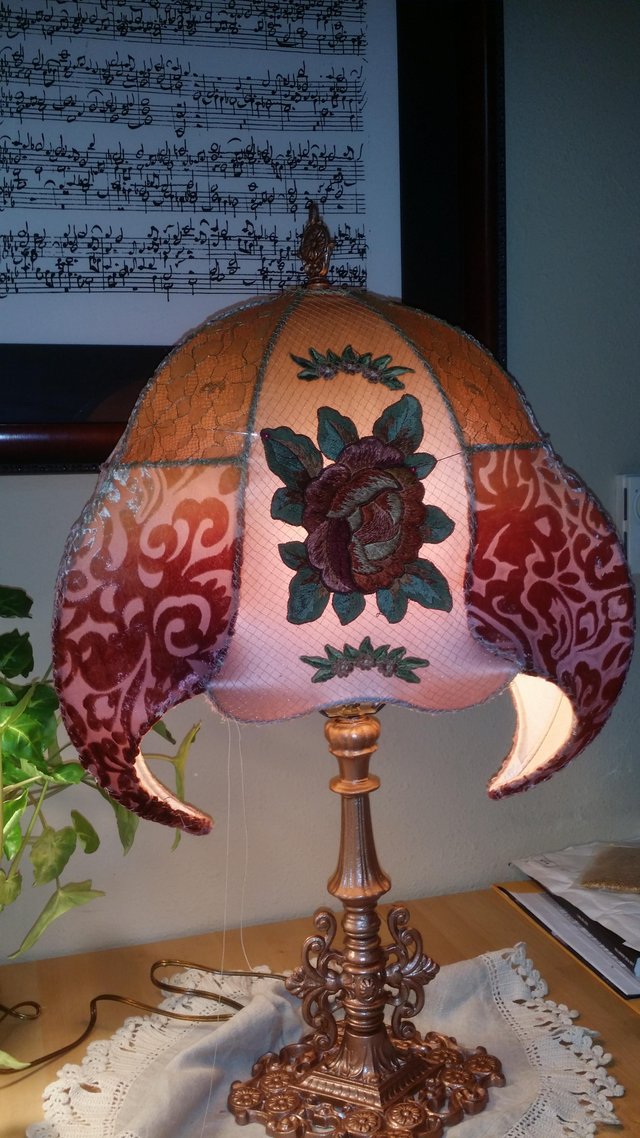
Here, I've pinned-on the appliques for even spacing before sewing them on. You can see the metal lace on the top panels, the metal mesh on the center panel, and the silk velvet on the lower panels have been all sewn on. I did the back of the lamp exactly the same, and the side panels are full velvet. Next up, antique gold metal trim on all frame wires, except the bottom. I have to string the beads and sew them to the shade BEFORE the final bottom trim, in order to hide the surgical knots. Contrary to logic, the strands must be sewn onto the face of the lamp, and not underneath. This way, all you see is trim on the front, and lining on the underside. Tricksey, eh?
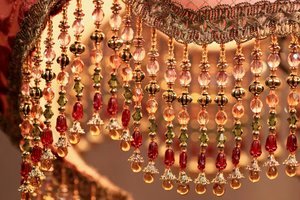
Sadly, I did not snap any shots of the beading process for this lamp, and I regret it. There are over 3,700 pieces on this shade, including gold-plated metal beads, Czech crystals, tulip beads, and some amazing Czech antique amber drop beads that I found purely by accident in Bellevue, WA. Beading this lamp took well over a week, and I was bargaining with the gods near the end to please make it stop. I usually space the strands about 1 cm apart if the largest bead in the strand is 8mm, which in this case, it was.
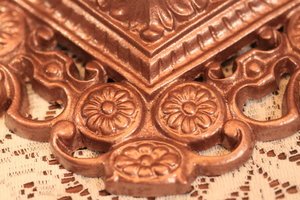
I didn't really have the courage to hand-paint additional detail on this lamp base. The pattern is so beautiful, and with so much color in the shade and beads, I thought it might get a little train-wreckish if I put more paint on it. I still have the lamp in the studio and each time I walk past it, I think...Hmmmm..should I paint the detail on this lamp? I'd love to hear what you think.
.................and finally.....................
The Finished Product
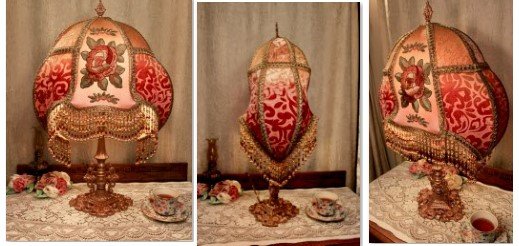
I hope you enjoyed working the process with me! Here's a short summary of what a few of my friends said about this lamp:
- Male: I like the shape, it's sexy.
- Female: OMG OMG OMG I loooove it! It's sooooooo pretty! OMG! Wow!
- Male: It looks like a falconry hat.
- Male: No more paint. But, yeah, the shape is cool.
Thanks for reading!
lovely work! very luxurious looking
Downvoting a post can decrease pending rewards and make it less visible. Common reasons:
Submit
Thank you, whatalannah! The velvet feels amazing. We don't see much silk velvet anymore--mostly polyester.
Downvoting a post can decrease pending rewards and make it less visible. Common reasons:
Submit
Wow! That is really cool. I've never seen someone put together a lampshade. That is quite impressive and a lot of work. Do you now sell it or keep it? What kind of a sewing machine do you use? I don't see my Brother being able to do that kind of work... Thanks for the post! That is really interesting. Look forward to seeing more posts from you!!
Downvoting a post can decrease pending rewards and make it less visible. Common reasons:
Submit
Thanks, @apanamamama! I would like to say that the lamps I make are flying off the shelves, but the market for this type of art is very small. It takes a significant investment of time and money to make these beauties, so it is reflected in the price. I both keep and sell them on my website.
I don't actually use a sewing machine to make the shades. All of the work is sewn by hand, and I do my very best to ensure that all applique materials are antique and also hand-sewn. Some are machined, but I like to avoid anything made after 1930.
Thanks so much for your interest! I will indeed be making additional post reflecting the process of creation of the lamps. I hope to inspire people to create all kinds of art, and develop an appreciation for antique textiles.
Downvoting a post can decrease pending rewards and make it less visible. Common reasons:
Submit
Wow! That is amazing. I can imagine it is quite a time investment! Thanks for answering my questions!!
Downvoting a post can decrease pending rewards and make it less visible. Common reasons:
Submit