Hello Everyone
I'm AhsanSharif From Pakistan
Greetings to you all, hope you all are well and enjoying a happy moment of life with steem. I'm also good Alhamdulillah. |
|---|
I hope everyone is well and enjoying their lives. This is the fourth week of our course, in which we have learned to create our own Payoneer account and also to connect it with our Amazon Affiliate account. With this knowledge, I am going to complete this task according to my knowledge. I hope you guys like it. If there is any deficiency, you can fix it.
Let's move on to our main task.

Design On Canva
Create a Payoneer Account
To create our account, first of all, we will open our Google Chrome and there we will search for a Payoneer account, based on which we have to open the first link that comes up. If Google Chrome is not working properly, you can change your browser. You can use a different browser where you can easily open your account.
When we open the first link, we will have a Payoneer main interface open, on which a signup button will be visible. Because we do not have an account created before, we have to create a new account, so we will click on sign up.
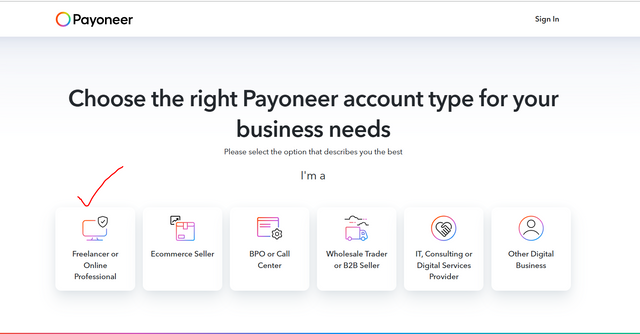
As soon as we click on the signup button, we will have different options. From these options, we have to choose the type of our account. If you see an option here according to your relevant field, then you have to select it. You will click on the other digital business. I am creating this account for a freelancer, so I will first select the freelancer. As soon as I select it, then after that, we will have a new interface, from there we have to select the correct type of account, so I will select my first option from there.
 |  |
|---|
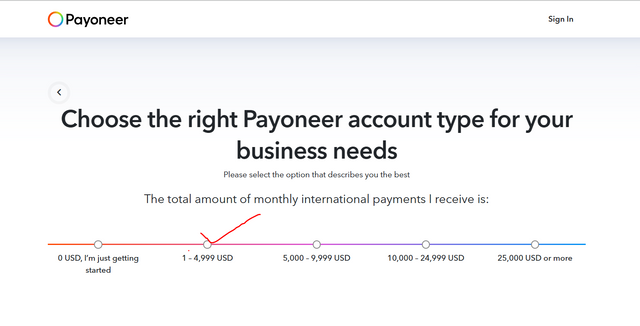
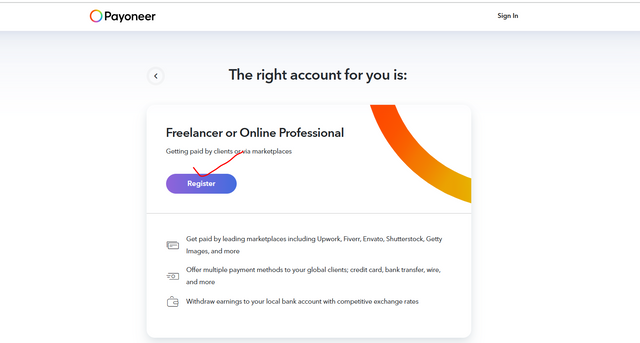
After selecting from there, a new interface will open, and from there we will be asked how much the monthly amount in our account will be. From here, we will select the button of one to 5000 USD, so that the amount we have between one and five thousand will come monthly. After clicking on it, when we have a new interface open, there they will tell us which account is the best for us. There they will give us the option to register, so we have to click on register to continue our work and procedure.
 |  |
|---|
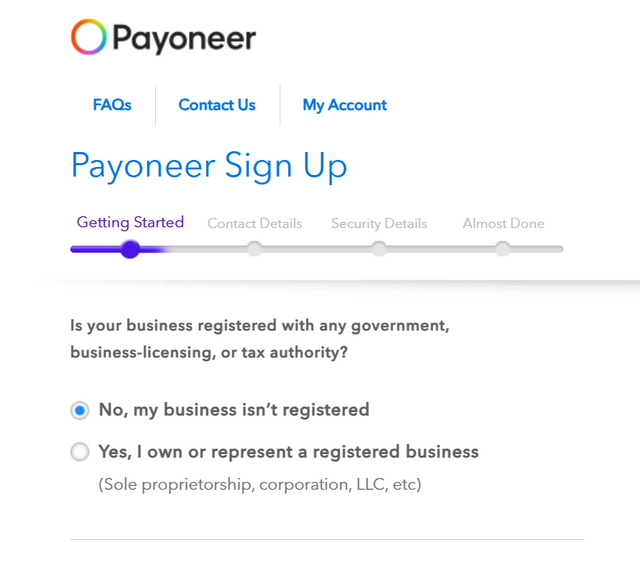
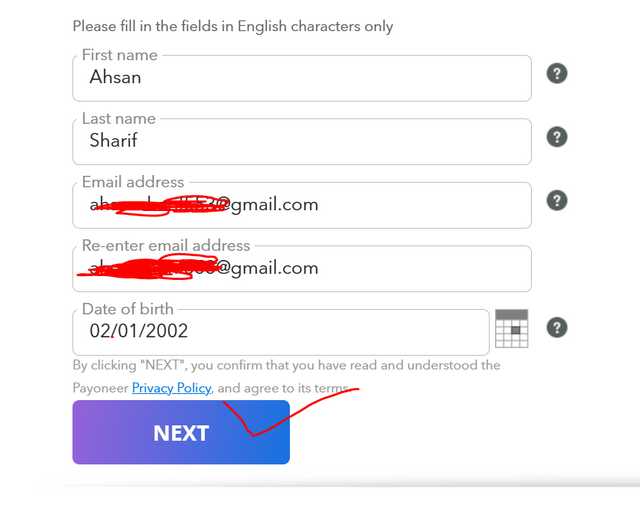
When we click on the register button, a page of four interfaces will open in front of us, we have to solve it one by one. The first one is started, in started we have to select the type of account we have, whether we want to use it for our business or we want to use it openly for a company. After selecting from there, then below we will be asked for our name, email address, and also our date of birth. Usually, we put the wrong date of birth here, so I would recommend that the date of birth on our ID card should be written here and our name should also be written. Along with this, the email address should be confirmed, after writing all the data, click on the next button.
 |  |
|---|
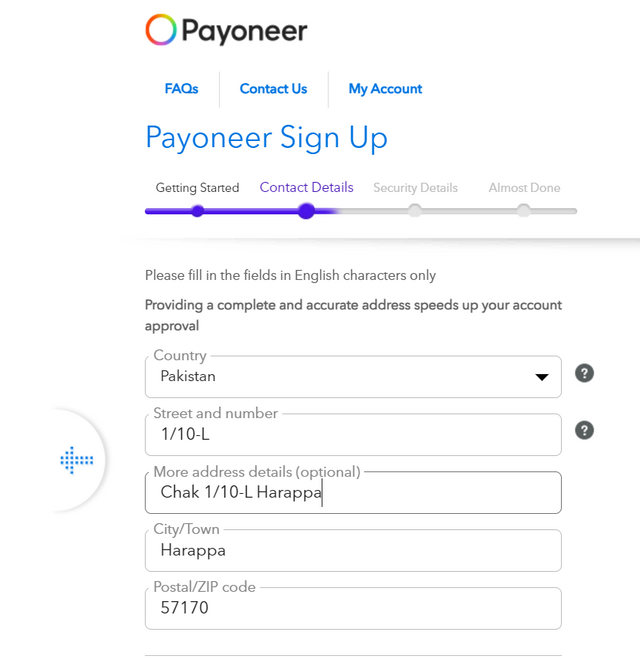
After this, our contact details will be asked. In the contact details, first of all, we have to select the country, in which country we are living. We have to write our street number, neighborhood, and city town here. We also have to write our postal zip code. After this, we have to enter our mobile number. A verification code will come on this mobile number, which is one type of verification. We have to put that code here, then we have to click on the next button for our further procedure.
 |  |
|---|
Now our important procedure will open in which we have to set our security. To set security, first we will write our username which will be our email address and then we have to select a strong password so that no one can access it. After setting a strong password, we have to set a security question so that you can access your account through it. Similarly, after setting the phone number ID number, we have to fill in the data here according to our national language and then click on the next button.
 |  |
|---|
This is our finathetep where we have to add our bank details, so for bank details, first select, the country and set your currency. Then you have to write the bank you are related to and write the name of the account holder of that bank. After writing the name, you have to write your IBAN CNIC and click on the submit button while following their terms and conditions.
 |  |
|---|
With this procedure, your application will be submitted, you will be shown a congratulatory message, then your account will go into review and within 24 hours, your account will be verified. If there is any problem, they will then email you.
Then I got an email saying that your application is under review. After a while, I got another message saying that your application and your account have been approved and you can access it. But after that, I got another email. In this email, they gave me a verification link that if I verify my account through this verification link, it will be fully approved. I verified my account through this email and then my Successful account was verified.
 |  |  |  |
|---|
After the account verification, I will now log in to my account again. To log in, I will first have to enter my username. After entering the username, I will have to enter my password there. As soon as I click on sign in, a confirmation message comes to my email. This is a verification message that the right person is accessing it. A message came to my email, I entered it here and submitted it.
 |  |
|---|
After signing in, the main interface that opened did not show any extra features, just a feature of Home was visible here. An update was being asked from us on top of it, that update is because it contains some questions that are used to access your account. Here, we will first update it, we will click on the update button, then we will get a verification code again, after entering this verification code, we will submit it again.
 |  |
|---|
There are about three to four questions here, we have to fill these questions there and submit them. Then the update option that will come to us will be sayinsayur security questions have been updated. Then we will click on the Let's Go button so that our main interface will appear in front of us.
 |  |
|---|
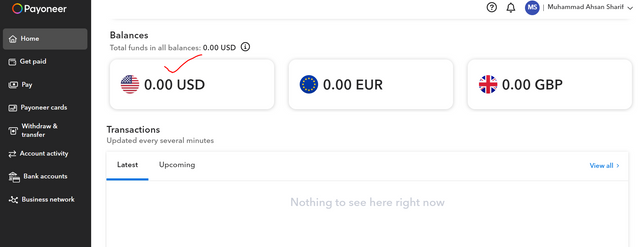
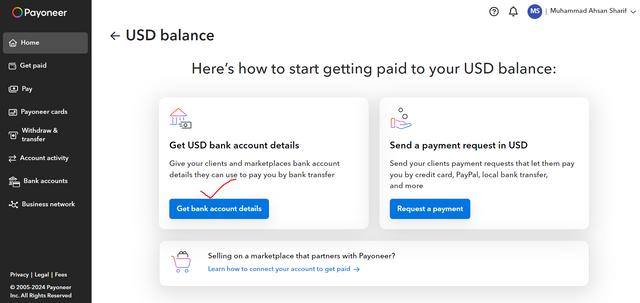
Now you can see that we have full access to our account, all the options that we need are open in our sidebar. First of all, here we will select our currency. To select the currency, I will select the American currency USD. After selecting it, then we will get the bank details of our account. To get this, we have to click on Get Bank Account Details.
 |  |
|---|
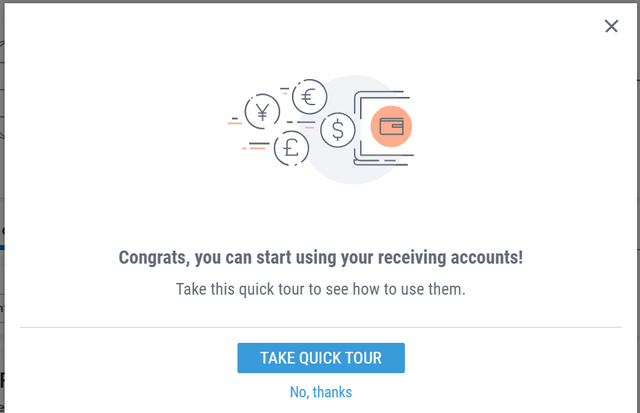
From there we will get our account and it will be approved and we will get a congratulatory. And then again when we click on our receiving account, our USD account will open from there, as soon as we click on it, all the bank details we have will open. We have to copy it from here which we will need for our affiliate account.
 |  |
|---|
Hurdles To Create Payoneer Account
I have faced a lot of difficulties while creating a Payoneer account. These difficulties are covered below.
The first problem I had with browsers was that when I was running it on Google Chrome when I submitted my information, it was not showing any error. It was just loading and I tried running it for an hour but there was no response.
The second big problem I faced was that when I had to update its security, a verification code was sent to me via email to update it. That verification code took me about 20 to 25 minutes to arrive, so in that time our security update would expire. When I used to enter that code, it would say that this code was outdated.
The last big problem was that the USD account details I was supposed to get from Payoneer were delayed for a long time, and I had to resubmit my data, so I went back and got my details.
That's why this entry of mine is quite late, but I didn't give up and I completed this task using different browsers and different data connections.
Link Payoneer to Amazon Affiliate
To link our Payoneer account with our Amazon Affiliate account, first, we have to open our Amazon Affiliate account. To open it, we will first have to sign in. Once signed in, first we have to enter a username and password, through which our account will be signed in.
 |  |
|---|
Our main interface of the Amazon affiliate account will open where our email is showing. As soon as we move our cursor over this email, four options will open for us. Out of these four options, the first option is Account Settings, we have to select it so that we can add our account here.

Here all the information of our account will be opened which will be related to our account. It will contain our account information, payment and tex,t information. Among all these, we have the option of change changing the method. We have to select this option.
I have turned on my two-step verification here, so here it will ask for verification on email and phone number, for this as soon as we click on this button, this interface will open for us, and here we will first enter our password. After entering the password, our verification code will come to the email address we have entered the email verification. Then we will have phone number verification, after this phone verification, our main interface where we have to enter our bank details will open.
 |  |
|---|
We will fill in the bank details that we have copied from our Payoneer account here exactly as we copied them from there. Wherever the bank name is asked, wherever the IBAN is asked, we have to write the same here that we have copied from our Payoneer account. After filling it, we will submit it here. As a result of submitting, our Payoneer account will be connected to our Amazon Affiliate account. Whatever earnings we have, we will get in our Payoneer account. And if we have linked our bank account with the Payoneer account, we will transfer it to our bank.

With this method, we can create our Payoneer account well and then connect it with an Amazon Affiliate account. I hope you have understood all my steps. I have performed them step by step and explained them clearly so that it is easy for those who are new newcomers. Thank you all so much for stopping by. I will see you in a new post with new content. Until then, I ask for your permission. May Allah protect you. I would like to invite my friends @josepha, @ruthjoe, @abdullahw2, and @jyoti-thelight to join this task.
Cc:
@hamzayousafzai


Thank you very much for sharing your assignment task with us! We truly appreciate the time, effort, and creativity you have put into completing this assignment. Your dedication to following the guidelines and your commitment to learning are evident, and it’s a pleasure to see your progress.
Below are the evaluation results, highlighting the strengths of your post and any areas of focus for improvement:
Teacher Recommendation and Feedback!
The steps are clear and detailed providing a good guide for new users. Sharing real problems like browser and verification issues adds valuable insight to help others.
The challenges faced and solutions found like switching browsers and data connections show determination. Explaining delayed codes and retries highlights persistence which inspires others in similar situations.
Your steps on linking accounts and managing two step verification are helpful.
Your overall work is good.Share simple solutions for common problems like delayed codes to help readers.
Total | 8.5/10
Downvoting a post can decrease pending rewards and make it less visible. Common reasons:
Submit
Dear @neelofar Thank you so much for the verification and the valuable feedback. But sorry for that where is my fault for performing this task? Because you did not mention anything in the comment review. If in my post there is no fault then why my grade is 8.5? How I imagine these grades without any fault?
Cc: @hamzayousafzai
Downvoting a post can decrease pending rewards and make it less visible. Common reasons:
Submit
you went from out of topic. we did not ask for challenges. you just creat payoneer account and link with Amazon.
you need to solve the assignment task to the point and also be creative
Downvoting a post can decrease pending rewards and make it less visible. Common reasons:
Submit
You should be mentioning these points in your grading comments...
Downvoting a post can decrease pending rewards and make it less visible. Common reasons:
Submit
I recognize my assistant missed these points, but I later offered suggestions for improvement in my comment.
Downvoting a post can decrease pending rewards and make it less visible. Common reasons:
Submit
These things are extra I mentioned here because I faced during creation of Payoneer account. How I can skip these things. These are relate to my activity for making Payoneer account. Also I totally perform the task well.
In review section you not mention these things to decrease my grades. That's why I asked you. Thank you
Downvoting a post can decrease pending rewards and make it less visible. Common reasons:
Submit
please focus on learning not on grades... grades are just numbers but if you learn this skill properly it change your life.
Downvoting a post can decrease pending rewards and make it less visible. Common reasons:
Submit
Yes I'll focus on learning that's why I perform this task. These grades shows us a how much work we done better after learning. That's why this is our motivation.
Downvoting a post can decrease pending rewards and make it less visible. Common reasons:
Submit
Dear @ahsansharif you stayed focus Irrelevant Information.You shared unnecessary personal struggles instead of focusing on the required steps. You Focused more on challenges rather than clear step by step guidance. You post is lack of Creativity. Missed adding visuals, unique tips, or solutions to improve understanding and make the content engaging.
Please dear don’t take this personally our intention is only to help improve your work. This feedback is meant to guide you in refining your approach not to criticize you or anyone else. We appreciate your effort and just want to make your work even better.
Downvoting a post can decrease pending rewards and make it less visible. Common reasons:
Submit
With these information my work is complete. I explain clearly the account creation steps and connection with affiliate account. If you explain these things in comment review then its better to understand. Thanks
Downvoting a post can decrease pending rewards and make it less visible. Common reasons:
Submit
yes, you're right. She missed these things in the review.
Downvoting a post can decrease pending rewards and make it less visible. Common reasons:
Submit
Upvoted! Thank you for supporting witness @jswit.
Downvoting a post can decrease pending rewards and make it less visible. Common reasons:
Submit