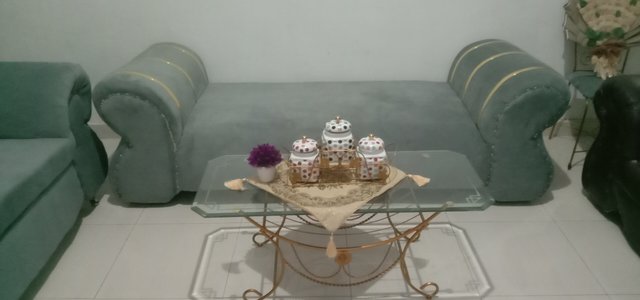
Renovate an Old Chair.
Turning an Old Chair into a Minimalist Lounge Chair in the Living Room
Today, after visiting several homes of family and relatives, when I got home, after taking a break, I did another creative job, namely changing an old chair into a minimalist lounge chair in the living room.
My job, not only requires time, money to buy materials, buy equipment, but, on the other hand, what I'm thinking about right now is doing creativity to make my family happy by changing old chairs into new minimalist chairs, which are trending in several household furniture markets.
Even though the work I do is creatively reckless, it is aided by an artistic mindset, so there's nothing wrong with having a lot of money, but that doesn't mean we can buy another chair that's nicer to have. However, what I have in mind is how to change an old chair into a new one, for the sake of comfort when greeting guests who come to our house, of course.
today, you will see, the original chair in my house, which I have had for a long time, let's see it below:
Old Chair Condition
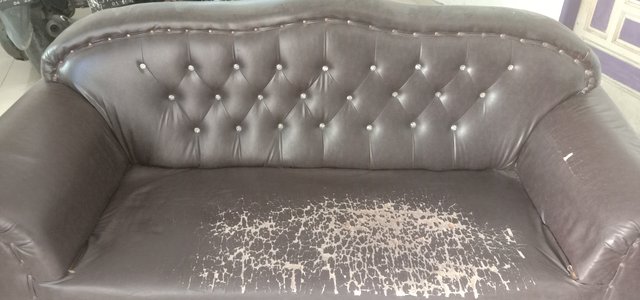
As you can see, the chair above, is it still suitable for use, I think it is no longer suitable, so, I want to change it to another pattern, namely into a lounge chair whose presence, I will place in the living room, so, when there are guests coming , they can relax there, including me and my family if we are tired.
After looking, and I kept thinking, what kind of model would I change, and finally, I opened the wall of the old chair, so it became empty, and only the left and right hand supports were left there, like the picture below:
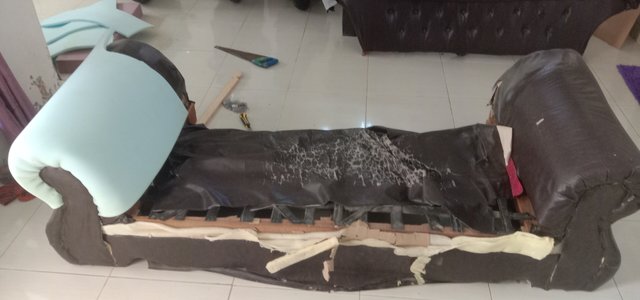
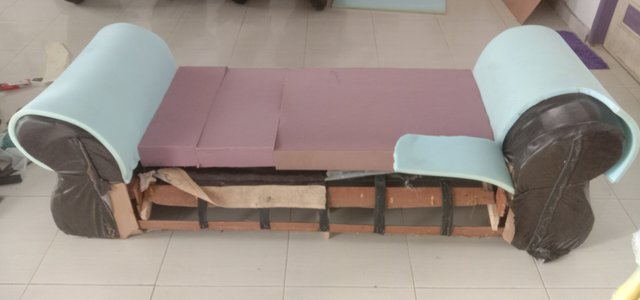
As time went on, I continued to tidy up several other parts, such as repairing the damaged chair seat rubber, by re-nailing it. and on the parts that are already neat, I give new foam first, to print the foam mall, so that I can find out the new size of the foam, so that there are no excesses or deficiencies after I dismantle it later.
After everything was finished, and after the final inspection, everything was in accordance with the holder, then, then I glued it with foam adhesive, so that it wouldn't move anymore, all the new foam that I had installed, as in the picture below:
took a short break, my wife served me coffee and some cakes, and finally I continued making chairs again, with a new job, namely printing the size of the gray velvet fabric on the part where I had given the foam,
To print the fabric mall, I used velvet fabric directly, so, in certain parts I used fabric as a temporary adhesive, so that the mallet fits perfectly, when I cut it. because if I print the fabric incorrectly, the fabric will be reduced and it will become a big problem again. heheheh.,"it could cost more". So, I have to be extra careful in this part.
After everything is OK, while taking a few photos, and paying attention to the most important parts, we can cut the fabric with scissors in large increments, when finished, on the part that we gave the cutter earlier, we pry it back with a screwdriver,
After everything is finished, it will look like the image below:
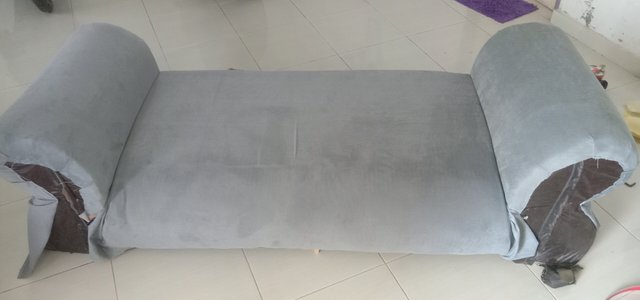
Because there have been several changes to the photo, I have not attached several parts that I have photographed in this section. As I said in the section above, we have made all the fabric, and we just need to attach it all using tape, glue and nails.
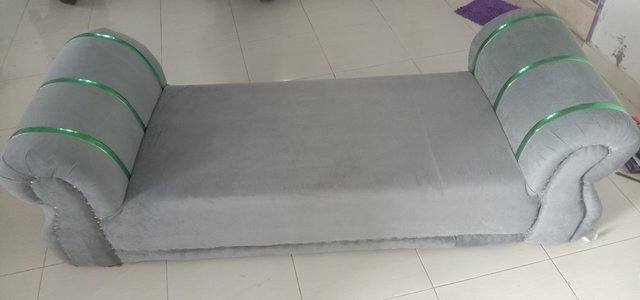
After everything was finished, in line with the minimalist chair trend, I added gold trim to the right and left sides. as I took another short break, coffee and cake were still left, and added by smoking just 1 cigarette, "to warm the body" and all my work was finished, as in the picture below:
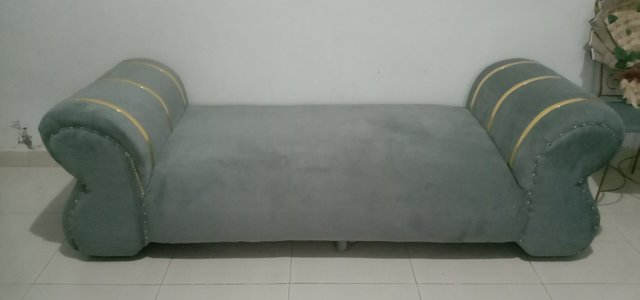
At the end, I gave the chair legs that I bought new, because the old ones were broken, and the chairs that I had finished making, I immediately arranged in the guest room, so that they looked beautiful and neat. like the picture below:
So, at the end of this section, I will collect all the chairs that I have made, in the first section here : Renovate an Old Chair - Minimalist Living Room Sofa Chair
Even though it was already evening, because a little work was finished, I gathered all the chairs and tables that I had refurbished in the living room, so it looked like the picture below:

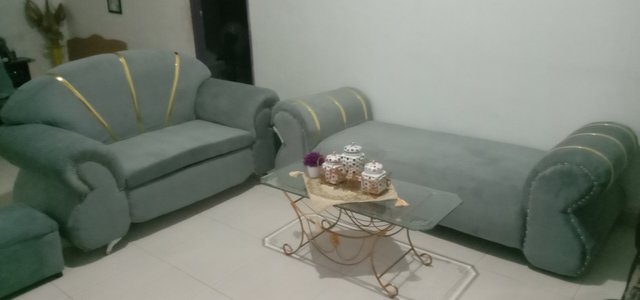
Job Done, finally my work has been completed, and finally, my wife and child can now enjoy their old chair as a new chair again. they are very happy now, without spending a lot of money, with a small cost, they can be happy at home with a new chair.
This is what I can say, my final words are that all chairs in this world can be changed, if we use them with a good and creative artistic mindset, for the sake of happiness in the household
see you, and creative slam for steemit users.
Regards
@sultan-aceh
COMMUNITY INFORMATION


Woow, they turn out great
Downvoting a post can decrease pending rewards and make it less visible. Common reasons:
Submit
Thank you for your encouraging comments @xpilar
hehehehe
that's the result, the old shape was very big and no longer modern, so I changed it into a lounge chair, so I could relax in the living room, hehehe
Downvoting a post can decrease pending rewards and make it less visible. Common reasons:
Submit
Wow how professional
Downvoting a post can decrease pending rewards and make it less visible. Common reasons:
Submit
Thank you for your encouraging comments @arbol
I'm still in the learning stage @arbol
Downvoting a post can decrease pending rewards and make it less visible. Common reasons:
Submit
It is great! I love how you gave new life to that sofa.
Downvoting a post can decrease pending rewards and make it less visible. Common reasons:
Submit
Thank you for your comment, glad to hear you like this type of sofa
Downvoting a post can decrease pending rewards and make it less visible. Common reasons:
Submit