What Will I Learn?
- Create a Asterisk server by Raspberry Pi
- Config 3G dongle in Asterisk
Requirements
- A Raspberry Pi 3B
- 4G TF card
- 3G dongle with voice support. There is a list of supported models here.
- 5V/2A Power
- Basic linux knowledge
Difficulty
- Intermediate
Tutorial Contents
The Basic Principle Diagram

Basic configuration
1.Download a image from http://www.raspberry-asterisk.org/downloads/. This image is based on Debian and also has been integrated with asterisk and freepbx. In this tutorial I use the raspbx-03-12-2017.zip. It contains Asterisk 13.18.3 and FreePBX 14.0.1.20.
2.Unzip the image and burn this image into the TF card. You can use Etcher with in 3 steps. First select the image file, and then select the TF card, and last click the Flash button to start burning task.
3.Put your TF card into your RaspberryPi and power on. Get into the system with the default username and password, root / raspberry.
4.(Optional) Config WiFi in this file /etc/wpa_supplicant/wpa_supplicant.conf,
country=GB
ctrl_interface=DIR=/var/run/wpa_supplicant GROUP=netdev
update_config=1
network={
    ssid="your_wifi_ssid"
    psk="your_wifi_password"
}
Edit the file and save and reboot.
5.Open your browser and input your RaspberryPi's IP. You'll see the administrator configuration page.

Input your username and password and email to create an admin account.
And then the login page comes up.

6.Login and set the Language and timezone

Then you'll get in the dashboard page.

7.Get in Application => Extensions => Add Extension => Add New PJSIP Extension to add a new Extension.

- User Extension is the username to login when you use the SIP App to connect your server.
- Display Name is optional.
- Secret is the password to login when you use the SIP App to connect your server.
- Link to Default User means whether to create a user to manage your SIP account. I set None for secure.
Click the Submit button to save configuration and then click the Apply Config on the upper right corner to make the configuration take effect.
Add another PJSIP extension for testing.
8.Get in Settings => Asterisk SIP Settings page
- change to General SIP Settings tab.
- In the External Address, input your server domain or your server public IP.
- In Local Networks, input your router subnet IP.
- In RTP Port Ranges, input 10000 to 10100.
- Click the Submit button.

- change to Chan PJSIP Settings tab.
- set tcp to yes.
- click Submit to save and click Apply Config to enable.

9.Open your router config page and add portmapping. You need add ports 5060 and 10000-10100.
!(portmapping)[ ]
]
!(portmapping)[ ]
]
10.Go to http://www.linphone.org/ to download Linphone into your phone and computer as your SIP clients. You can follow these snapshots to finish configurations.


11.Now you can call 102 on your phone and will receive the call on your computer.
Config 3G Dongle
1.Put your SIM card into your 3G Dongle.
2.Open your SSH terminal and connect to your RaspberryPi to setup the Dongle plugin.
root@raspbx:~# install-dongle

- ①Input your phone number.
- ②Input your email to receive the SMS.
- ③If you don't want to forward sms, leave empty to disable.
And last you will see
Would you like to install a webpage for sending SMS with
chan_dongle? (http://raspbx/sms/) [y/N] y
Enter password for SMS page: 123456
Input y to setup a web UI to send SMS and set a password.
3.Back to the WebUI and get into Connectivity => Trunks => Add Trunk => Add Custom Trunk page.


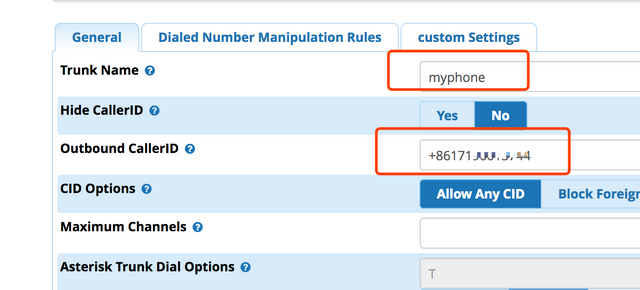
4.Under the General tab input a Trunk Name and put your phone number into the Outbound CallerID field.
5.Change to the custom Settings tab and input dongle/dongle0/$OUTNUM$

If you plugin more than one 3G Dongle on your RaspberryPi, you need confirm your dongle id first with this command.
root@raspbx:~# asterisk -rx "dongle show devices"
ID           Group State      RSSI Mode Submode Provider Name  Model      Firmware          IMEI             IMSI             Number
dongle0      0     Free       6    5    4       CHN-CUGSM      E1750      11.126.10.00.00   359767033517971  460090019804894  +8617xxxxxxx44
6.Click Submit.
7.Go to Connectivity => Outbound Routes => Add Outbound Route.
- Select the Route Settings tab.
- Input a name into the Route Name field.
- Select the trunk which you just added in the Trunk Sequence for Matched Routes.

8.Change to Dial Patterns tab and add a rule like the snapshow

The meaning of this configuration is that numbers starting with 0 will be forwarded to the trunk.
9.Click Submit and Apply Config. Now you can call a number starting with 0 by your phone app.
10.Go to Connectivity => Inbound Routes => Add Inbound Route => General.
- In the Set Destionation, select Extension option and the extension you just added.
- Click Submit and Apply Config.

Now, you can call the phone number in your 3G Dongle by another phone and Linphone app will receive the call.
Setup email to receive SMS
1.Get to SSH terminal and input this command
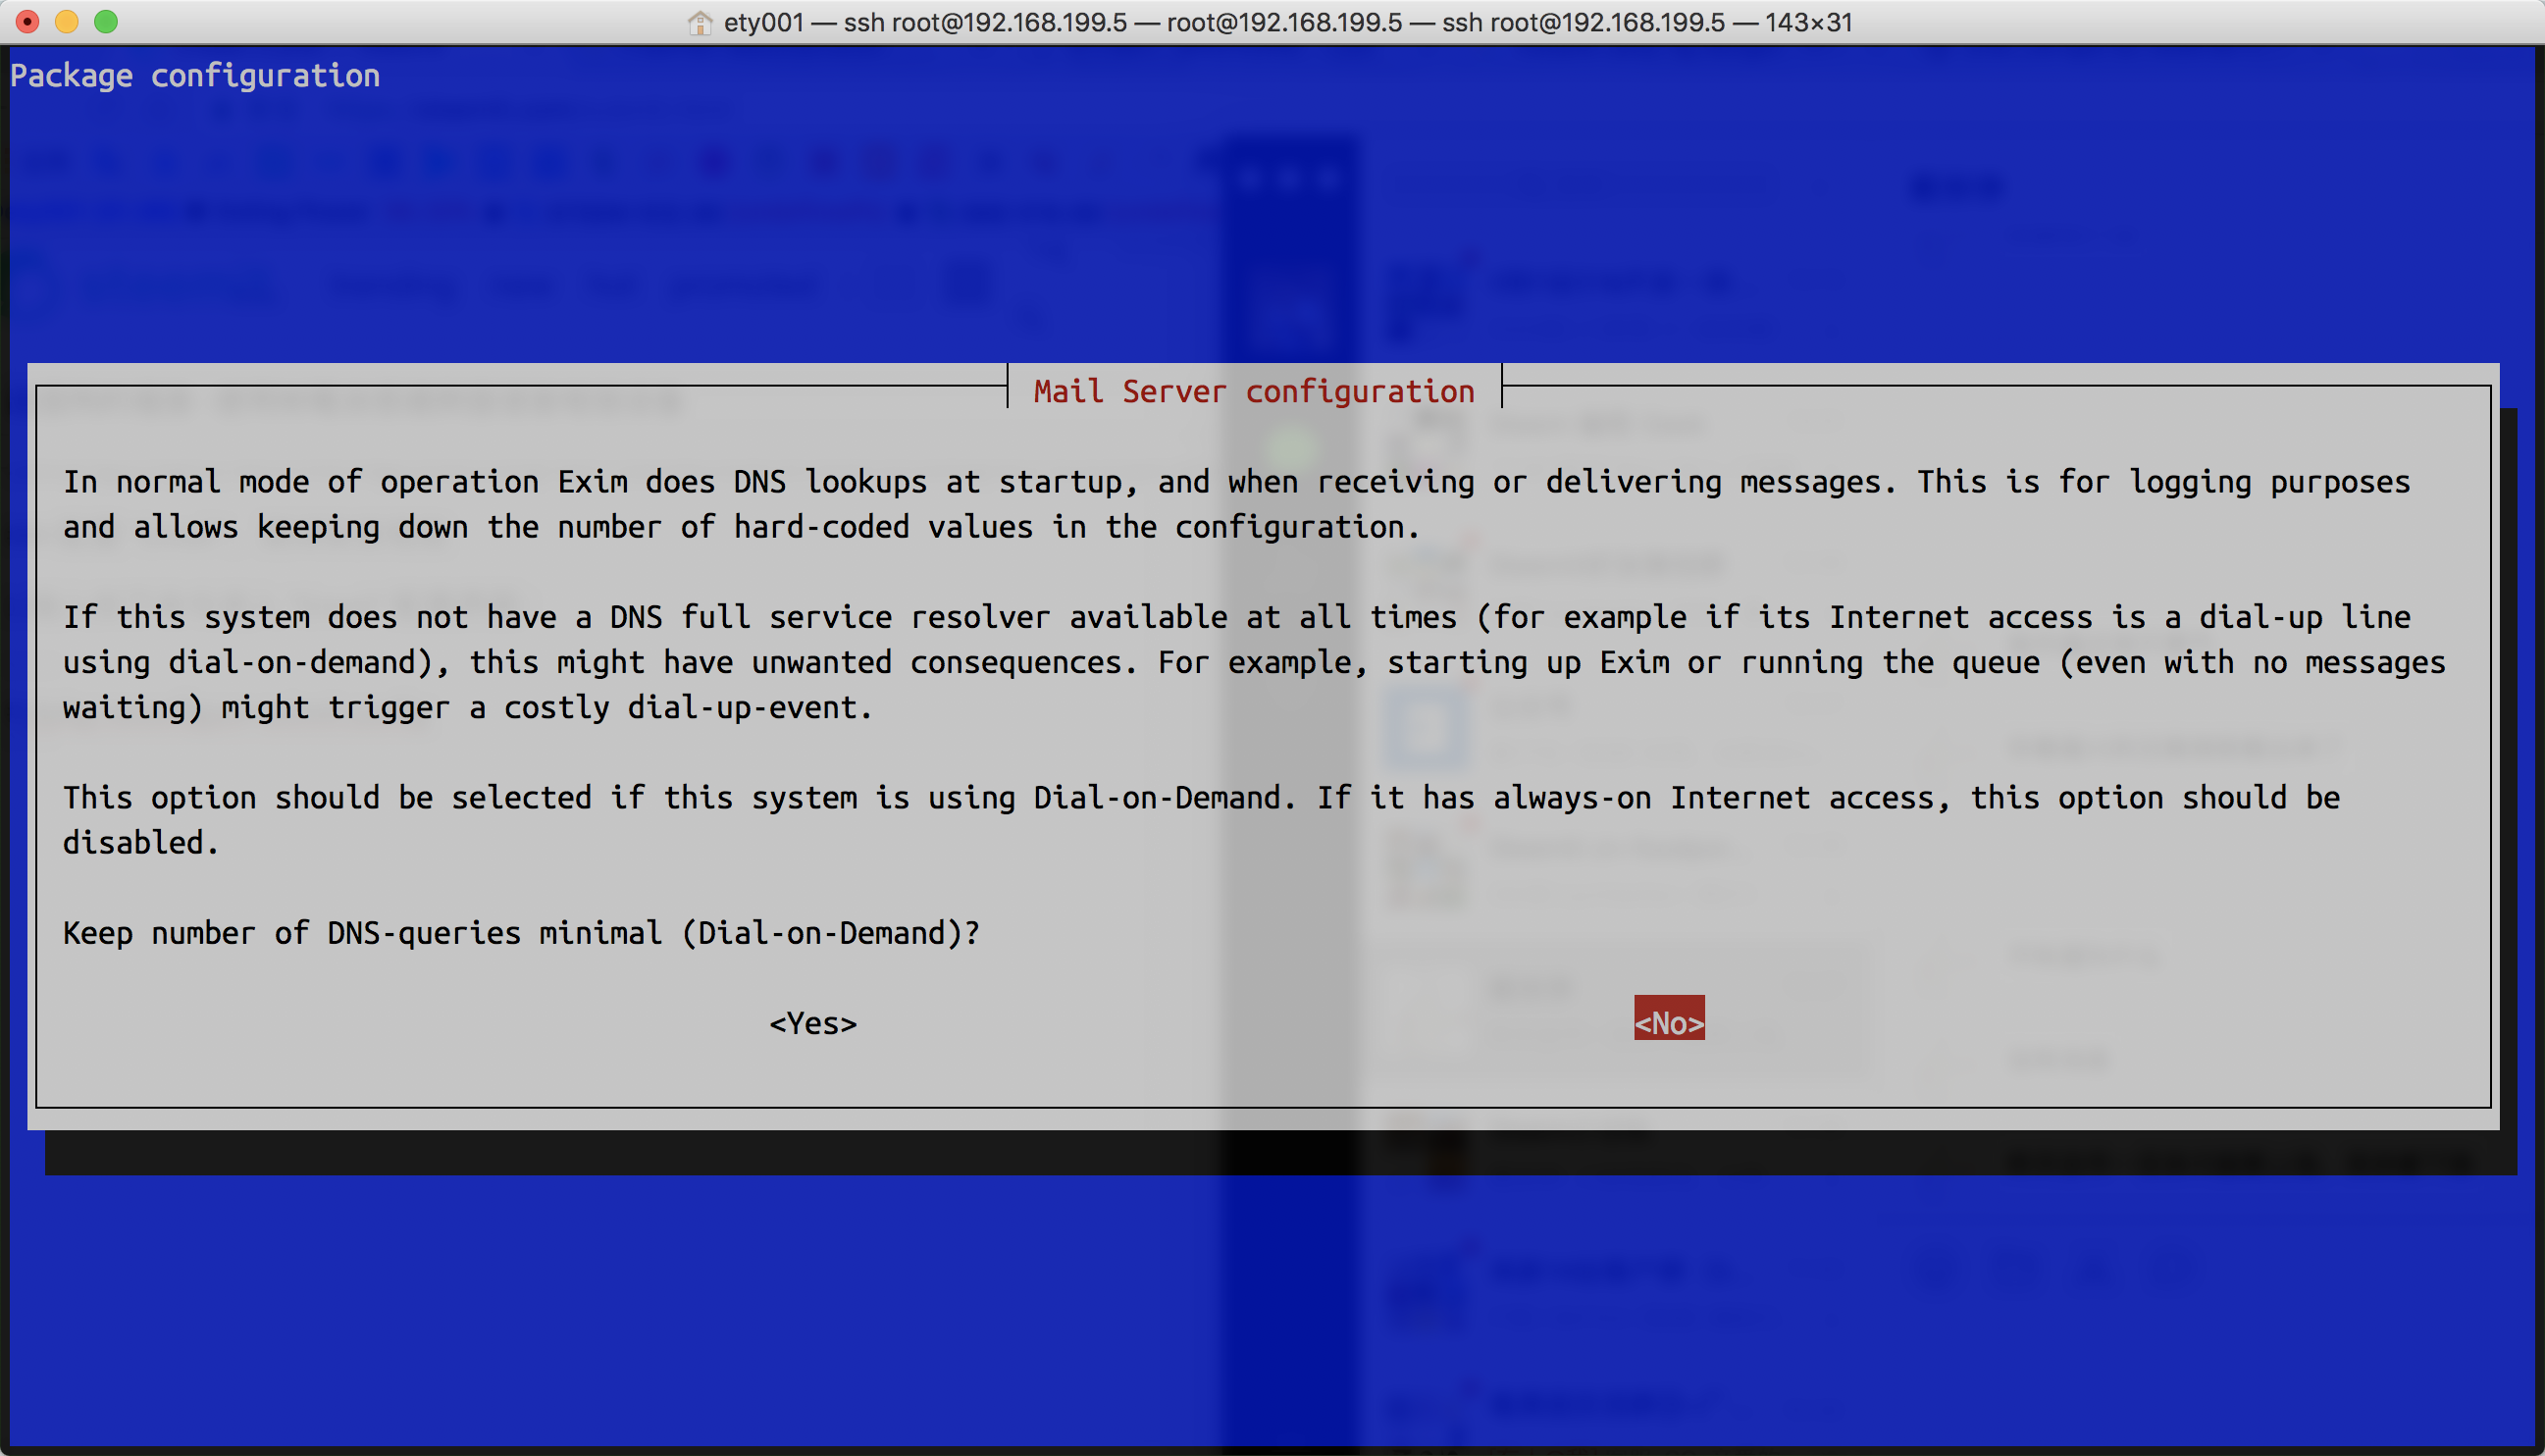
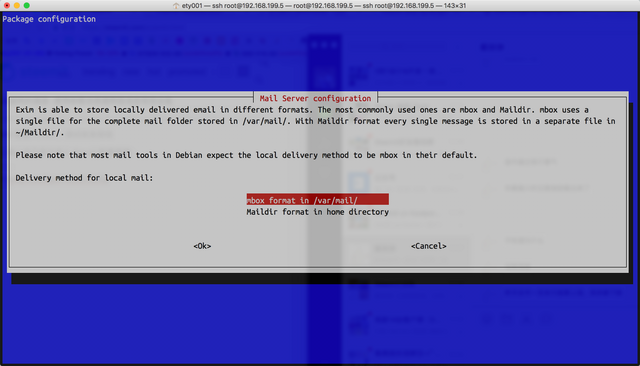
# dpkg-reconfigure exim4-config
2.Select internet site; mail is sent and received directly using SMTP

3.Add your domain as your email domain

4.Keep the default value in this step

5.Add your email domain

6.Keep default value in following steps


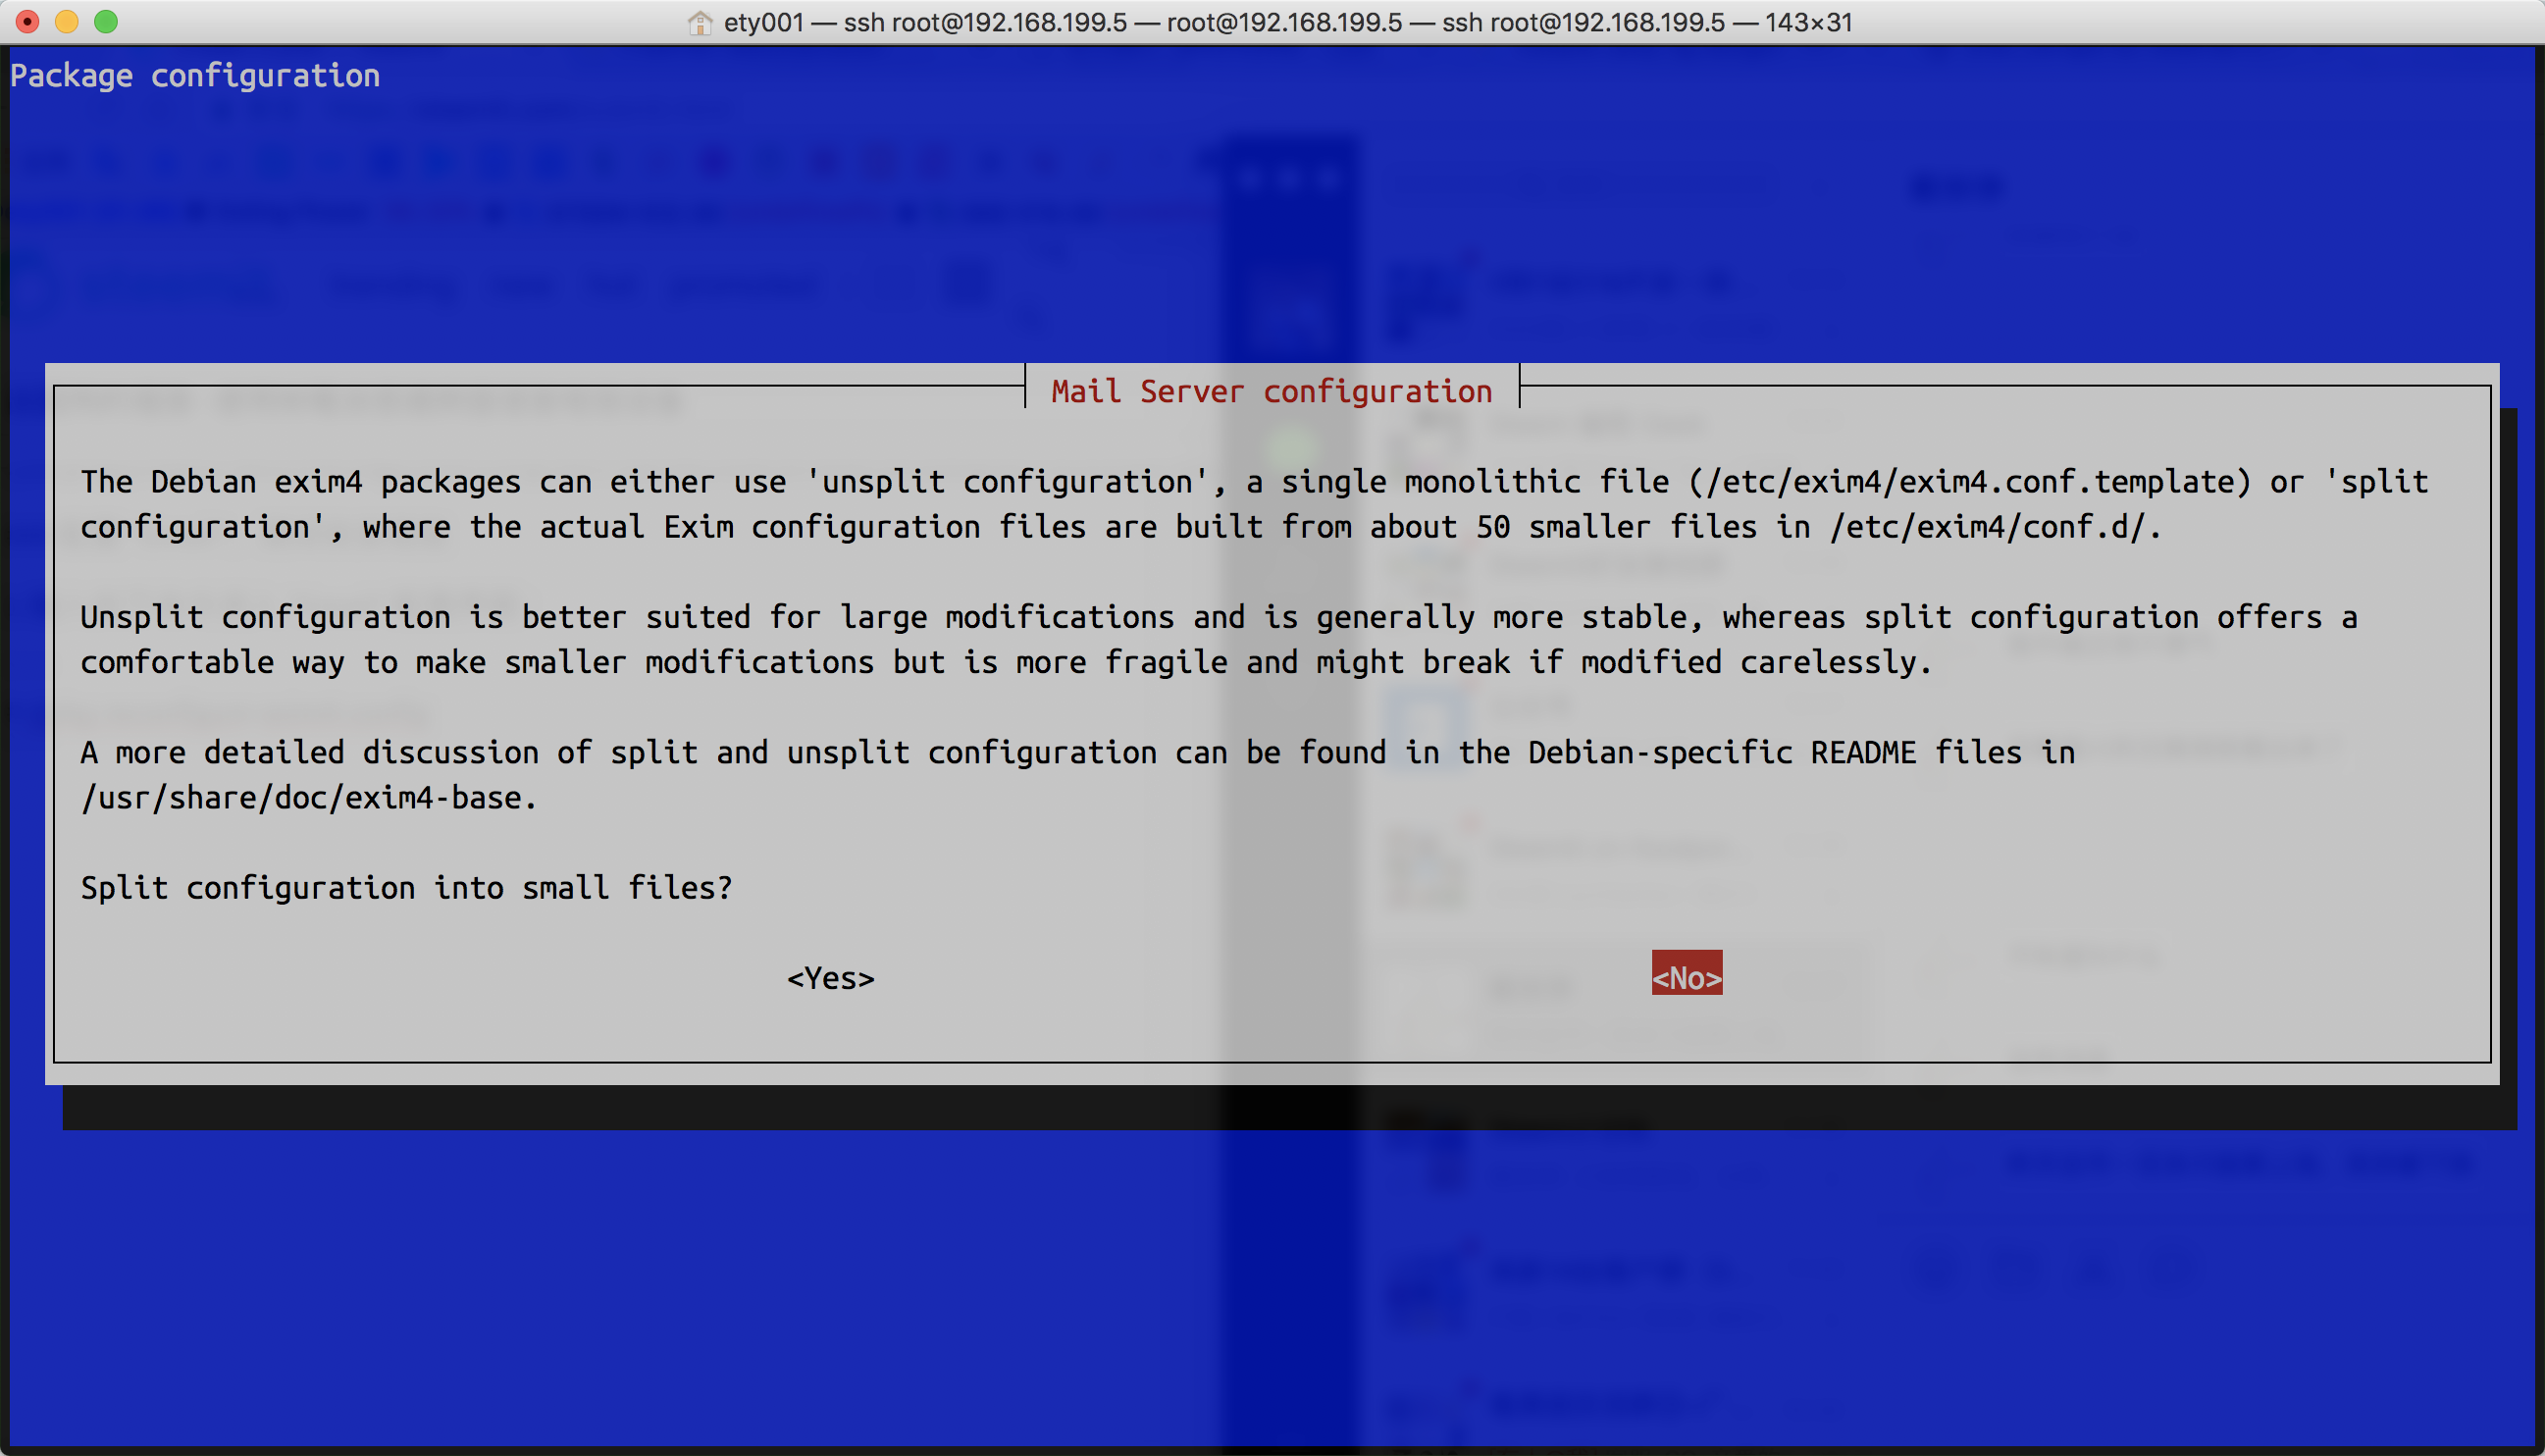
7.In this step input root
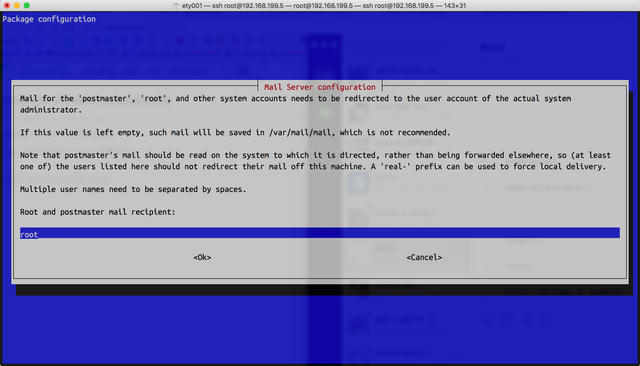
8.Finish the configuration. You can send a test email by this command
send_test_email <your_email>
Attention: Due to your email service provider's antispam rules, you may need to whitelist your configured email domain.
9.Now you can send a SMS and you will get this SMS through your email.
Send SMS through WebUI
Open your browser and go to http://your_raspbx_ip/sms. Input your password and login.

Secure!!!!!
Please be sure to pay attention to SECURE.
1.Make sure you have set a strong password in your extension.
2.Install Fail2ban to prevent cracking
# install-fail2ban
Open the config file /etc/fail2ban/jail.conf and search [asterisk] and set maxretry to 2. Then search bantime and set it to 604800.
Last
Now you have a Asterisk server at your home. If you have any questions, please leave it in the comments.
Posted on Utopian.io - Rewarding Open Source Contributors

This is a test for steem mention.
Downvoting a post can decrease pending rewards and make it less visible. Common reasons:
Submit
@ety001, Like your contribution, upvote.
Downvoting a post can decrease pending rewards and make it less visible. Common reasons:
Submit
Thank you~
Downvoting a post can decrease pending rewards and make it less visible. Common reasons:
Submit
Thank you for the contribution. It has been approved.
You can contact us on Discord.
[utopian-moderator]
Downvoting a post can decrease pending rewards and make it less visible. Common reasons:
Submit
Thank you for your work.
Downvoting a post can decrease pending rewards and make it less visible. Common reasons:
Submit
Hey @ety001 I am @utopian-io. I have just upvoted you!
Achievements
Suggestions
Get Noticed!
Community-Driven Witness!
I am the first and only Steem Community-Driven Witness. Participate on Discord. Lets GROW TOGETHER!
Up-vote this comment to grow my power and help Open Source contributions like this one. Want to chat? Join me on Discord https://discord.gg/Pc8HG9x
Downvoting a post can decrease pending rewards and make it less visible. Common reasons:
Submit
Congratulations! This post has been upvoted from the communal account, @minnowsupport, by ETY001 from the Minnow Support Project. It's a witness project run by aggroed, ausbitbank, teamsteem, theprophet0, someguy123, neoxian, followbtcnews, and netuoso. The goal is to help Steemit grow by supporting Minnows. Please find us at the Peace, Abundance, and Liberty Network (PALnet) Discord Channel. It's a completely public and open space to all members of the Steemit community who voluntarily choose to be there.
If you would like to delegate to the Minnow Support Project you can do so by clicking on the following links: 50SP, 100SP, 250SP, 500SP, 1000SP, 5000SP.
Be sure to leave at least 50SP undelegated on your account.
Downvoting a post can decrease pending rewards and make it less visible. Common reasons:
Submit