.png) Tutorial
Tutorial

What Will I Learn?
This tutorial builds on the last, which explained how to add invader graphics.
In this article, you will learn to place a player ship and make it move.
Assumptions
- You have installed Godot Engine v3.0
- You've completed the previous tutorials
- You should be familiar with Scenes, Nodes, creating instances and a basic grasp of GDScript syntax and documentation
You will
- Create a Player Scene
- Add the Player Scene as a node to the game
- Add keyboard control for movement
Requirements
You must have installed Godot Engine v3.0.
All the code from this tutorial will be provided in a GitHub repository. I'll explain more about this, towards the end of the tutorial.
A note on images and game design
Since the last article, things with the game have progressed at a good pace; take a peek at sp33dy @ itch.io!
Looking at the images I obtained from the community last time, I realised we could create a 'Space Invaders' with a twist.
Given there are multiple colours of Aliens and Player ships, I thought:
"Wouldn't it be neat to use the colours in a way to make a unique game"
The design decision was made:
- The Invaders can ONLY be killed when hit with a bullet of the same colour.
- The colour of the ship has to be changed to emit the right colour.
To achieve this, I needed to get the images altered to work correctly. I started to manually (and badly) make changes directly to the images, but I also contacted Carlos Alface in parallel to let him know of my intention.
As mentioned in my previous article, it is ALWAYS worth staying in contact with these kind folk, because sure enough, Carlos has kindly gone out of his way to provide us with a new set of images, aligned with what we require for this tutorial!
To continue with this tutorial, I recommend you download the latest images from his blog page or from the project GitHub repository.
Let's create a Player ship!
We first need to add the player ship to the Game Scene. I would like you to:
- Create a new Scene
- Create a new Sprite as the root node of the scene
- Rename the Sprite as Player
- Save the Scene as Player, with the recommendation of placing it into a folder of the same name
We now need to copy the Player ship images, as mentioned in the previous section. Please:
- Create an images folder in the Player folder
- Copy the six spaceship[colour]_07.png files into your images folder
Then drag one of the images to the Player Sprite Texture (I dragged the Blue, as it is my favourite colour):
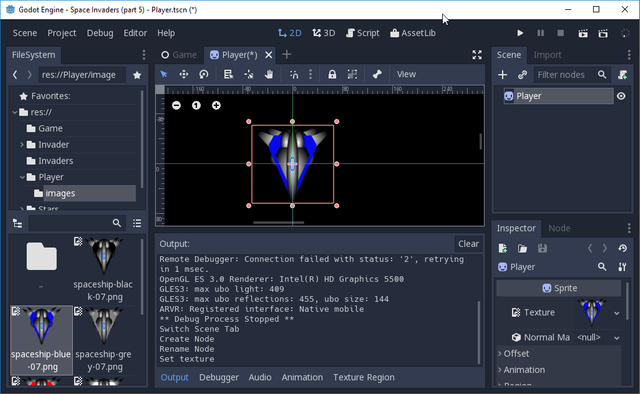
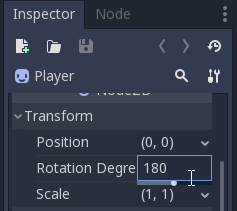
I then need you to open the _Transform > Rotation Degree_ option in the Inspector of the _Player_ Sprite and set it to 180.
You are required to do this because the Player ship is drawn facing down, but we need it to face-up, towards the Invaders!
The image in the 2D Editor will flip around, to reflect your new setting.
I also recommend you set the Scale to (0.5, 0.5), i.e. half the size. The quality of the image is superb, but we need it smaller given our small window size. When designing and implementing games, it is usually best to start with images larger than you need. You can then shrink them as required; especially if being their lives as a vector rather than bitmap format.
We now have our base Player ship Scene, but if you run the game, it wont show! Can you think why?
Let's add the Player Ship to the Game Scene!
In order to see the Player ship, we need to create an instance of it in the Game Scene. Please:
- Open the Game Scene
- Add an Instance of the Player Scene
You should see this:
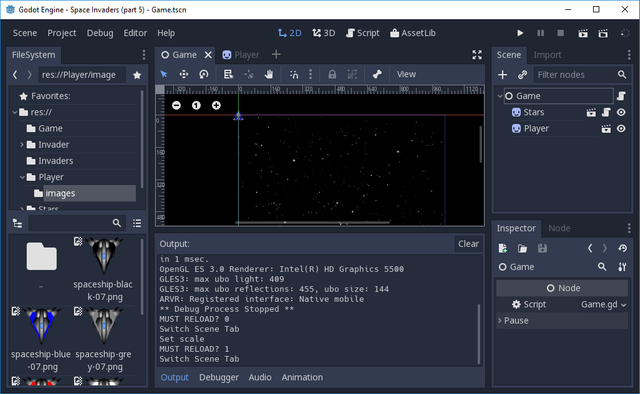
The Player node is automatically added at position (0.0, 0.0), i.e. top left of the screen! We'll want to programmatically set its position, especially when the game starts. I.E. think about Space Invaders, the Player is always started bottom left and scrolls to the right.
In a future article, I'll discuss 'States'.
States is the particular condition that something is in at a specific time.
I'll be specifically focusing in on Game States, i.e. when the player is shown a Title page (Title state), or enter Play State after pressing a key and enters Play State.
For now, we will ignore State and simply delegate the task of positioning the Player node to the Game node upon being ready.
- Open the Game Scene
- Edit the Game root Node Script
- At the bottom of the ready() function, add the following line:
$Player.position = Vector2(40, 550)
As seen in the editor:
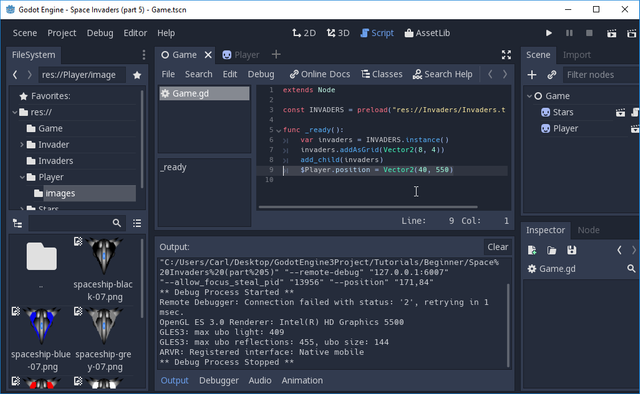
The single line repositions the Player node towards the bottom left. However, it will only do so, when you run the game. Whilst you are in the edit, it remains where it is. Try it!
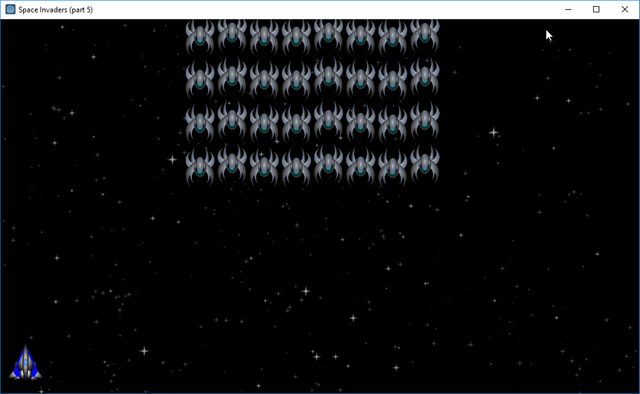
Returning back to the code, you should note that I used '$Player' as the first part of the instruction. The $ is used as a shortcut to mean, find the Node, using the Path in the tree; thus in the example, find our Node called Player as a child of the Game Scene.
This mnemonic was added in v3.0 of Godot because previously, you were required to labourously type get_node("[path]") every time you needed a child or parent look-up!
Please read the GDScript documentation to become more familiar with it, as you'll be using it an AWFUL lot!
FYI, I can't find exact details for this shortcut (but I will provide a link when I can), for now, reading the Node object getter methods is INVALUABLE to you. Effectively, remember $ is performing the get_node() function and you aren't a million miles away from understanding its use!
Lets MOVE the ship!
Having added a Player ship is great, but it doesn't have the ability to be moved and controlled! For that, we need to add keyboard control.
There are many ways to approach this solution, with two thoughts jumping to mind:
- Delegate the keyboard response into the Player node script
- Delegate the keyboard response into the Game node script
Strictly, there is NO right decision. Clearly, the player presses a button, logically, it makes sense placing the control logic into the Player object.
HOWEVER
The Player ship is just one actor in the Game Scene; therefore I have decided to place the control processing into the Game Scene. I've declared it as the Dictator for all objects in the game.
This will be built-on further as we introduce Game States, i.e. when the player dies, it will determine how to refresh the screen and display whatever is needed by the player.
Please:
- Open the Game Scene.
- Open the Game root node script.
- Add the following code to the bottom of the script:
func checkControlPressed():
    if has_node("Player"):
        if Input.is_key_pressed(KEY_LEFT):
            $Player.position += Vector2(-10, 0)
        if Input.is_key_pressed(KEY_RIGHT):
            $Player.position += Vector2(10, 0)

func _process(delta):
    checkControlPressed()
as per the editor:
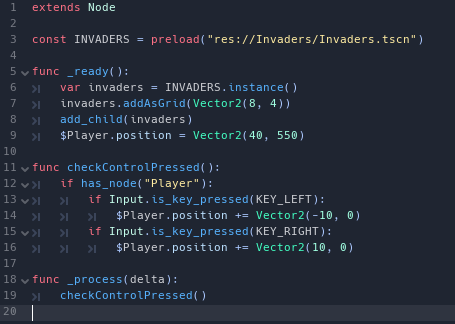
Let's examine the code:
func checkControlPressed():
Declare new function
if has_node("Player"):
Check that the Player ship exists in the Game Scene Tree
if Input.is_key_pressed(KEY_LEFT):
Check whether the Cursor Left key is pressed
$Player.position += Vector2(-10, 0)
If it is, decrease the position of the Player node with a Vector2 value (left by 10 pixels)
if Input.is_key_pressed(KEY_RIGHT):
Check whether the Cusor Rigft key is pressed
$Player.position += Vector2(10, 0)
If it is, increase the position of the Player node with a Vector2 value (right by 10 pixels)
func _process(delta):
    checkControlPressed()
Utilise the process function that Godot calls regularly with the Delta time. On every call, call and check for a keypress; therefore controls are processed every frame!
Try it!
... Ah, the Ship moves as desired, but did you notice what happens at the border?
The Player node will happily float off into the ether, never to be seen again!
Can you think how to fix it?
Keeping the Player on the screen
To keep the Player node on the screen, we must add additional code to its Sprite.
- Open up the Player Scene
- Add a script to the root Sprite node
- Add the following code:
extends Sprite

var screenWidth = ProjectSettings.get_setting("display/window/size/width")

var leftBorder = 0.0
var rightBorder = 0.0

func _ready():
    var halfSize = (get_texture().get_size() * scale) / 2
    leftBorder = halfSize.x
    rightBorder = screenWidth - halfSize.x

func move(adjustment):
    var newX = position.x + adjustment.x
    if newX <= leftBorder:
        newX = leftBorder
    elif newX >= rightBorder:
        newX = rightBorder
    position.x = newX
Or as seen in the editor:
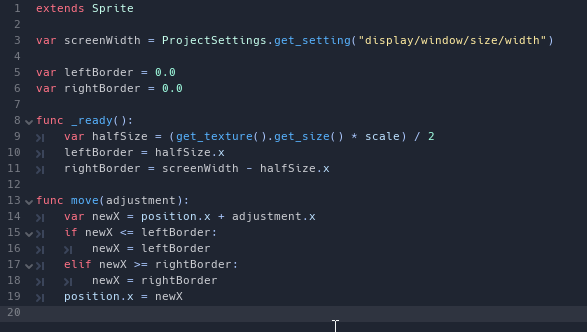
Let's examine this code:
extends Sprite
We are extending the Sprite Class
var screenWidth = ProjectSettings.get_setting("display/window/size/width")
Set an instance variable with the screen width, obtained from the ProjectSettings. This is added as a helper to the class. We could have moved this into the init method because it is the only function that needs it right now. However, if we decided, for example, to allow the Player to move up and down, we would need the screen height!
var leftBorder = 0.0
var rightBorder = 0.0
Declare two instance variables, that will hold the left and right-hand border position values.
func _ready():
Declare when the node is ready in the tree, call this
var halfSize = (get_texture().get_size() * scale) / 2
Calculate half the size of the current texture, remembering to multiply by the scale first; i.e. we scaled to (0.5, 0.5) half size, thus the texture size will be half.
leftBorder = halfSize.x
Set the left border position, which is half of the Sprite texture, because the Sprite is positioned by its centre
rightBorder = screenWidth - halfSize.x
Set the rightBorder position, which is the screenWidth less half the sprite size
func move(adjustment):
Declare a function to move the Sprite. Note: This is going to replace the use of the 'position' property of the class!
Unfortunately, we can't override this method, or I would show you a better solution; therefore I've simply introduced a new method to perform the move.
var newX = position.x + adjustment.x
First, take the current position and add the adjustment, storing the result in a temporary variable; the adjustment will be -10 or +10 in the X-axis (for now)
if newX <= leftBorder:
Check whether the new X axis position is less than the current border position
newX = leftBorder
The left border was crossed, therefore set the new X temporary variable back to on screen, touching the border position
elif newX >= rightBorder:
Check whether the new X temporary position crossed the right border
newX = rightBorder
If it did, set the new X temporary position to touching the right border
position.x = newX
Finally, set the Sprite's position property to be equal to the temporary calculated position.
Before you run the code, we have to change the script in the Game Scene! Otherwise, the movement continue to allow the Ship to move offscreen because the new restricted function is not being called.
- Open the Game Scene
- Open the Game root script
- Edit the lines 14 & 16:
Change the position settings into calls to the move function instead, from this:

To:

I.E. the new function code should be:
func checkControlPressed():
    if has_node("Player"):
        if Input.is_key_pressed(KEY_LEFT):
            $Player.move(MOVE_UNITS_LEFT)
        if Input.is_key_pressed(KEY_RIGHT):
            $Player.move(MOVE_UNITS_RIGHT)
I've also removed the Vector2(x, y) values with constants, i.e. MOVE_UNITS_LEFT and MOVE_UNITS_RIGHT.
Add the constant values above:
const MOVE_UNITS_LEFT = Vector2(-10, 0)
const MOVE_UNITS_RIGHT = Vector2(10, 0)
By using constants, it is absolutely clear what my intentions are in the logic! I can easily change the constants, without having to find the lines to code to modify.
My script for the Game Scene now resembles this:
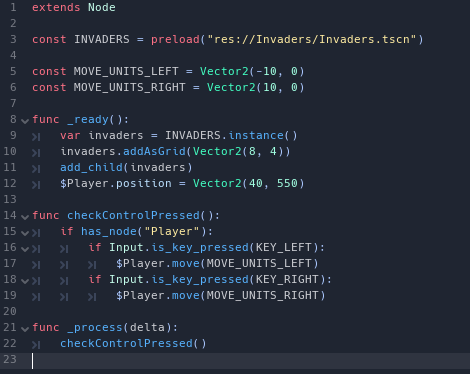
Try running it! You should find the player is now restricted to the screen.
Finally
That concludes this issue. My next article will address bullets! We need a projectile, to shoot the Invaders down.!
Don't forget to check out the game on itch.io. I'm publishing the game in advance of tutorials, so it is worth you checking it out periodically! You'll be able to guess what is coming up in my posts!
Please do comment and ask questions! I'm more than happy to interact with you.
Sample Project
I hope you've read through this Tutorial, as it will provide you with the hands-on skills that you simply can't learn from downloading the sample set of code.
However, for those wanting the code, please download from GitHub.
You should then Import the "Space Invaders (part 5)" folder into Godot Engine.
Other Tutorials
Beginners
Competent
Posted on Utopian.io - Rewarding Open Source Contributors
Thank you for the contribution. It has been approved.
I just played the version on itch.io, and I must say it looks really cool! Very interested to see how you implement everything (especially the shields).
You can contact us on Discord.
[utopian-moderator]
Downvoting a post can decrease pending rewards and make it less visible. Common reasons:
Submit
Hey @amosbastian, I just gave you a tip for your hard work on moderation. Upvote this comment to support the utopian moderators and increase your future rewards!
Downvoting a post can decrease pending rewards and make it less visible. Common reasons:
Submit
Thank you. I'm just adding in the Score etc into it, so it can 'play' soon. I've also eliminated the bug that meant you could kill the Invader with the wrong colour (doh).
Downvoting a post can decrease pending rewards and make it less visible. Common reasons:
Submit
Hey @sp33dy I am @utopian-io. I have just upvoted you!
Achievements
Suggestions
Get Noticed!
Community-Driven Witness!
I am the first and only Steem Community-Driven Witness. Participate on Discord. Lets GROW TOGETHER!
Up-vote this comment to grow my power and help Open Source contributions like this one. Want to chat? Join me on Discord https://discord.gg/Pc8HG9x
Downvoting a post can decrease pending rewards and make it less visible. Common reasons:
Submit
nice project. :D
Downvoting a post can decrease pending rewards and make it less visible. Common reasons:
Submit
Good work~ :d
Downvoting a post can decrease pending rewards and make it less visible. Common reasons:
Submit
good project.
Downvoting a post can decrease pending rewards and make it less visible. Common reasons:
Submit
Great project~ :D
Downvoting a post can decrease pending rewards and make it less visible. Common reasons:
Submit
interesting project. 😇
Downvoting a post can decrease pending rewards and make it less visible. Common reasons:
Submit
nice project. 😇
Downvoting a post can decrease pending rewards and make it less visible. Common reasons:
Submit
great project. 🙃
Downvoting a post can decrease pending rewards and make it less visible. Common reasons:
Submit
Cool project.
Downvoting a post can decrease pending rewards and make it less visible. Common reasons:
Submit
nice project. ✅
Downvoting a post can decrease pending rewards and make it less visible. Common reasons:
Submit