Restorative yoga is a peaceful practice with gentle, slow movements. It’s great for calming a busy mind, decreasing stress and also to build flexibility. A restorative yoga sequence usually includes 5-6 poses that you hold for 5 minutes or more. The goal is to get relaxed and rest during the practice. It is similar to Yin Yoga, where you also hold poses for 5 or more minutes, but the difference is that in Yin Yoga some discomfort in the poses is welcome, while in a Restorative practice the aim is to be comfortable. We use props like blocks and bolsters to be as comfortable in each pose as possible.
These restorative yoga poses can be perfect to do after a long, stressful day, but I also like to do them when my muscles are sore from the gym. Just 15 minutes of this practice can help you feel rejuvenated, relaxed and less stressed. Your hips and spine will also thank you for it, they will feel yummy and loose after a restorative practice.
You will feel the effects of this practice immediately and most likely you will want more of it, but you don’t have to give up your gym routine for restorative yoga, just try to incorporate it into your daily life. You can do some of these poses in the evening after work, or before you go to bed. They can help you wind down and sleep better.
In this routine I use blocks or a bolster with a blanket for each of the poses. You can use a bolster or a big pillow for all the poses if you don't have the blocks, but they can be a good (and inexpensive) investment. Give yourself time to settle into each pose, let your brain get the message that it can now switch off. Close your eyes and stay in each pose for at least 5 minutes. Take deep inhalations and exhalations while you are in the pose, this way your brain relaxes more easily. At the beginning it might be difficult to stay in a pose for a full 5 minutes, but it’s OK, as you practice more often, you will be able to stay in the poses longer.
Restorative Easy pose with forward fold:

Instructions:
Sit cross legged on the mat, or on a blanket to make it easier. Put a block in front of you on the highest setting. Inhale, raise your arms up, exhale and start walking your hands towards the block until you can put your head on it. Your third eye should be resting on the block, your arms next to the block. Take deep breaths and stay in the pose for 5 minutes or more.
Benefits:
This pose stretches the back, shoulders, hips, knees and ankles. Folding forward calms the mind, and reduces anxiety and fatigue. Because the head is supported it also helps with neck pain.
Supported child's pose:

Instructions:
Sit on your heels, with your knees mat distance apart. Put a bolster or a big pillow between your thighs. Bend your torso forward until your belly rests between your thighs and your belly rests on the bolster, your head turned to the side.
Benefits:
The child's pose stretches the hips, the back and ankles and it also reduces stress. The supported version of it is very soothing and relaxing.
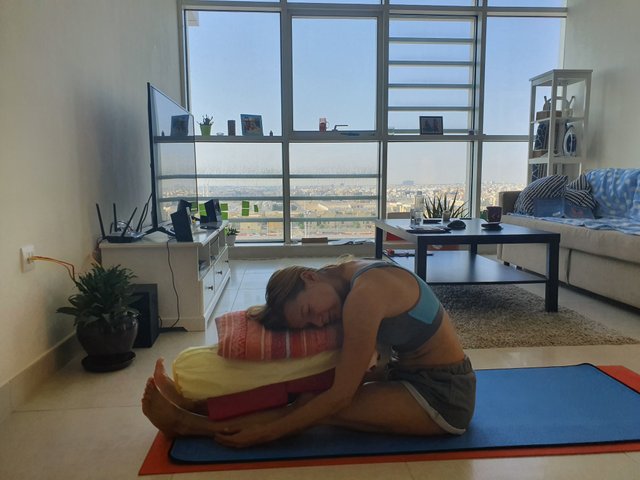
Supported seated forward bend:
Instructions:
Sit on the mat with your legs stretched out in front of you, your back straight. The bolster or pillow is placed on your outstretched legs. As you breath out, start walking your hands towards your feet and come closer to your bolster until you can lay your upper body on it. If the bolster is not high enough, add a blanket to make it higher. Remember, this practice is relaxing, you should feel comfortable in it.
Benefits:
This pose gives a nice stretch to the whole backside of the body. It is relaxing and calming for the nervous system.
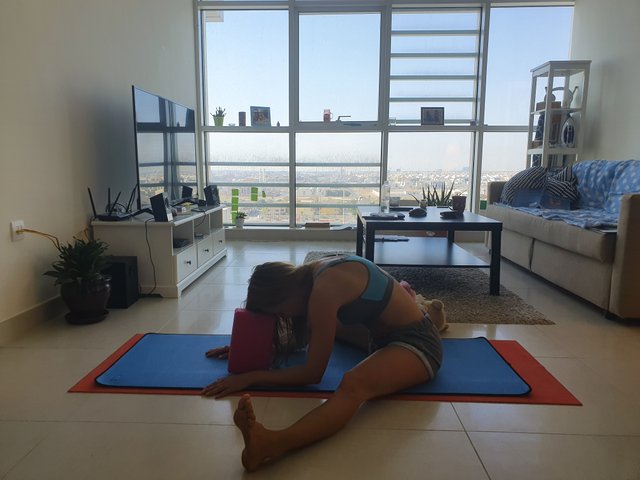
Supported seated wide legged forward bend:
Instructions:
Sit on the mat with your legs as wide as it is comfortable for you. It's ok to feel some pressure in this pose but it shouldn't be painful. The block is placed in front of you between your legs on the tallest setting. Start walking your hands forward while breathing out, first with your back straight and bend it slowly as you come closer to the block. Put your third eye on the block to rest.
Benefits:
This pose gives a deep stretch to the inner thighs, the hamstrings and the spine and it gives a stimulation to the abdominal organs. In its supported version it is also very calming.
Supported Fish Pose:
There are two pictures here, because the block under the back is placed differently in each picture. You can have it along your shoulder blades (picture 1), or between them, along the middle of your back (picture 2). Play with it and see which setting feels better for you. I like to do both, one after the other.


Instructions:
Sit on the mat with your legs extended, your blocks are placed behind you so you can lie on them slowly, adjust them as you get into the pose so one is supporting the bottom part of your head, the other is in between the shoulder blades or across the shoulder blades. Once you are lying down, extend your arms to the sides, palms up and take deep breath into your chest to relax into the pose.
Benefits:
This pose stretches the front of the body, it's very beneficial for people hunched over a computer for many hours as it brings the shoulders back. It improves spinal flexibility and posture.
Reclining Bound Angle pose:

Instructions:
Sit on your mat with a straight back, legs extended in front of you. Place your bolster behind you so it touches your sacrum. Pull your feet close to you, bending your knees, the so the bottom part of your feet touch each other. put a block each under your thighs, so it's not too much strain for your hips. Lie down onto the bolster slowly, let your arms fall to the sides, palms up. Close your eyes and take deep breaths into the chest.
Benefits:
This pose lowers blood pressure, decreases muscle tension, stretches the hips and in its supported form also opens the front of the body and helps with posture. It calms the mind and reduces stress.
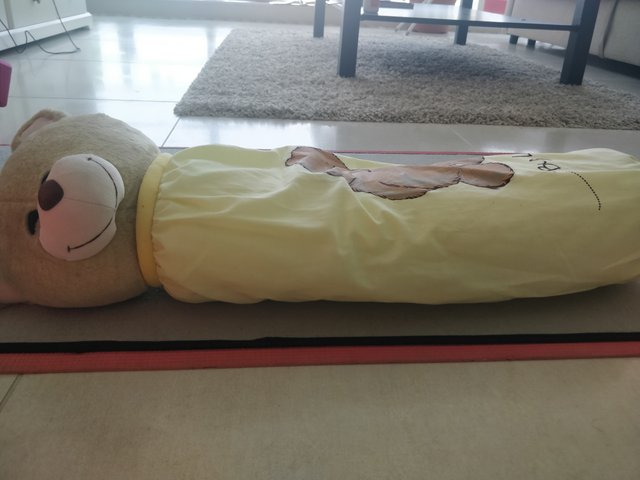
If you don't have a proper bolster (like me), then you can experiment with your props:
This was my bolster on its own:
In some poses I needed more support:
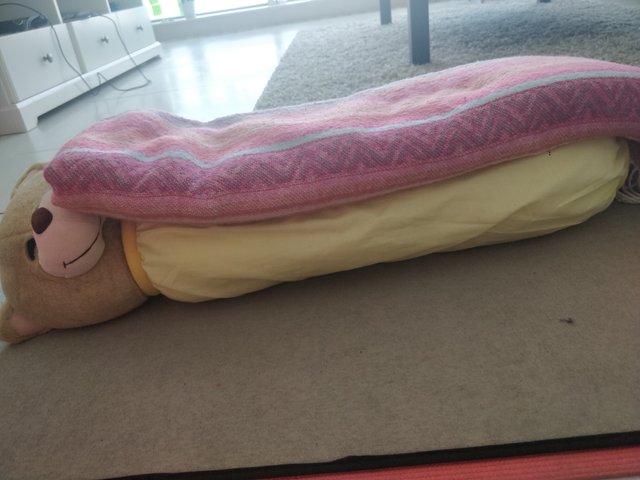
This is what I did for seated forward bend:
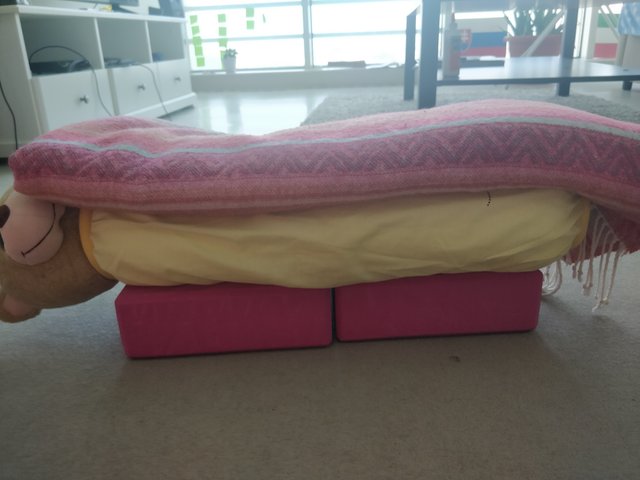
In case you need even more support, add something else:
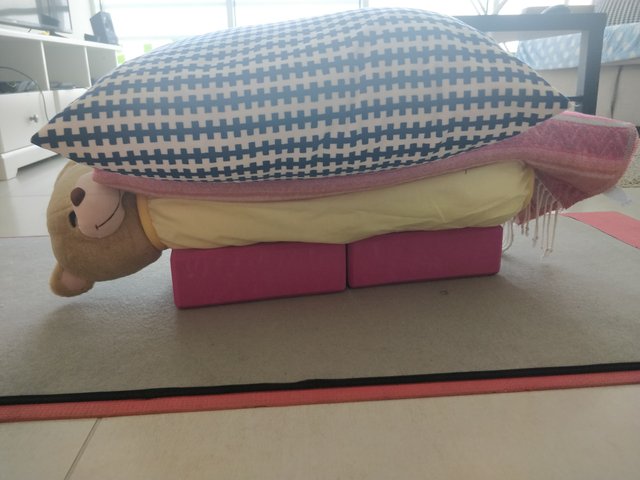
And finally a fun pose you can do with the help of a block. This one has nothing to do with Restorative Yoga, but it's fun and energizing:
Forearm Stand

Instructions:
Do this pose close to the wall so you can use it for support. Place the block on the lowest setting in front of you, put your forearms on the sides of the block. Come into forearm plank with the block just below your head. If you are doing this pose for the first time then this might be enough, after some practice you can bring one leg up at a time and lean them against the wall. The block gives you a feeling of security, as it is closer to your head than the floor.
As a next step you can go further away from the wall before you get into the pose and open your legs, leaning just one foot against the wall. This way you will be able to find your balance. Try to bring the foot away from the wall and stay in the pose without any support. And that's how far I got with this pose :).
Benefits:
This pose really strengthens the core and the upper back. It gives confidence, it's calming for the mind and it also greatly improves blood flow.
Have a great time practicing!
Namaste
Thank you guys, certainly will try a few poses to try to relax after a busy day.
God bless
Downvoting a post can decrease pending rewards and make it less visible. Common reasons:
Submit
Warning! This user is on my black list, likely as a known plagiarist, spammer or ID thief. Please be cautious with this post!
If you believe this is an error, please chat with us in the #cheetah-appeals channel in our discord.
Downvoting a post can decrease pending rewards and make it less visible. Common reasons:
Submit
really nice lesson
Downvoting a post can decrease pending rewards and make it less visible. Common reasons:
Submit